Here’s a sneak peek at Adobe’s new masking tools for Lightroom and Camera RAW
Updated versions of Adobe Lightroom and Camera RAW arrive at the end of October and include a completely re-engineered set of masking tools.
New versions of Adobe Lightroom, Lightroom Classic and Adobe Camera RAW (Photoshop’s RAW processing engine) are coming on October 26th. Part of the update includes a completely re-engineered suite of masking tools with a new user interface.
For those not familiar, masking is used to select portions of an image to apply localized adjustments. Let’s take a look at what’s changed.
A new panel
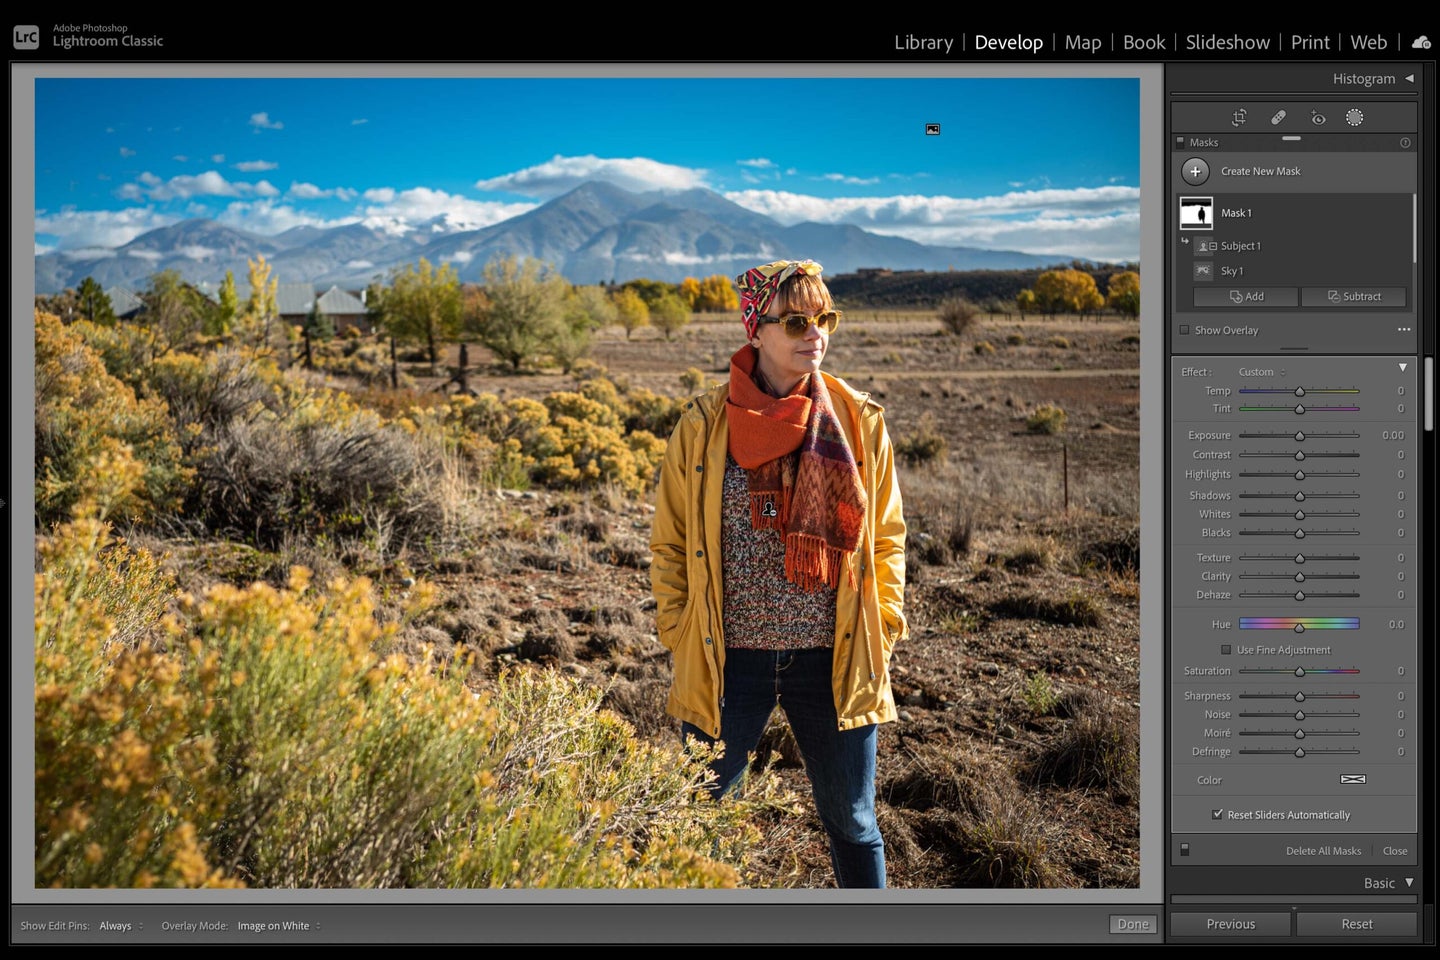
Adobe has removed the “Brush,” “Linear Gradient” and “Radial Gradient” local adjustment buttons and replaced them with a single “Masks” button that pulls out a new “Masks” panel. Users can then click “Create New Mask” to select which tool they’d like to use.
This is now where you’ll find the “Brush,” “Linear Gradient” and “Radial Gradient” options, as well as “Color Range,” “Luminance Range” and “Depth Range.” There are also two new AI-powered options: “Select Subject” and “Select Sky.” More on that below.
AI-powered selections
According to Adobe, the reason for the change is to bring Photoshop-like AI and machine learning functionality to Lightroom and ACR. We first saw the “Select Sky” feature this time last year and it was officially added to Photoshop CC in August.
However, because existing masks in Lightroom/ACR were vector-based and the AI selections require bitmap masks, there had to be a total overhaul of the underlying image processing engine—which gave Adobe the opportunity to add a load of new features.
The two AI-powered masking options, “Select Subject” and “Select Sky” are both pretty self-explanatory. Though it’s worth noting that Adobe claims “Select Subject” works regardless of whether your subject is “a person, animal, or inanimate object”. Click the relevant button and Lightroom creates a best-guess mask. These features are pretty solid in Photoshop (and you can always make adjustments) so we’re optimistic they’ll be really good in Lightroom/ACR.
Workflow changes
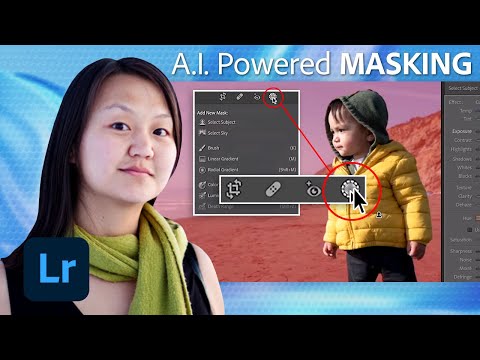
The above video, from Adobe, shows off some of the new masking features coming to Lightroom and ACR on October 26th.
While Adobe likes to trumpet their AI work, the most exciting changes are the basic workflow tweaks. One of those tweaks—the ability to name and organize masks—is a huge deal for Lightroom/ACR users. This means no more hovering over your photo with your cursor looking for the random adjustment pin that corresponds to one of your brush selections. You can now just select it from the panel.
How the selection tools work together has also been improved with “Mask Groups”. You can now use one tool to create your initial mask then select “Add” or “Subtract” to use another mask to, well, add or subtract from it. This enables you to make incredibly complex selections, as shown in the video above.
Using the example in the video, let’s say you want to darken everything in the image except for the boy and the sky. In the new Lightroom/ACR you can do this by using the “Select Subject” option to create a mask around the boy. You can then invert that selection to have a mask around everything but him. Next, you can use the “Subtract” function and the “Select Sky” feature to remove the sky from the mask. And voila!
Or you could combine a “Brush” selection, a “Luminance” selection, and a “Color Range” selection to only select the colored bokeh in the background of a portrait.
Masking everywhere
Adobe has also taken the opportunity to make masking a consistent experience across all the Lightroom apps (plus ACR). You now get the exact same options whether you’re using Lightroom on the Web or your iPad, Lightroom Classic on your laptop, or Photoshop on your desktop.
When can I use the new tools?
The new masking features will be released on the 26th of October. Update your Lightroom and Photoshop apps to install them.
