Adobe Lightroom Classic review: The old standard still has lots of life left in it
After 15 years, Adobe Lightroom Classic still finds itself at the top of the photo workflow heap.
We may earn revenue from the products available on this page and participate in affiliate programs. Learn more ›
Photographers can be creatures of habit. We’ll find ourselves getting attached to a lens or a camera body. Or, in the case of Adobe Lightroom Classic, a piece of photo editing software. Lightroom Classic has been around in some form or another for 15 years now. It currently shares the Creative Cloud lineup with the simply-titled Lightroom, which Adobe released to give users a tighter integration with the mobile version of the program.
In true photographer fashion, however, Lightroom users weren’t ready to give up the die-hard desktop version of their favorite photography workflow tool. As a result, Adobe Lightroom Classic lives on.
Despite its age and its position outside the spotlight in Adobe’s lineup, Lightroom Classic still feels as relevant as ever. Sure, some features have gotten clunky over time, and its resource management can still tax even the most powerful editing computers. But, Adobe is still giving Lightroom Classic new features all the time, and just this summer it got a few notable upgrades. Here’s a look at the state of one of the best image editing programs of all time.
What is Adobe Lightroom Classic
It can be slightly hard to envision exactly what Adobe Lightroom Classic is if you’ve never used it before. Essentially, it’s a photography workflow tool that’s designed to help import, organize, sort, edit, and export images.
It also facilitates tethered shooting, in which you can attach your camera directly to the computer running Adobe Lightroom Classic and shoot photos directly into the program. This is particularly handy in a studio situation where you want to see big previews of your photos in a hurry so a creative director can look over your shoulder and tell you what’s wrong with them in real-time.
The mighty organizer

Stan Horaczek
If you work with photos in high volume, Lightroom’s import interface is very handy once you get the hang of it. The software creates catalogs into which you can import photos (hopefully those of the raw variety). Some users create many different catalogs. Others simply create one big catalog and then organize their folders and files within it. I prefer the latter solution simply because I don’t trust myself not to lose my catalog files or forget which images belong inside which catalog. When everything is in one place, I can definitely find it, even if it takes a while.
Importing the photos can pull them off of a memory card and onto the computer. If they’re already on your computer, you can simply point the software to their location and edit them right where they are. Lightroom is a non-destructive editor. That means the program makes adjustments by keeping track of the changes in a file that’s separate from the original photo. So, if you brighten up an image, you’re simply telling Lightroom “When you show me this photo, make it brighter,” rather than making a permanent change to the original file. You won’t see the finished file until you export a jpeg or tiff file.
Within the catalogs, you can create collections and photographers like to use these in different ways. My workflow typically involves doing an initial sort in which I pick the select images by pressing “B” to add them to a quick collection. Then, I add the selects to a smart collection so I can work on the selected images without trashing the rest. Ask another photographer and they’ll likely tell you they work differently. That’s part of the beauty of a piece of software that has been around this long.
Adobe Lightroom Classic editing tools
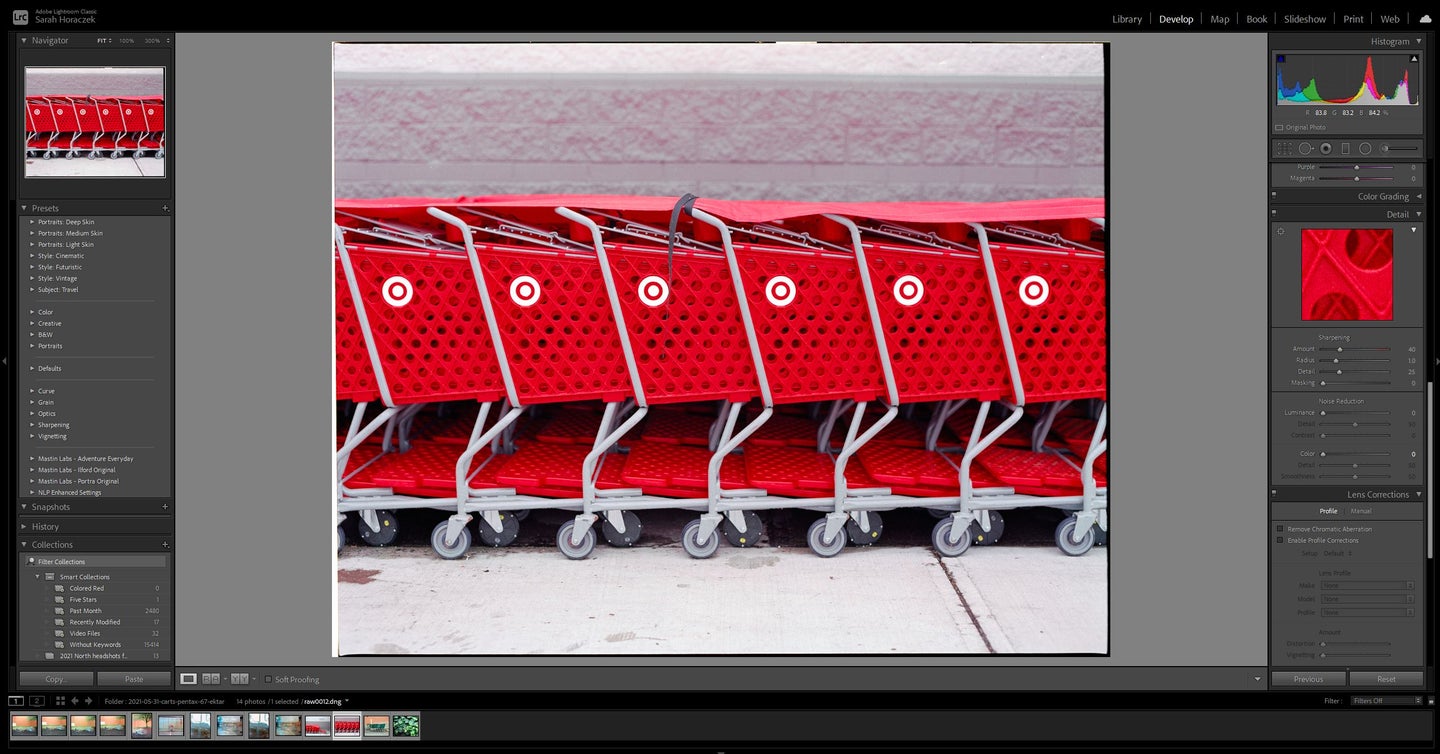
Once you’ve got your images selected, it’s time to tweak them. Adobe Lightroom Classic offers a familiar set of tools that you may have seen if you’ve ever used Photoshop’s Camera Raw feature. You can adjust exposure, contrast, sharpness, crop, and all the rest of the usual suspects.
Lightroom will let you make the editing process as simple or as complicated as you want. If you’re just learning, you can stick to the Library module and use the quick edit buttons. Switch to the Develop module and sliders replace the buttons for more granular control. This is also where you’ll find more advanced editing tools. You can mess around with the tone curve or tweak specific variables of individual colors. If you can look at an image and say, “there’s too much saturation in the blues across the dark areas of this image,” then Lightroom Classic has the tools to let you fix it.
The Develop module also houses a couple of Adobe Lightroom Classic’s other useful features. The Upright tool automatically tries to straighten out your images. So, if your idyllic beach scene has a distracting, crooked horizon, Upright can fix that automatically. The Lens Correction tool also allows you to apply lens profiles that iron out the quirks of your favorite lenses. This feature typically flattens out the field of view a little. It also often brightens up the corners of the image to counteract the lens’s natural vignette. It makes a big difference in many cases.
Local adjustments

If you want to do in-depth retouching, then Photoshop is the tool you want. It’s not even a contest. Adobe Lightroom Classic does, however, offer some tools for making local adjustments. The spot removal tool is relatively useful, but it doesn’t give you much in the way of brush options like you’d get in Photoshop. It’ll quickly nuke a small mark off of a wall, but or dust spots off of a photo negative, but you wouldn’t want to do a full portrait retouch with it. It’s just too awkward.
The gradient and radial filters are useful if you want to correct some weirdness that happens around the frame. The gradient filer, for instance, can be useful if the sky in the top part of your photo is a lot brighter than the landscape in the bottom part of your photo. The radial filter is similarly useful for helping to cure vignettes. You could also add a vignette if you really wanted to, but in my experience, that makes your photo worse 100 percent of the time.
Lastly, the adjustment brush tool allows you to select changes and then paint them onto specific areas. So, if one part of an image is too dark, but the rest looks correct, you can try to single out that outlying area with the brush. It’s like the dodging and burning tools in Photoshop, only it can also apply adjustments to variables like the contrast in addition to typical exposure.
Maps and Books

I’m grouping these features together because I find myself using them rarely. Even if my photos have geotags attached to them, I’d rather track them using software like Google Photos. The Books feature is also handy if you want to rough out a layout, but many book services now have their own workflow software.
Overall performance
Adobe Lightroom Classic has made some real strides in terms of speed in recent years. The program only started implementing GPU acceleration back in 2019, which was a step in the right direction.
The current edition of Lightroom Classic runs fairly quickly most of the time for me. Even on my several-year-old laptop, I can still work at a reasonable (though, not super fast) pace. I typically let the program generate previews as I import the images, which makes the process take longer, but also saves me time during the editing process.
When you switch from one photo to the next, there’s an inevitable lag while you wait for the high-res preview to load. Even on a fast computer, it can get bogged down, especially if you’ve been editing for a long time. My main computer has 64 GB RAM and an AMD Ryzen 9 processor, and it still gets to sounding like an airplane about to take off when I’m moving quickly through photos.
Interestingly, I found that Lightroom Classic runs really excellently on Apple’s new M1-powered computers. Even the minuscule M1 MacBook Air handled the program surprisingly well. Hopefully, Adobe will continue trying to make Lightroom Classic run faster with future updates.
Who should buy Adobe Lightroom Classic?
Other photo workflow programs have come along and shown some advantages over Lightroom Classic. Capture One Pro, for instance, provides slightly better overall image quality and a more refined interface when it comes to making edits. Luminar has some very smart AI-driven editing features that automate otherwise tedious tasks.
Still, at the end of the day, many photographers come back to Lightroom Classic. It has a learning curve, but once you’ve navigated it, it’s hard to leave. After heavy use, the shortcuts become second nature and you get sucked into it.
Eventually, it seems inevitable that Adobe will try to shoehorn Lightroom Classic users into the more modern Lightroom software. Frankly, I’m surprised it hasn’t done more to encourage that transition already.
If you want access to Adobe Lightroom Classic, you will need a Creative Cloud subscription Adobe still offers the Creative Cloud Photography plan, which includes both versions of Lightroom, the full version of Photoshop, and several Photoshop mobile apps for $10 per month. I don’t love having to subscribe to my software (a common outlook in the photography community), but I can appreciate the low price of that plan. And with Creative Cloud speeding up the frequency with which the software gets updated, the subscription life does have its upsides.
For now, Adobe Lightroom Classic is still the champion in the complete photography workflow world. The competition gets closer every day, though.
