Testing the advantages of Apple’s ProRAW format
Apple ProRAW is a hybrid file format that combines the flexibility of a traditional Raw file with the benefits of AI-powered image processing.
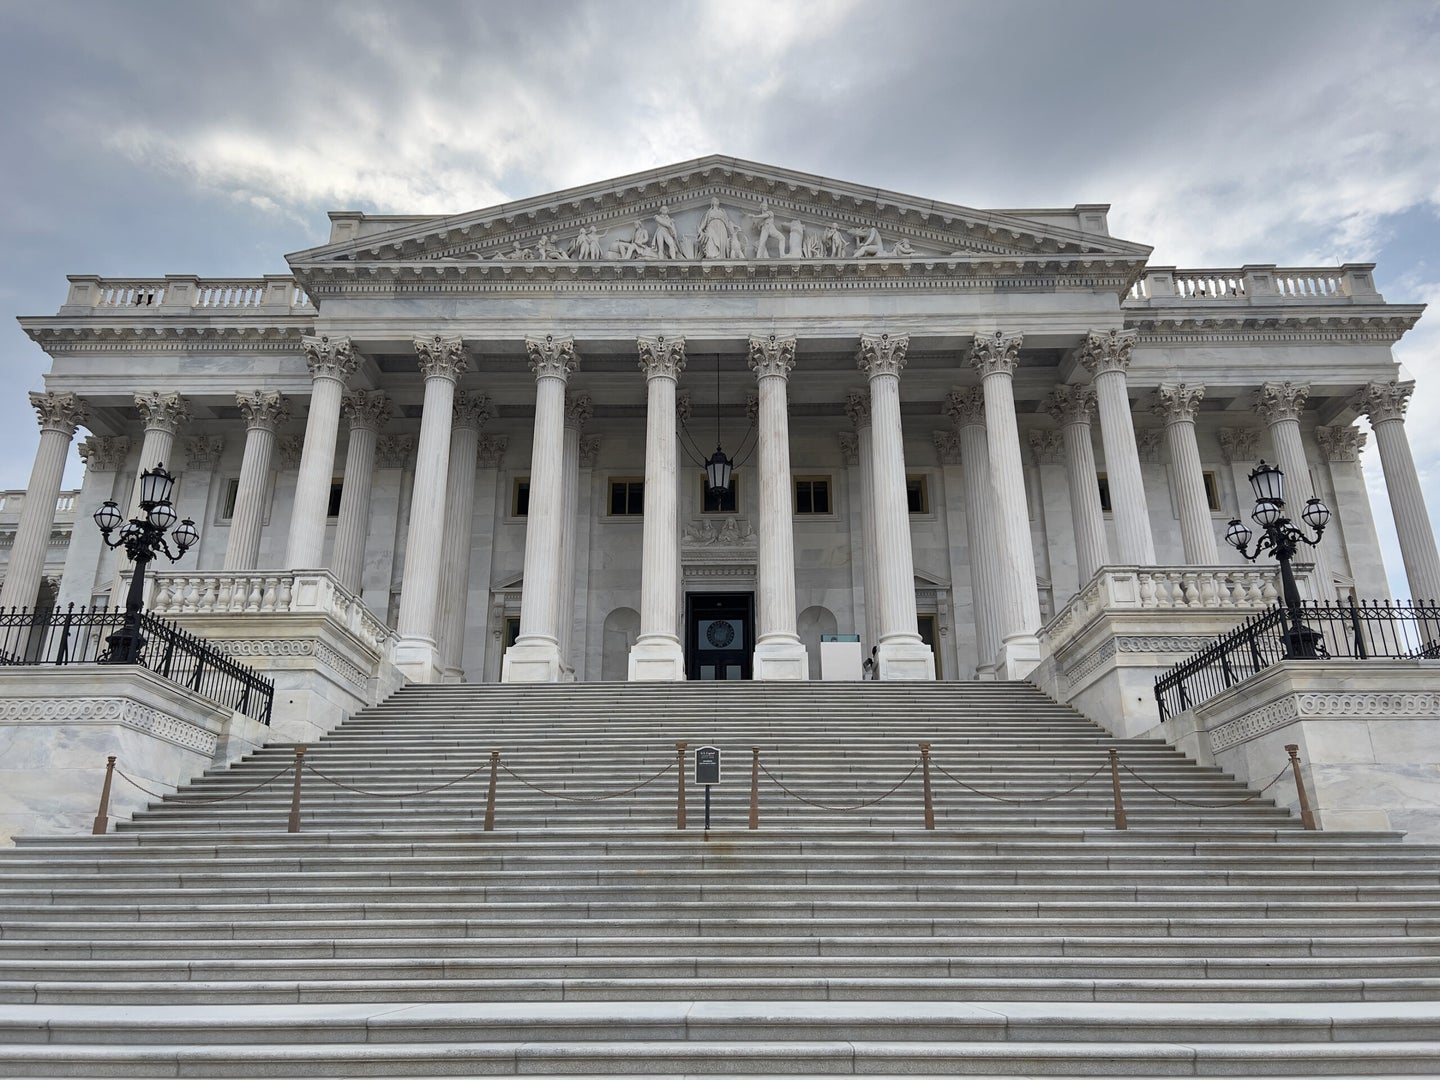
Photo technology continually advances, and generally, that’s great for photographers. But let’s be honest, lately, that pace seems to be overwhelming. It often feels as if we don’t have much choice between embracing or rejecting the changes.
In a recent Smarter Image column, I wrote about how to outsmart your iPhone camera’s overzealous AI. The author of a New Yorker article bemoaned Apple’s computational photography features for creating manipulated images that look “odd and uncanny.” My column pointed out that by using third-party apps, it’s possible to capture photos that don’t use technologies like Deep Fusion or Smart HDR to create these blended images.
Although true, that also feeds into the idea that computational photography is an either/or choice. Don’t like the iPhone’s results? Use something else. But the situation isn’t that reductive: sometimes smart photo features are great, like when you’re shooting in low light. A quick snap of the iPhone (or Google Pixel, or any other computationally-enhanced device) can seize a moment that would otherwise be lost with a regular camera while you’re fiddling with settings to get a well-exposed shot.
How can we take advantage of the advancements without simply accepting what the camera’s smart processing gives us?
The promise of Raw
This isn’t a new question in digital photography. When you capture a photo using most cameras, even the simplest point-and-shoot models, the JPEG that’s created is still a highly processed version of the scene based on algorithms that make their own assumptions. Data is then thrown out to make the file size smaller, limiting what you can do during editing.
One answer is to shoot in Raw formats, which don’t make those assumptions in the image file. All the data from the sensor is there, which editing software can use to tease out shadow detail or work with a range of colors that would otherwise be discarded by JPEG processing.
If you’ve photographed difficult scenes, though, you know that shooting Raw isn’t a magic bullet. Very dark areas can be muddy and noisy when brightened, and there’s just no way back from an overexposed sky comprised of all-white pixels.
The ProRAW compromise
This swings us back to computational photography. Ideally, we want the exposure blending features to get an overall better shot: color and detail in the sky and also plenty of shadow detail in the foreground. And yet we also want the color range and flexibility of editing in Raw for when we need to push those values further.
(News flash: We’re photographers, we want it all, and preferably right now thank you.)
Apple’s ProRAW format attempts to do both. It analyzes a scene using machine learning technology, identifying objects/subjects and adjusting exposure and color selectively within the frame to create a well-balanced composition. At the same time, it also saves the original Raw sensor data for expanded editing.
There’s a contradiction here, though. As I mentioned in Reprocess raw files with machine learning for cleaner-looking photos, a Raw file is still just unfiltered data from the sensor. It doesn’t specify that, say, a certain range of pixels is a sky and should be rendered with more blue hues. Until software interprets the file through the demoasicing process, the image doesn’t even have any pixels.
Apple’s ProRAW solution is to create a hybrid file that actually does include that type of range-specific information. ProRAW files are saved in Adobe’s DNG (digital negative) format, which was designed to be a format that any photo editing software could work with (versus the still-proprietary Raw formats that most camera manufacturers roll with). It’s important to point out that ProRAW is available only on the iPhone 12 Pro, iPhone 12 Pro Max, iPhone 13 Pro, and iPhone 13 Pro Max models.
To incorporate the image fusion information, Apple worked with Adobe to add ProRAW-specific data to the DNG specification. If an editing app understands that additional information, the image appears as it does when you open it on the iPhone, with editing control over those characteristics. If an app has not been updated to recognize the revised spec, the ProRAW data is ignored and the photo opens as just another Raw image, interpreting only the bare sensor data.
So how can we take advantage of this?
Editing ProRAW photos
In my experience, ProRAW does pretty well with interpreting a scene. Then again, sometimes it just doesn’t. A reader pointed out that the photos from his iPhone 12 Pro Max tend to be “candy-colored.” Editing always depends on each specific photo, of course, but reducing the Vibrance or Saturation values will help that; the Photographic Styles feature in the iPhone 13 and iPhone 13 Pro models can also help somewhat, although the specific attributes you can change are tone and warmth, not saturation specifically. And, of course, that feature is only on the latest phones.
With the iPhone 13 Pro, my most common complaint is that sometimes ProRAW images can appear too bright—not due to exposure, but because the image processor is filling in shadows where I’d prefer it to maintain darks and contrast.
Let’s take a look at an example.
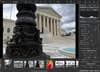
Editing ProRAW files in Apple Photos
In this ProRAW photo shot a few weeks ago with my iPhone 13 Pro, Apple’s processing is working on a few separate areas. There’s a lot of contrast in the cloudy sky, nice detail and contrast on the building itself, and plenty of detail on the dark flagpole base in the foreground.

Want to see the computational photography features at work? When I adjust the Brilliance slider in Apple Photos, those three areas react separately.
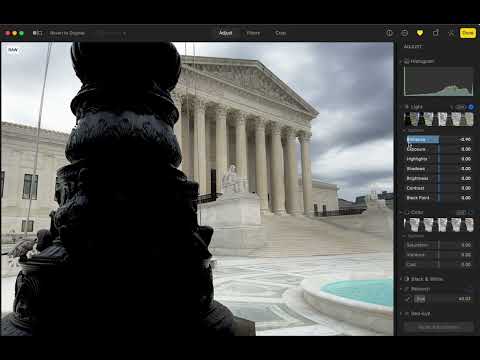
Moving the Brilliance slider in Apple Photos adjusts the foreground, building, and sky separately.
However, I think this is an instance where the processing feels too aggressive. Yes, it’s nice to see the detail on the flagpole, but it’s fighting with the building. Reducing Brilliance and Shadows makes the image more balanced to my eyes.
The thing about the Photos app is that it uses the same editing tools for every image; Brilliance can have a dramatic effect on ProRAW files, but it’s not specifically targeting the ProRAW characteristics.
Editing ProRAW files in lightroom
So let’s turn our attention to Lightroom and Lightroom Classic.
Adobe’s solution for working with that data is to use a separate Apple ProRaw profile. If we switch to another profile, such as the default Adobe Color, the Apple-specific information is ignored and we get a more washed out image. That can be corrected using Lightroom’s adjustment tools, of course, because the detail, such as the clouds, is all in the file.
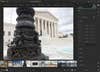
With the Apple ProRaw profile applied, though, we can adjust the Profile slider to increase or reduce the computational processing. Reducing it to about 45, in this case, looks like a good balance.
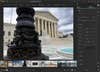
Editing ProRAW files in RAW Power
The app RAW Power takes a similar approach, but with more granularity in how it processes raw files. For ProRAW photos, a Local Tone Map slider appears. Initially, it’s set to its maximum amount, but reducing the value brings more contrast and dark tones to the flagpole.
This is just one example image, but hopefully, you understand my point. Although it seems as if computational processing at the creation stage is unavoidable, I’m glad Apple (and I suspect other manufacturers in the future) are working to make these new technologies more editable.
