Capture One 21 Pro review: Raw power
Capture One 21 Pro offers some of the most advanced photo editing features and imager quality available.
We may earn revenue from the products available on this page and participate in affiliate programs. Learn more ›
Getting started with Capture One Pro can be intimidating. Maybe it’s the “pro” in the name. Or perhaps it’s the fact that it used to be designed specifically for high-end photographers shooting with fancy Phase One medium format digital cameras. Capture One Pro software has come a long way from those days, though. It still comes with a learning curve, but it’s now one of the most powerful and complete image editing programs around. It also has some distinct advantages over its venerable adversary, Adobe Photoshop Lightroom Classic. Here’s a look at the latest version of Capture One to help you decide the future of your photography workflow.
What is Capture One 21 Pro?
Like Lightroom Classic, Capture One 21 Pro is designed to handle your entire raw processing workflow. You drag in raw files from your camera, sort them, edit them, then export finished versions to match your specific needs.
It’s a non-destructive editor, which means it leaves your original files alone during the editing process. Capture One keeps track of your adjustments and lets you see them in real-time as you make changes. Then, you can export a finished version while leaving your raw file untouched.
Getting organized

Capture One Pro gives you two options when you’re importing images. You can reference files that sit in folders on your hard drive or the program gives you the option to bring the files into the CaptureOne Library and store everything in one enormous file. If you’ve ever used Apple Photos or even Apple’s old pro-grade image processing software, Aperture, this is the same basic mechanism.
I prefer to leave my photos in their folders, mostly out of paranoia. Conglomerating everything into one big file would be handy for managing space, though. Lightroom doesn’t offer this feature at all.
Starting the edit process with Capture One Pro
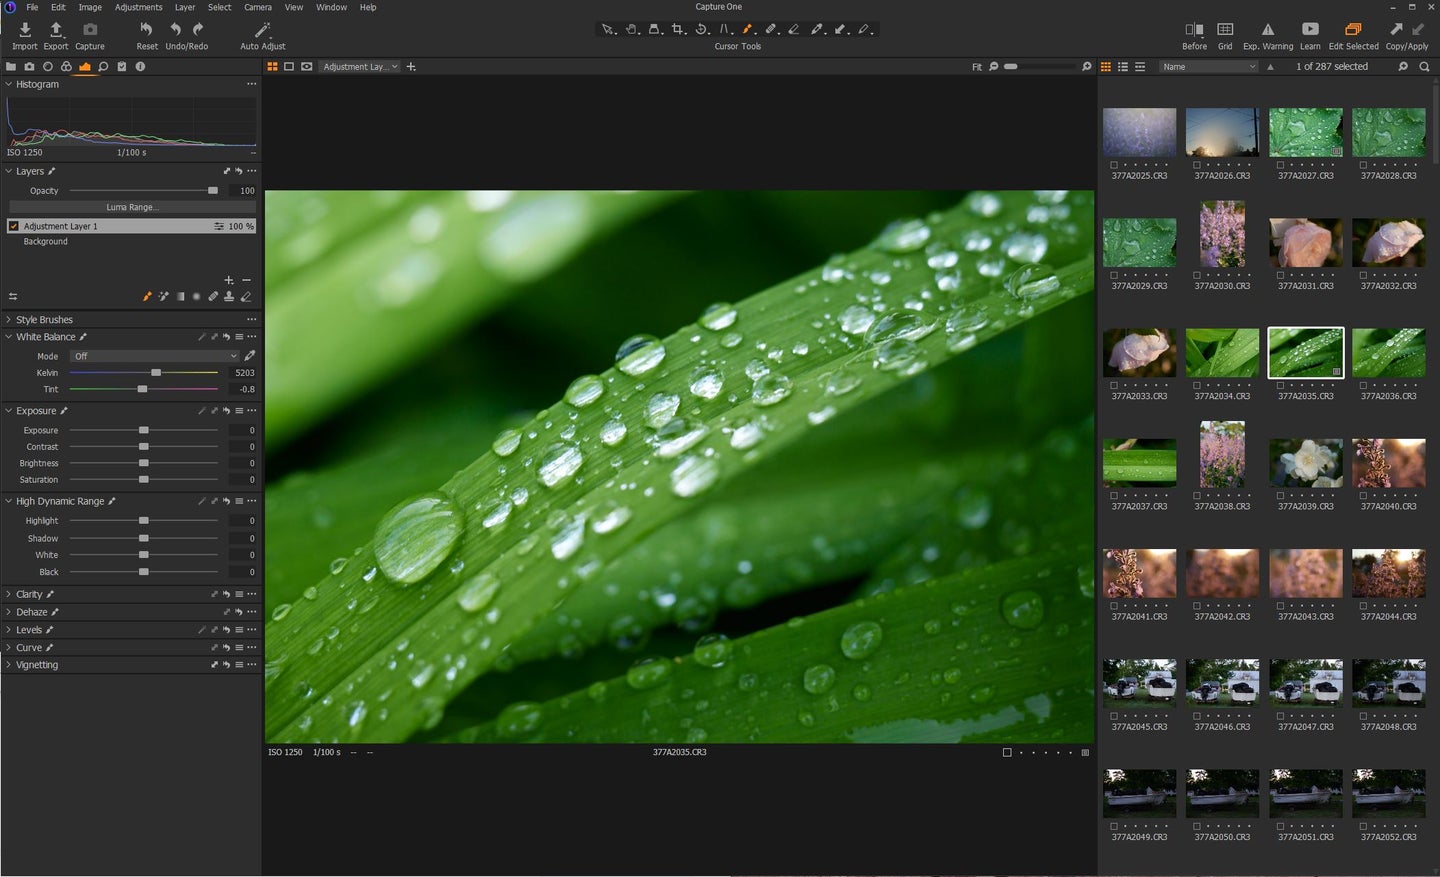
Here’s where things start to get a little complicated, at least if you’re new to the program. Capture One splits its editing tools up into panels, which are represented by icons in the top left area of the interface. Within those panels, you’ll find all the standard editing options, as well as some more advanced adjustments for high-skill users. The Exposure panel contains most of the familiar sliders for adjusting things like exposure and color balance.
You’ll find a row of cursor tools across the top of the frame. These are more similar to Photoshop’s tools. They allow you to crop, rotate, and even add selective adjustments to the image.
Digging into layers
Those selective adjustments mentioned above represent another way in which Capture One works very differently from Adobe Lightroom Classic. Capture One adds adjustment layers to your image so you can easily tweak and even discard them if you screw up. In Lightroom, local adjustments aren’t as flexible and don’t give you as much forgiveness if you mess up.
Image quality

When it comes to pure image quality, I find Capture One the best in the bunch. Every raw conversion software works slightly differently and whatever Capture One does, seems to work at least a little better than its competition.
Once you start working on the image, Capture One offers a number of styles and preset looks to choose from. As with many other editing programs, many of the styles deliver somewhat underwhelming results that look rather unnatural. Capture One’s presets, however, provide simple adjustments that I have found helpful on more than one occasion. As you scroll over the preset names, you can get a real-time preview of how it will affect the image.
Capture One Pro also supports third-party presets. If you already bought some preset packs from a brand or influencer, you should check to see if they’re compatible with Capture One as well as Lightroom. Many of them don’t work across platforms. Some will make you rebuy presets you’ve already paid for to work on your new program.
I was pleasantly surprised by Capture One’s auto adjustment tool. It’s easy to brush off automatic corrections as lazy and ineffective, but this one didn’t offend my eyeballs, which puts it above just about every other one I’ve ever tried.
The Auto-Adjust feature even lets you tweak which aspects of the photo you want it to affect. You can select any of the following: White balance, exposure, contrast and brightness, high dynamic range, levels, rotation, and keystone. It’s handier than you might expect, even if you’re an editing snob.
Learning the ropes of Capture One Pro
There’s nothing quite like practice to help you learn a new process. But, Capture One also includes a Learn channel right in the program itself. Click the button in the upper right of the interface and it brings up a pop-up with a host of video tutorials to guide you through various parts of the editing process.
I know it’s tempting to blow past stuff like this and learn by clicking buttons and cranking sliders. But, the tutorials are well-done and very informative so I recommend them if you’re thinking about committing to Capture One 21 Pro long term.
Working around plug-ins
While some image editing programs allow for plug-ins to tweak their functionality, Capture One doesn’t work like that. Instead, the program allows you to send images to another program to make adjustments before bring the tweaked file back in to finish it up and export it. This isn’t as convenient as simply installing a plug-in, but it gets around weirdness with compatibility and security when plug-ins malfunction or go out of date.
Shooting tethered
When Capture One was new, tethered shooting was a huge part of its appeal. This feature allows you to connect your camera directly to a computer and automatically import each shot after it’s captured.
Capture One makes this process very easy and it works super quickly. It’s the best tethering experience in my opinion.
Speed and performance
For a while, Capture One 21 Pro had a noticeable speed advantage over Lightroom in terms of loading previews and applying adjustments. Now, the gap seems much closer. Capture One still feels a little faster, but it’s not a vast difference.
Learning the keyboard shortcuts will really help speed up the overall experience. Like in Photoshop, you can cycle through the different cursor tools using specific letters on the keyboard. It’s handy and, once you learn them, you likely won’t forget them. It becomes second nature.
Capture One 21 Pro buying options
If you want a full version of Capture One 21 Pro, you can buy it outright for $299. That’s not cheap, but it’s not even an option in the Adobe ecosystem. If you want Lightroom Classic, you’ll have to pay for a subscription each month no matter what. Capture One also offers a subscription, but it costs $20 per month. That’s twice the price as Adobe’s Creative Cloud Photography plan, which also includes the full version of Photoshop.
If you only need support for specific camera systems, you may be able to get the program cheaper. Capture One offers specific Nikon, Sony, and Fujifilm editions (sorry Canon) that offer a discount. In those cases, the full version costs $199 and the annual subscription will set you back $149. That’s a very noticeable reduction.
It’s worth noting that the versions work the old-fashioned way. Buying a full copy of Capture One 21 Pro will get you future updates, but it won’t get you free access to full releases in the future. So, even if you buy a full version of Capture One 21 Pro, you’ll have to pay an upgrade fee when Capture One 22 Pro comes down the line.
Who should buy Capture One Pro?
If you’re looking for something that’s compatible across mobile and desktop, Capture One isn’t the way to go. While Adobe has made serious efforts to integrate its Creative Cloud experience across devices, Capture One is only built for computers, at least for the moment.
Pound-for-pound, Capture One Pro is the best raw image editing software on the market at the moment. It comes with a learning curve and, if you’re transitioning from Lightroom Classic, you may find it rather jarring. Capture One offers a 30-day trial period in which you get full access to the program to see if it fits your workflow. Even if you’re a die-hard Adobe fan, it’s worth a try.
