‘Paint’ shapes in the dark with long-exposure photography
It's not magic, but you'll feel like a wizard.
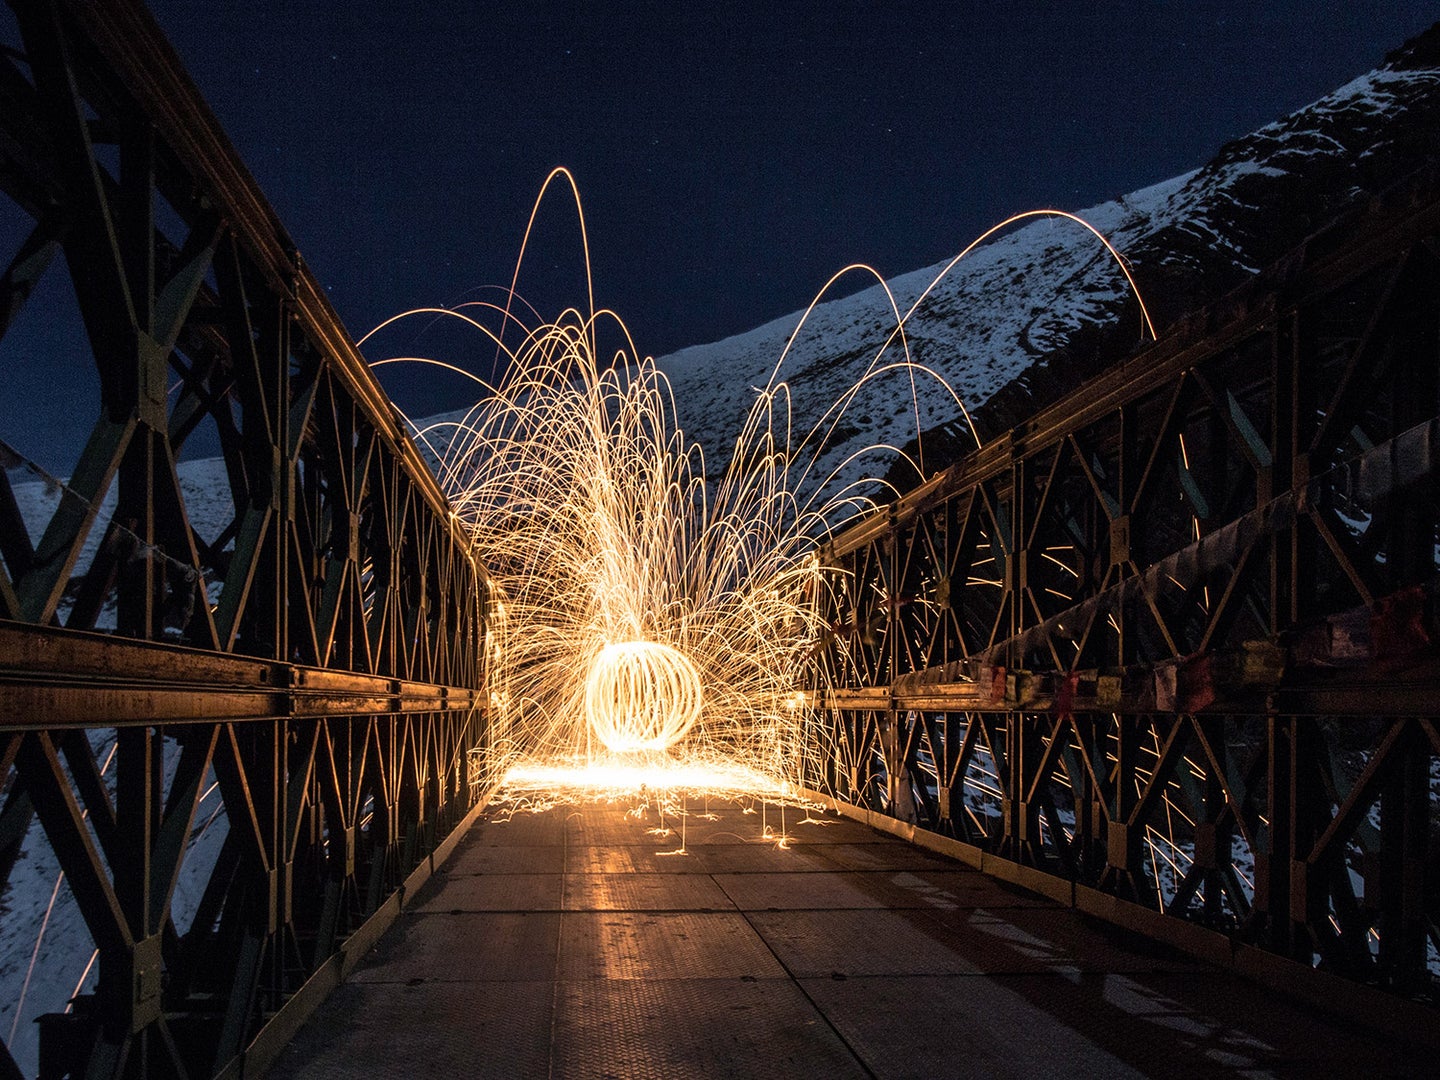
You’ve probably seen examples of “light graffiti” on social media. A creator skilled in this photographic art form can conjure circles and orbs by swinging a light source around their body, or “draw” on a real-world canvas with a laser pointer. With the right setup, you can, too.
Gather your gear
Usually, digital photos capture a mere fraction of a second of whatever’s going on in front of them. The more light there is, the better, as low light photography can leave you with blurry or unrecognizable shots. But if you stretch that capture time to seconds, minutes, or even longer, you can use light in myriad ways.
To make your own light painting, you’ll need a tripod, a light source, and a camera capable of taking long-exposure photos. Your light source could be an LED, laser, flashlight, or even flaming steel wool (with the proper safety precautions, of course). You could also use a remote shutter release, which will allow you to continuously record an image without touching the camera directly. This tutorial will outline the process for a Canon DSLR, but the principles can be applied to other camera types and even smartphones with software like NightCap Camera or Slow Shutter Cam.
Use your hands
In very low light, auto-focus may not function properly, so you may need to set your camera to manual mode to adjust it yourself. You could also shine a light on your target area to get auto-focus keyed in, then turn the light off while shooting, leaving the camera in the same position.
Then, set your camera’s exposure to the time needed to create your light art. If you’re not sure how long it will take, you can also set it to “bulb” mode and use a remote shutter release to keep the camera recording.
Get snapping
With the scene set, trigger your camera, then move your light source into position. Make the movements you want in whatever time you have and check the camera’s viewfinder for the results. Once you see the shots, you may need to further adjust the camera’s settings to get everything just right, but keep at it until you get the image you’d hoped for. I was happy to find that my initial f/22 aperture and 400 ISO settings worked well in my dimly lit garage.
Expand your mind
If you want to venture a little beyond the basics, try selectively lighting a subject. You won’t be creating new shapes with light, you’ll instead be artistically exposing what’s already there. For example, you could “create” a person with a brightly glowing body, but a face that inexplicably fades into the darkness. You could also splice several images together with video editing software to create an animated clip like the one above. Real-world light patterns, like those produced by cars on a highway or a Roomba patrolling a room, can be great subjects too. You could even build your own rig to produce automatic light patterns with a robot. Light graffiti is limited only by your imagination.