Edit stronger, faster, better with custom-built AI-powered presets
Good old-fashion presets are more powerful when combined with AI-assisted subject masking.
It’s time to confess one of my biases. I’ve traditionally looked down on presets in photo editing software.
I get their utility. With one click you can apply a specific look without messing with sliders or knowing the specifics of how editing controls work. There’s certainly appeal in that, particularly for novice photo editors. And selling presets has become a vector for established photographers to make a little money on the side, or have something to give away in exchange for a newsletter sign-up or other merchandise. (I’m guilty of this too. I made some Luminar 4 presets to go along with a book I wrote years ago.)
I’ve just never seen the value in making my photos look like someone else’s. More often than not, the way I edit a photo depends on what the image itself demands.
And then I saw the light: presets are not shortcuts, per se, they’re automation. Yes, you can make your photos look like those of your favorite YouTube personality, but a better alternative is to create your own presets that perform repetitive editing actions for you with one click.
For instance, perhaps in all of your portrait photos, you reduce Clarity to soften skin, add a faint vignette around the edges, and boost the shadows. A preset that makes those edits automatically saves you from manipulating a handful of controls to get the same effect each time. In many editing apps, presets affect those sliders directly, so if those shadows end up too bright, you can just knock down the value that the preset applied.
The downside is that a preset affects the entire image. Perhaps you do want to open up the shadows in the background, but not so much that you’re losing detail in the subject’s face. Well, then you’re creating masks for the subject or the background and manipulating those areas independently…and there goes the time you saved by starting with a preset in the first place.
Regular readers of this column no doubt know where this is headed. AI-assisted features that identify the content of images are making their way into presets, allowing you to target different areas automatically. Lightroom Classic and Lightroom desktop recently introduced Adaptive Presets that capitalize on the intelligent masking features in the most recent release. Luminar Neo and Luminar AI incorporate this type of smart selection because they’re both AI-focused at their cores.
Lightroom Adaptive Presets
Related: Testing 3 popular AI-powered sky replacement tools
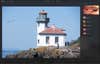
Lightroom Classic and Lightroom desktop include two new groups of presets, “Adaptive: Sky” and “Adaptive: Subject.” When I apply the Sunset sky preset to an unedited photo, the app identifies the sky using its Select Sky mask tool and applies adjustments (specifically to Tint, Clarity, Saturation, and Noise) only to the masked area.
Similarly, if I click the “Adaptive: Subject Pop” preset, the app selects what it thinks is the subject and applies the correction, in this case, small nudges to Exposure, Texture, and Clarity.
Depending on the image, that might be all the edits you want to make. Or you can build on those adjustments.

Related: ‘Photoshop on the Web’ will soon be free for anyone to use
Now let’s go back to the suggested portrait edits mentioned above. I can apply a subtle vignette to the entire image, switch to the Masking tool and create a new “Select Subject” mask for the people in the shot. With that active, I increase the Shadows value a little and reduce Clarity to lightly soften the subjects.
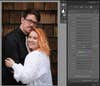
Since this photo is part of a portrait session, I have many similar shots. Instead of selecting the subject every time, I’ll click the “Add New Presets” button in the Presets panel, make sure the Masking option is enabled, give it a name and click Create. With that created, for subsequent photos I can choose the new preset to apply those edits. Even if it’s a preset that applies only to this photo shoot, that can still save a lot of time.
Luminar Presets
When Luminar Neo and Luminar AI open an image, they both scan the photo for contents, identifying subjects and skies even before any edits have been made. When you apply one of the presets built into the apps, the edits might include adjustments to specific areas.
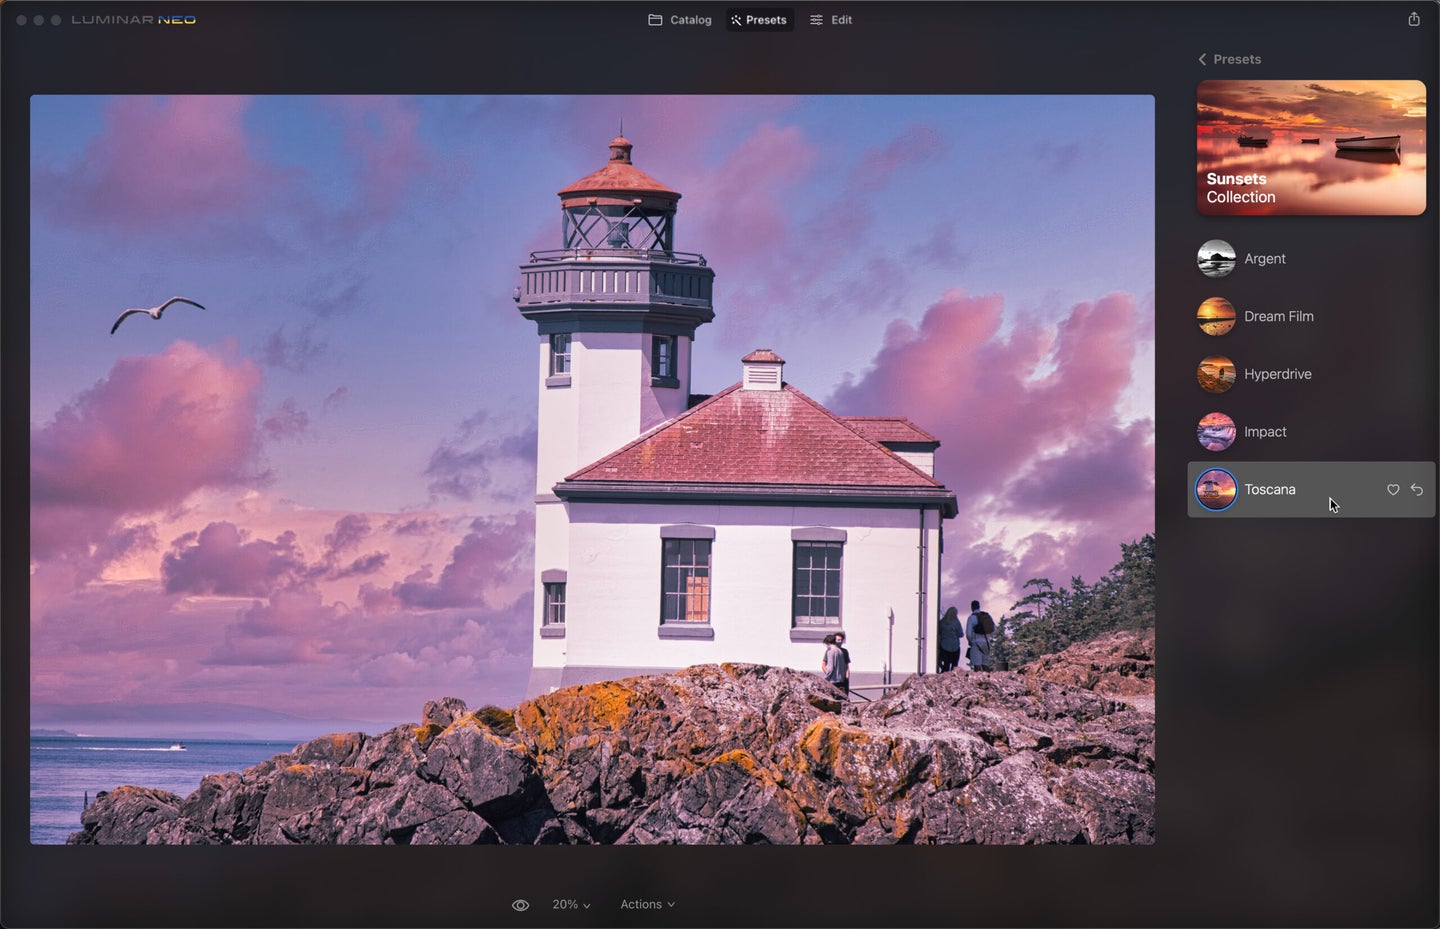
For an extreme example, in Luminar Neo’s Presets module, the “Sunsets Collection” includes a Toscana preset that applies Color, Details, and Enhance AI settings that affect the entire image. But it also uses the Sky AI tool to swap in an entirely new sky.
The portrait editing tools in Luminar by default fall into this category, because they look for faces and bodies and make adjustments, such as skin smoothing and eye enhancement, to only those areas. Creating a new user preset with one of the AI-based tools targets the applicable sections.

Preset Choices
The Luminar and Lightroom apps also use some AI detection to recommend existing presets based on the content of the photo you’re editing, although I find the choices to be hit or miss. Lightroom gathers suggestions based on presets that its users have shared, grouped into categories such as Subtle, Strong, and B&W. They tend to run the gamut of effects and color treatments, and for me that feels more like trying to put my image into someone else’s style.
Instead, I’ll stick to presets’ secret weapon, which is to create my own to automate edits that I’d otherwise make but take longer to do so.
