How to take a picture of the moon that doesn’t look like a tiny, white blob
Taking a good picture of our little satellite pal is harder than it seems, but a little prep makes a big difference.
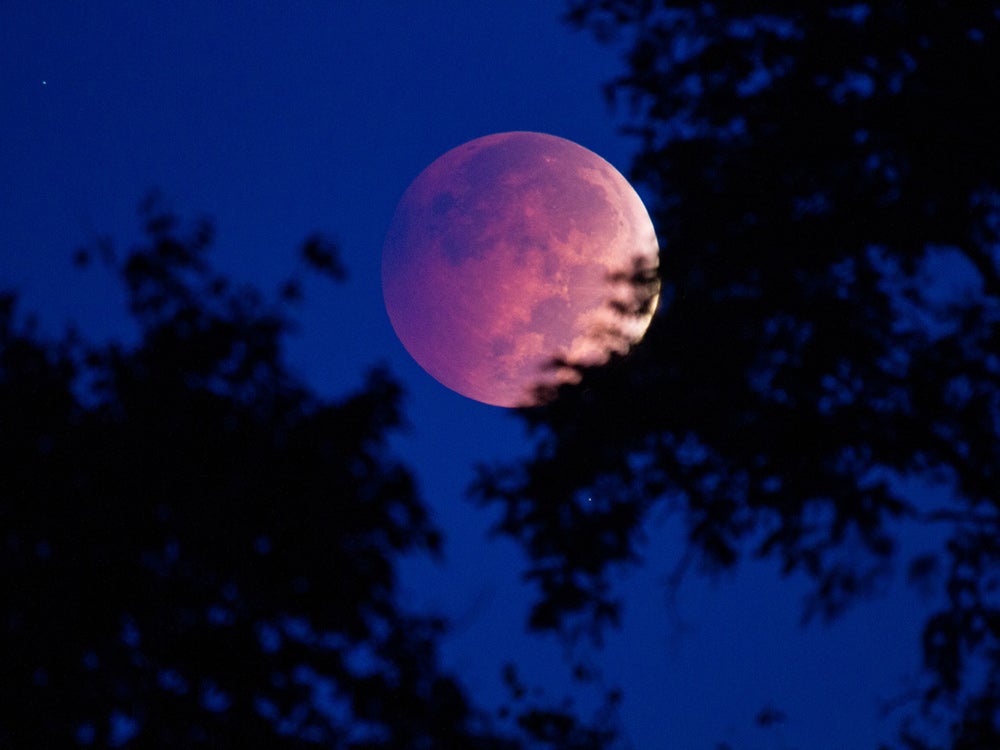
The moon is a photographic tease. It hangs up there in the sky, all big and bright. Then you try to take a picture of it and you get a pathetic white blob floating in a sea of digital noise and darkness. It’s frustrating, especially when you’re experiencing a super moon, or a blood moon, or a harvest moon, or any of those other moon phenomena that don’t really mean anything, but are extremely good at helping websites rack up page views and Instagram users gather likes.
But, while the earth’s little lunar buddy can be a pain to photograph, the results can be rewarding. Here are some tips for photographing a full moon, no matter what kind of camera you have, or what kind of media hype that particularly moon brings with it.
Plan your shot
Let’s start with the bad news: Stumbling across a beautiful moon and expecting to capture it with your smartphone is extremely unlikely to happen. In fact, you’ll probably end up with something like this mess.
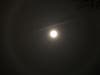
Bad moon photo
Gross, right? That’s because your smartphone—at least on its own—isn’t designed to snag a shot this kind of shot. The lens is too wide, the sensor generates too much digital noise, and the lens is often smudged with goop from your pocket that streaks the frame. It’s not pretty. So, it’s worth it to visualize the shot you want, and that will help determine the gear and technique you’ll want to use.
Sites like In-the-sky.org are a good reference for planning lunar events, or just tracking regular moon activities.
Using a dedicated camera
Your best bet for shooting the moon is an advanced camera with exposure controls and a long, telephoto lens. For the shot below, I used a full-frame Canon 5D Mark III DSLR with a Tamron 150-600mm zoom lens and an extender attached. If you don’t know anything about the numbers associated with zoom lenses, 600mm is extremely long. In fact, it’s longer than most of the big, white lenses you’ll find on the sidelines of pro sporting events.
Luckily, you don’t need $10,000 worth of gear to make a solid shot happen. Any modern interchangeable lens camera with access to a zoom lens will do the trick. Even a compact camera with a long zoom lens built in can work, although if it does make things a little trickier.
Pick your longest telephoto lens. If you’re not sure which is which, you’ll want to check the focal length of the lens, which is typically noted as a range, like 18-55mm or 70-200mm. The higher the number, the more zoomed in your view will be.
When using a camera with a built-in zoom lens, it gets a little more complex. As you zoom toward the telephoto end of the camera’s range, it can’t let in as much light (because the aperture gets smaller). As a result, it needs to crank up the sensor’s light sensitivity, which increases digital noise. You might have to do a little experimenting to find the perfect balance of zoom and noise for your specific camera, especially if it’s something with a monstrous 50x zoom. Many cameras also offer “digital zoom,” which you should ignore because it’s just cropping in on the image, which you can do better in post.
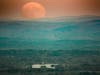
Super moon
Setting up
You’ll want a tripod for this shot, not because it’s dark, but because telephoto lenses are a lot harder to keep steady and free of motion blur without a sturdy base.
Pick a spot with a clear view of the moon—going out the night before to track the rough path across the sky can help you get an idea of when everything will fall into place.
If you want a shot of just the moon, location doesn’t matter as much, but adding some foreground can help give the moon some context that helps it feel as big as it looks, or even bigger.
Sometimes the time you shoot will be determined by a specific event, like an eclipse, but otherwise, you can pick the time that works best for your composition. Shooting a moon as it comes up over the horizon, for instance, will make it look huge, especially in a “super moon” situation.
Set the camera
If you’re not familiar with camera exposure modes and terms, you’ll want to switch your camera to program mode, which is typically represented by a “P” on the mode dial. This is an automatic mode, but it allows you to adjust exposure using something called “exposure compensation.” You’ll have to look up the exact method for using exposure compensation on your specific camera, but chances are, you’ll have to reduce the overall exposure by -2 or even more.
Moon shots often trick camera light meters because it tries to average out the bright celestial body with the dark sky. You can usually tell when you’re getting it right because you’ll start to see some actual detail in the moon.
If you do know about camera settings, start with a low ISO setting—even 100 will work to start. Choose a small aperture like f/8 or f/11 to get the sharpest performance out of your lens and start with a shutter speed around 1/125. This might be too dark, depending on your location, but you can adjust as you see fit.
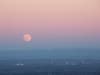
Super moon
Shoot the photo
Focusing on the moon should be pretty easy if your lens is long enough. If your camera lets you zoom in when using the back screen to compose a shot, that’s a great way to carefully check that everything is sharp. You can use the camera’s autofocus system, but if you find that it’s constantly zipping back and forth, looking for its subject (photographers call this “hunting”) then manual focus might be a better bet.
Once you’re ready to take the picture, use your camera’s self-timer mode to actually fire the shutter. Many cameras have a mode that will wait two seconds after you push the button to take the picture and that comes in handy here. Pushing the shutter button with your finger can introduce small amounts of camera shake and give you a blurry photo, even if you’re on a tripod.
Don’t take just one. Lots can go wrong with a photo like this, so shoot as much as you can while you have the chance.
If you can’t get close enough to get a really tight shot of the moon, don’t sweat it too much. You only need a picture that’s roughly 1000 x 1000 pixels to look great on Instagram, so there’s plenty of room to crop into files from most cameras.
Shooting with your phone
The biggest challenge of a decent smartphone moon-shot is the lens. The simplest solution is to find a buddy with a telescope and borrow it. They make special adapters for attaching smartphone cameras directly to telescope eyepieces, but you can get a similar effect by just hand-holding it.
You want to make sure that you use your hand—or even some tape—to block light from coming in between the telescope and the smartphone camera. That can cause lens flare and haze that will ruin your otherwise fancy photo.
It will likely take a little monkeying around with it to get the exact distance from the phone to the viewfinder in order to get everything in focus, but luckily phones have storage for lots of photos and you can delete the stinkers later.
Editing the photos
No matter how you shoot the image, editing should be pretty straight forward. You can typically use the “daylight” setting for color balance, even if there’s an eclipse happening, which will give it a red cast. After all, that is reflected sunlight that you’re capturing.
If you know how to shoot in raw—something that both smartphones and dedicated cameras now do regularly—enabling it will keep all the image data you capture without compressing it to make a JPEG file. That gives you extra leeway when it comes to editing a finished image.
And if you see weird purple or green fringing around the moon, that’s an effect called chromatic aberration and it often happens at high-contrast edges, especially with cheaper lenses and optics. It’s simply the lens’s inability to correct for different colors of light refracting at different angles. You can fix it in post using something like Lightroom or Photoshop. Or, just switch it to the best hider of imperfections ever: black-and-white.
