Tips from a pro: How to improve your insect photography
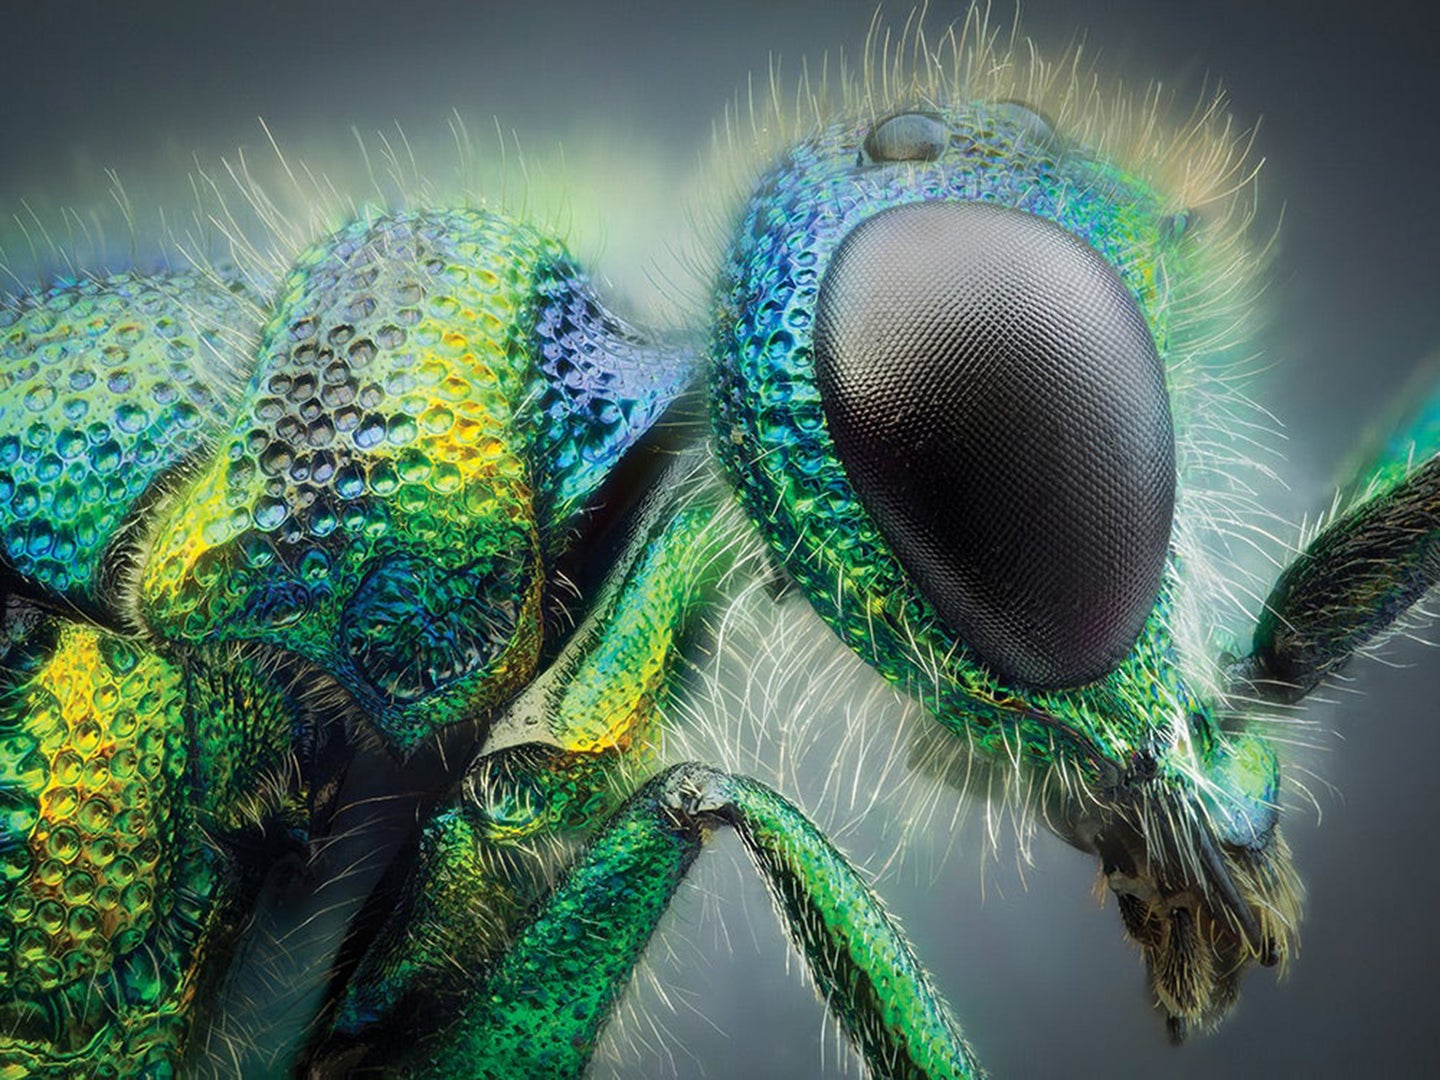
Bugs can be pretty beautiful if you get in close enough.
This post on insect photography has been updated. It was originally published on October 10, 2016.
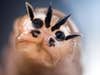
Most parents are not, as a rule, overjoyed when their kid comes home with head lice. But John Hallmén is different.
“This year in March my son finally came through with some head lice!” he gushed. So he photographed one of the little bugs (“I think it’s a female”) poised on a shaft of reddish brown hair. Looking at his image, you realize that what is ordinarily considered a repulsive creature is weirdly beautiful.
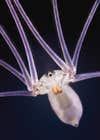
That’s what Swedish photographer Hallmén does. He shows us the incredible, strange beauty of tiny beings—insects, other arthropods like spiders and pillbugs, and worms—you get the picture.
From film photography to focus stacking
“I’ve been interested in bugs and other animals since I was very little,” he tells us. “If you look at video footage from my childhood you typically see me searching for frogs, snakes, or bugs underneath rocks in the background or holding some interesting find up to the camera. I got my first SLR when I was 13 years old, back in 1992, and made many attempts at macro photography. However, at that time I found it quite frustrating. Experimentation was expensive back in the analog days!”
This changed when Hallmén got his first digital camera—a Fujifilm superzoom model, with an add-on macro lens and external flash unit. Then came the next revolution, the one that has utterly changed macro photography—focus stacking. This involves taking multiple images of a subject with slight changes of focus with each, then combining the “stack” into a single image in software. This overcomes a fundamental problem of extreme close-up photography, the extremely limited depth of field, even with very small apertures. “I was a bit skeptical at first but quickly fell in love with the technique,” he says.
Today he makes his living by licensing images, teaching, and organizing workshops. He also has multiple books to his credit, including a children’s book, Minimonster, created in collaboration with his wife Hanna, with their son Bruno as a model. “I was lured into macro and bug photography by my passion for the interesting subjects and techniques, and then the hobby grew out of control and took over to the point where I simply didn’t have time for anything else.” While Hallmén often works with biologists on projects, he describes himself as “self-taught in biology.” His educational background was in engineering, which shows through in his DIY equipment setups.
Finding tiny subjects
Where does he find his insect photography subjects? “They are literally everywhere,” he says. “This may very well be one of the most compelling aspects of macro photography—you can find truly exotic-looking subjects right at your doorstep. And the vast majority of my images are made within cycling distance from my home in Stockholm.”
Hallmén frequents a nature preserve nearby, and, while he prefers shooting live species in the field, “I’ve made a habit of never leaving home without some kind of jar for catching presumptive subjects that, for some reason, can’t be shot in the field or that may need a closer examination to be able to be properly identified.”
His primary recommendation for shooting bugs in the field? Get up early on cold mornings. Arthropods, being cold-blooded, are lethargic, even inert, in the cold. “This is the reason why my alarm clock is one of the most important pieces of equipment,” he says. “As a bug photographer, you really benefit from being out and ready by dawn. Besides, nothing beats the natural morning light.”
But then it can be too cold. Sweden has long, cold winters, during which a “painfully limited” supply of bugs can be found. Hallmén, therefore, keeps some dead specimens in his freezer, sometimes sourcing more from entomologist friends. “This way I can keep occupied all year round,” he says. “Also, even though shooting dead subjects has some obvious downsides, it does let you shoot at much higher magnifications than what is possible in the field.” (For “sentimental reasons,” he says he is more likely to freeze “annoying species” like ticks and mosquitos rather than, say, butterflies.)
Specimen “preparation”
Dead specimens must be “prepared,” and this is more complex than you might think. “As soon as you look closely at a dead insect you realize how much time and effort they spend keeping themselves clean,” he tells us. “Because as soon as they’re dead they are rapidly covered in dust particles, fibers, etc. One of the most time-consuming parts of shooting dead specimens is the cleaning process. I sometimes need to spend an hour or so at the microscope picking off dust particles one by one with a fine needle before I can begin shooting.”
Before you try focus stacking
For macro insect photography newbies, Hallmén advises starting out simple. “Put stacking aside for a moment and focus on good old single-frame shooting,” he advises. When you’re starting out, learning to use a diffused flash—whether to avoid blur due to camera shake and/or subject movement—is more important than optics. “Out of the box, a flash will give harsh and unpleasant lighting, but with just minimum do-it-yourself effort you can turn a sheet of paper or a white plastic container into a simple but effective macro softbox,” he says. For continuous studio lighting, Hallmén commonly uses inexpensive gooseneck LED lamps.
Hallmén now generally prefers an interchangeable lens camera. With an ILC, there is no mirror slap (unlike DSLRs), whose vibration can cause blurring in extreme close-ups. Most can also be set for electronic, rather than mechanical, shutter firing, to further reduce vibration. Further, mirrorless cameras can be adapted to mount a wide variety of makes and models of lenses.
And oh, about the dénouement of the head lice shoot: “It went perfectly fine! The anti-lice treatments of today are extremely effective and completely non-toxic,” he explains. “Just spray it on, wait a few minutes and rinse—done. The lice get covered in this oily substance that clogs up their breathing and makes them suffocate. You almost feel sorry for them.”
We have the sneaking suspicion that John Hallmén really does feel sorry for them.
Insect photography gear
Here’s what you need to get closer to insects, whatever your level of experience.
Beginner insect photography
Go with what you’ve got. Use a prime lens with extension tubes or a front-mounting close-up lens such as the Raynox DCR-250. Even better, try a reverse-mounting ring. If your lens aperture is controlled electronically (most modern optics work this way), you’ll need a reverse adapter control. A variety of brands are available. You’ll probably want a focusing rail, too, because it’s far easier to focus extreme close-ups by moving the camera back and forth.
Intermediate insect photography
Get a dedicated macro lens. John Hallmén uses a 180mm Sigma macro, a long focal length that allows extra working distance—good for bugs. He also uses the Canon MP-E 65mm f/2.8 Macro, which can provide up to 5x life size without extra tubes or accessories. At that magnification, a bug 0.3 inches long fills a full-frame sensor.
At this point, you may want to try focus stacking. A number of programs (including Adobe Photoshop) will let you do this, but the de facto standard is Zerene Stacker (another is Helicon Focus). For extensive stacks, many macro photography enthusiasts use a Proxxon table—a device actually designed for fine machining. “In my experience, even the best fine-focusing rails simply aren’t fine enough to handle the small focus increments needed as you move beyond life-size magnification,” Hallmén says. “I recommend the Proxxon table to beginners as a low-cost, easy-to-find alternative.”
Advanced insect photography
Microscope objective lenses, typically used with bellows, can provide, well, a microscopic view. One hitch: ‘scope lenses are set to infinity focus, which won’t allow you to focus the image on a camera sensor. Macro photographers use a device called a morfanon tube lens to correct for this. Finally, for really extensive stacks (many hundreds of frames) Hallmén uses a fully automated, motorized setup, the Cognisys Stackshot.