10 tips for dynamic waterfowl photography
How to capture exceptional avian photos without traveling too far from home.
This post on waterfowl photography has been updated. It was originally published on December 17, 2008.
You don’t need to trek into the wild to create incredible waterfowl photography. City parks and wildlife sanctuaries are ideal for photographing ducks, geese, and swans. Not only are they easily reached, but in these spots, the wildlife is used to having people around.
Another advantage? You don’t need outrageously hardcore gear. While super-long, super-fast lenses and teleconverters can be helpful, more casual shooters can do well with something along the lines of a variable-aperture zoom, like the Tamron 70-300mm F/4.5-6.3, available for most full-frame mirrorless mounts for $500.
Remember, when it comes to creating captivating waterfowl photography, timing and technique count the most. Here are 10 specifics to keep in mind:
1. Get out often
Late fall through early summer is the best time for waterfowl photography. You’ll find fluffy newborn goslings and ducklings in the spring. Later in the summer, the birds molt and look scruffy.
2. Join the flock
Waterfowl are most active from shortly before sunrise until midmorning, and then again from midafternoon until after sunset. I like to arrive an hour before these prime times (yes, that often means showing up in early-morning darkness) to let the birds get accustomed to my presence. And when you move around, do so slowly and quietly. Bring a small foam pad to sit or kneel on; you’ll be less threatening to the birds if you’re low to the ground. A tripod that gets low is also important.
3. Watch the light
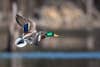
That the birds are active when the light is best is a wonderful coincidence. Those soft, warm, low-in-the-sky rays couldn’t be better. When a bird is lit by an early or late sun from the front or side, you’ll get an attractive catchlight in the eye. It’s a detail that separates a great bird photo from an also-ran. And with mallard ducks, buffleheads, and wood ducks, a beam of directional light hitting the right way brings out the full spectrum of iridescence in their head coloring. Watch the mallard drakes carefully. Just by turning his head a fraction of an inch, a male’s head coloring can change from nearly black to a splendid green.
4. Study their moves
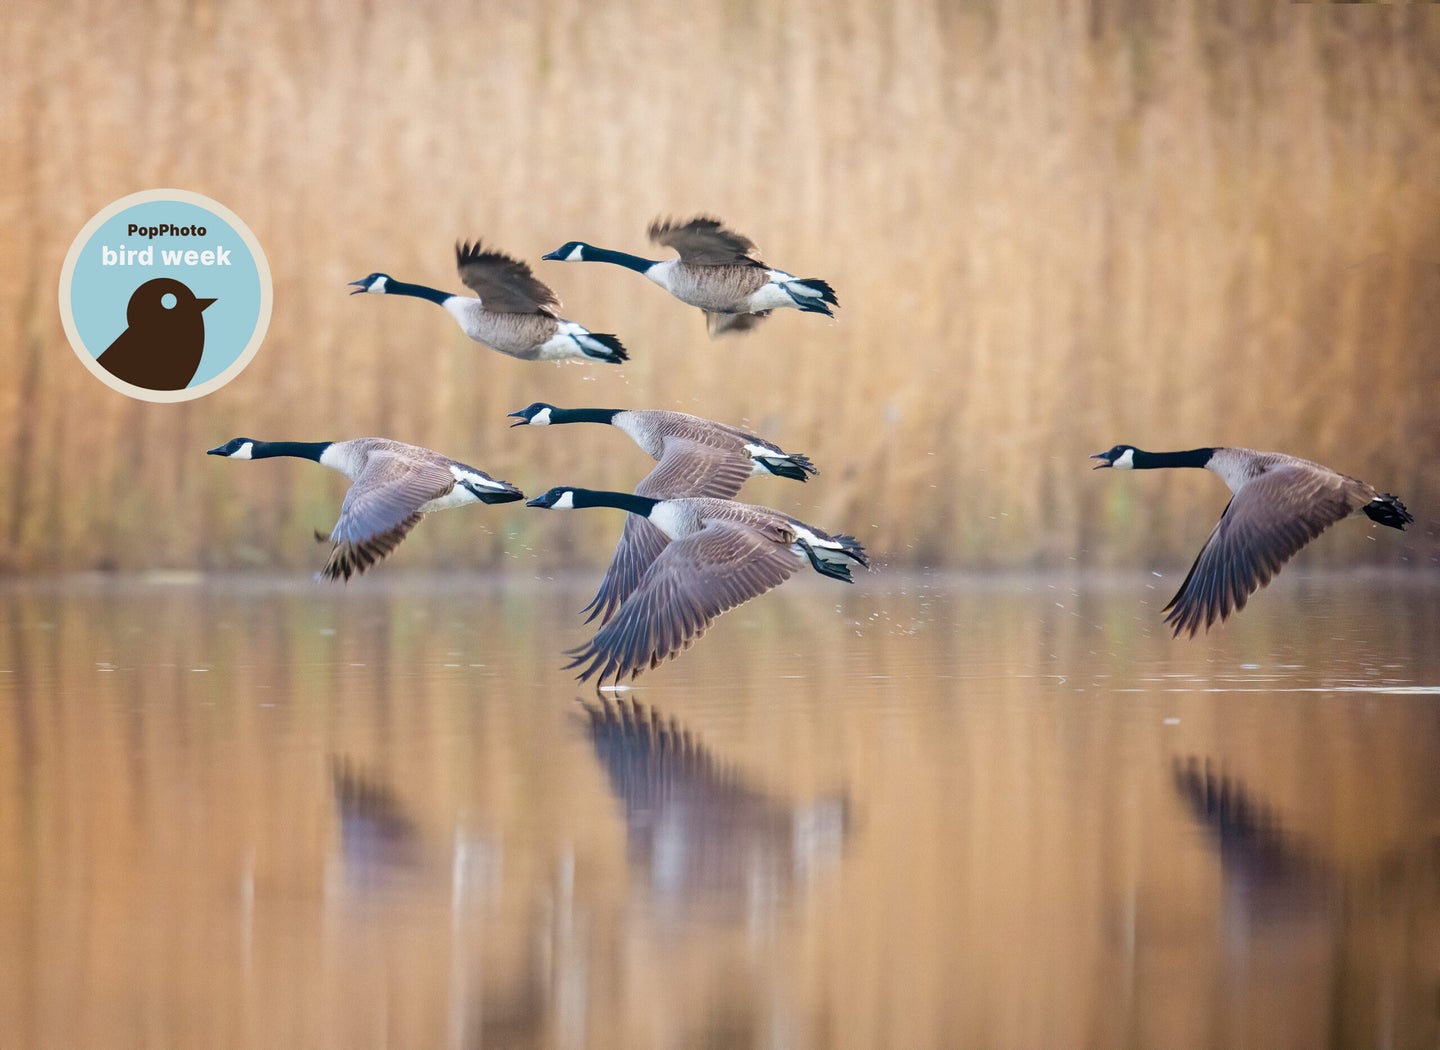
Pay close attention to the birds’ movements, and soon you’ll be able to predict what they’re about to do and plan your shot accordingly. Most ducks, geese, and swans bob their heads up and down, call out, and turn toward the wind before liftoff. Dabbling ducks, such as mallards, take off almost vertically. Diving birds such as coots require a running start, as do swans and geese.
5. Mind the wind
Related: The year’s best bird photography highlights the humor, beauty, and fragility of avian life
Calm days are best for waterfowl portraits. (When the wind blows, the birds are more nervous and keep their distance.) Mornings with an east wind and afternoons with a west wind are most productive for flight photography because birds often take off into the wind and land against it. This means you’ll have the light behind you, shining on your subjects, as they come toward you.
6. Backlight right
Swans look dramatic when backlit, especially when splashing in the water against dark backgrounds. Sunrise and sunset are good times to silhouette birds against dramatic colors. Look for ripples, patterns, and reflections in the water to add further impact to your image.
Act quickly
You’ve got to be fast when doing waterfowl photography. Capturing the action often requires speeds of 1/500 sec or faster to freeze their motion. Don’t be afraid to boost your ISO to keep a fast shutter speed. I often shoot at ISO 400 or even 800. But don’t overlook using slow shutter speeds for creative images. For instance, if you’re panning birds in flight, try something in the 1/15 to 1/125 sec range. The idea is to render the bird sharply while blurring the background.
Expose accurately
Preset your exposure as soon as you arrive at your location. Either spot meter a mid-tone or use auto-exposure mode with evaluative metering. Darker- or lighter-toned birds may require some exposure compensation. I’ll often work up to 1-stop in 1/3-stop increments to either side of the meter reading. And digital shooters have the advantage of not only instant image replay but also the histogram. Study it! I like the histogram to stack up as far to the right as possible without clipping the highlights.
Nail your focus
When photographing waterfowl in flight, consider using your camera’s AF subject tracking mode, if it has it. Some cameras even offer bird-specific subject tracking. If your camera doesn’t have subject tracking (or it’s unreliable), stick with good old fashion continuous autofocus using the AF area of your choice—a single AF point or small cluster of points should work well.
Be sure to lock focus onto your feathered friend as early as possible, regardless of which AF mode you use, and continue to hold focus on the bird as it moves in the frame. I try to keep the AF point area on the bird’s head or neck while shooting. To help with faster focus, set the focus limiter on your lens (if you have one)—that is, tell the camera to search for subjects only beyond a certain distance. This will keep your lens from wasting time hunting for subjects in the foreground.
Make space
When doing waterfowl photography, it’s important to avoid centering your subject(s) in the viewfinder. That makes for a static image. Instead, give them room to move in the frame. Leave some open space ahead of the bird—this will imply that it is going somewhere.
Shaun Cunningham is a retired optician turned pro nature photographer based in Victoria, British Columbia, Canada.