The best camera backpacks for hiking in 2023, tested and reviewed
Protect your expensive gear and make your hikes more enjoyable with these camera backpacks.
| Best overall |
|
Shimoda Explore V2 25L | SEE IT |
This bag is fully customizable and adjustable, so you can get a design that fits your body best for more comfortable hikes. |
|
| Best small |
|
Lowepro Trekker Lite BP 250 AW Backpack | SEE IT |
This tiny, lightweight option is ideal for short hikes. |
|
| Best for winter trips |
|
Lowepro Whistler Backpack 450 AW II | SEE IT |
The Whistler is built to hold skis and an assortment of wet gear for those snowy adventures. |
We may earn revenue from the products available on this page and participate in affiliate programs. Learn more ›
Having a proper camera backpack for hiking will make it easier and safer to bring your gear along on adventures. All camera backpacks offer protection for your expensive camera equipment. Many will also have additional space for hiking essentials such as food, water, and whatever else you may need on the trail. What type and size of bag you get depends on the hike, as short day hikes call for something different than an epic, weeks-long backpacking trip. But no matter what, the best camera backpacks for hiking should be comfortable to carry so that you don’t mind lugging around your camera.
- Best overall: Shimoda Explore V2 25L
- Best small: Lowepro Trekker Lite BP 250 AW Backpack
- Best for winter trips: Lowepro Whistler Backpack 450 AW II
- Best for backpacking: Moment Strohl Mountain Light 45L Backpack
- Best budget: Slinger Alpine 200 Lightweight Compact Camera Backpack
How we chose the best camera backpacks for hiking
The writers and editors of Pop Photo have been involved in the photography industry in various capacities for well over a decade. I have been a hiker and outdoor enthusiast since the time I could walk, growing up taking camping trips with long hikes each summer with my family. I’ve used my share of camera equipment and backpacks, learning the ins and outs of what works and what doesn’t.
When selecting the best camera backpacks for hiking, I prioritized bags that provide excellent protection for photography equipment. The ability to carry water and extra gear was essential. I looked for bags that offer flexibility and customization with layout and packing to suit a wider range of people. Comfort was also crucial, as a poorly made and ill-padded backpack will not result in a good hike.
Best camera backpacks for hiking: Review & recommendations
Finding the right camera backpack for hiking can be a tricky endeavor. Below you’ll find bags suitable for many types of hiking situations, so you can find the option that’s best for you.
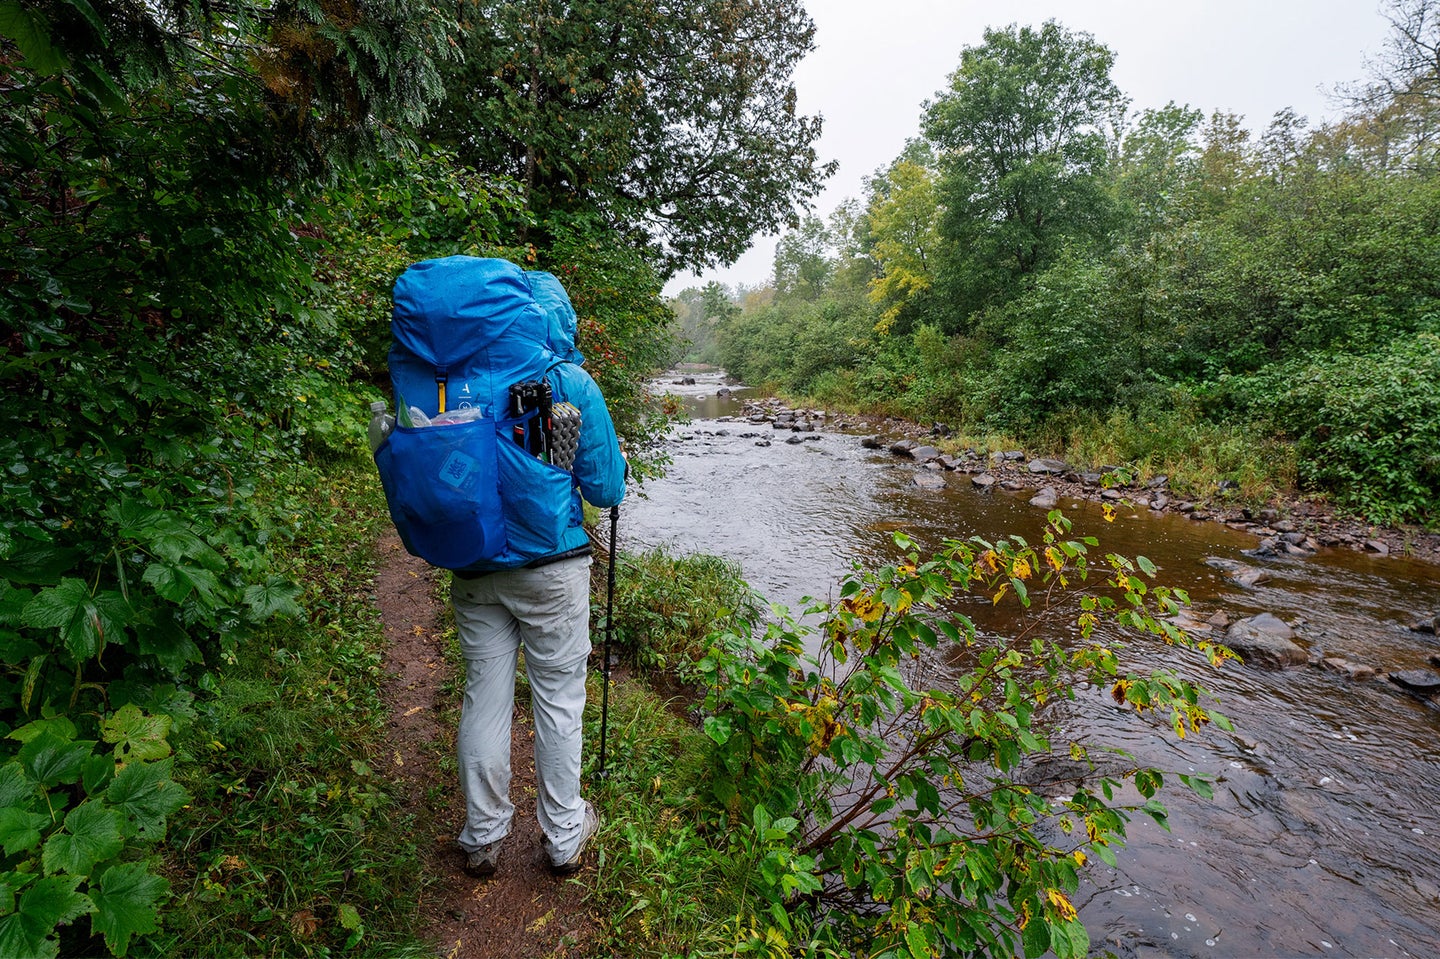
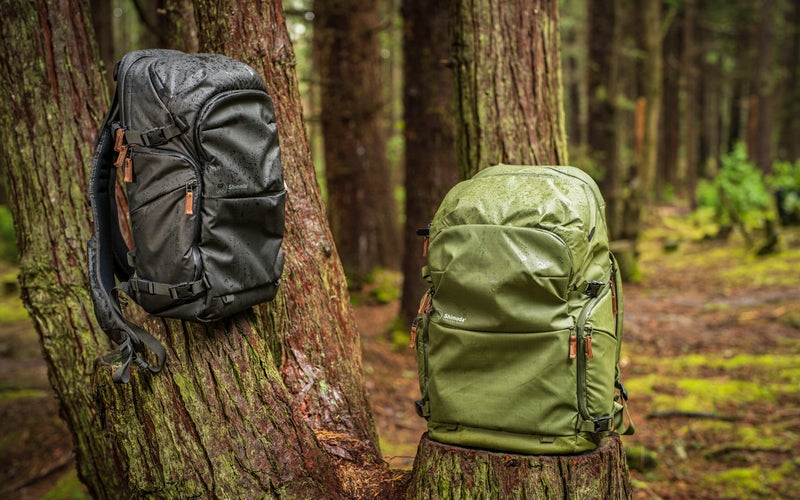
Best overall: Shimoda Explore V2 25L
Mason Marsh
Why it made the cut: It’s a smartly designed, feature-packed backpack with a rugged build, ready to hold up to whatever you throw at it while maintaining comfort.
Key features:
- Capacity: 25 Liters
- Laptop compartment: Yes, fits 13-inch laptop
- Weather resistance: Weather-resistant fabric, all-weather cover included
- Exterior dimensions: 10.6 x 18.3 x 6.7 inches
- Weight: 4.5 pounds
Pros
- Adjustable height
- Includes a pocket for a 3-liter hydration bladder
- Highly customizable, down to the straps
- Durable and water-resistant build
Cons
- Pricey
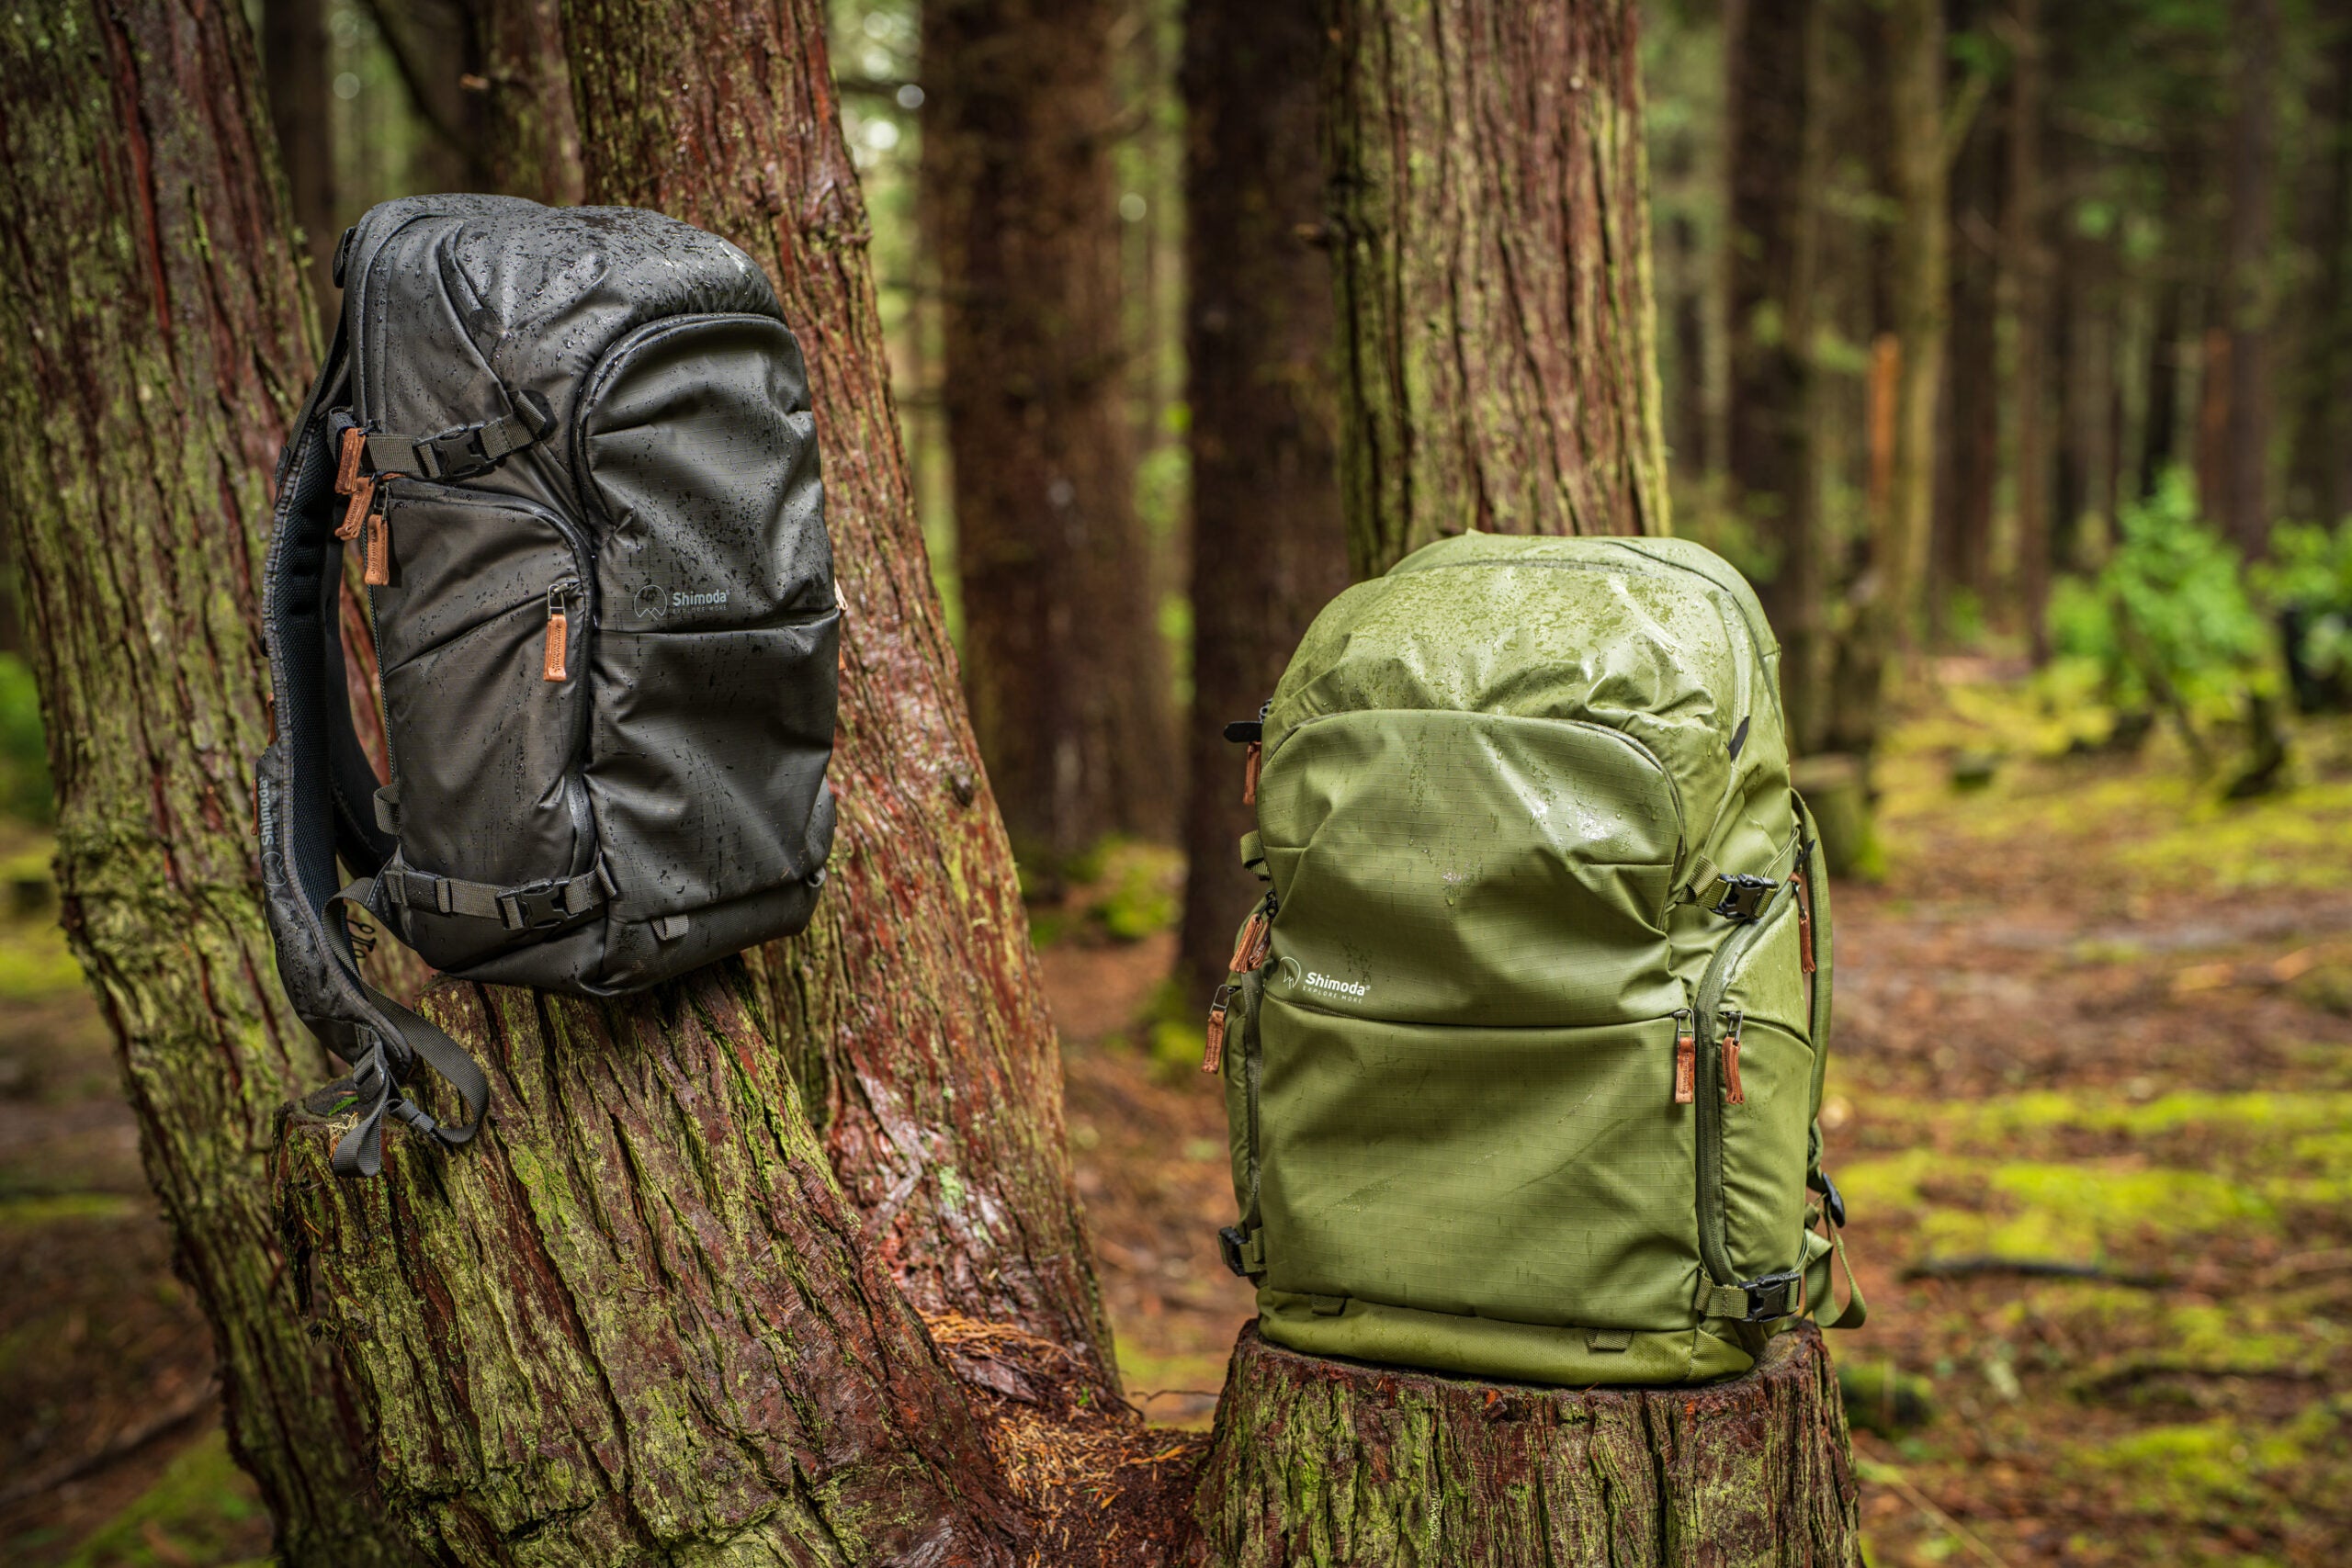
There are lots of reasons this bag won a 2021 Pop Award. It is fantastically designed and well thought out, providing solutions for a variety of photographers. I greatly appreciate that Shimodo took the time to work with a group of female photographers to address fit specific to their bodies. It is a simple thing, but one that often gets overlooked and can have a significant impact on comfort.
One of the best aspects of this bag is its customizability. Shimoda bags rely on its Camera Core Units for camera protection. These come in different sizes, allowing you to choose what you need based on your gear or even each particular trip. You have to purchase them separately (or in a bundle), but they provide more flexibility for organization. They are also more rigid than other bag dividers, offering better protection. Beyond the interior, Shimoda has multiple different shoulder strap designs, giving you options on that front as well.
The Explore V2 is a rugged, durable bag with a ripstop nylon shell that is tear and water-resistant. In addition, the zippers are lockable and water-resistant, keeping your gear extra safe from both the elements and other humans. And it also comes with a rain cover for those seriously wet hikes.
There are loads of pockets throughout the bag for organization, meaning you can bring lots of gear beyond your camera. It also includes a dedicated, padded laptop sleeve. For hydration, one side pocket fits a three-liter hydration bladder, and another has an expandable pocket that fits a large Nalgene, so you can easily stay hydrated on your hikes.
Should you want to read more about these bags, you can read our full, hands-on review.
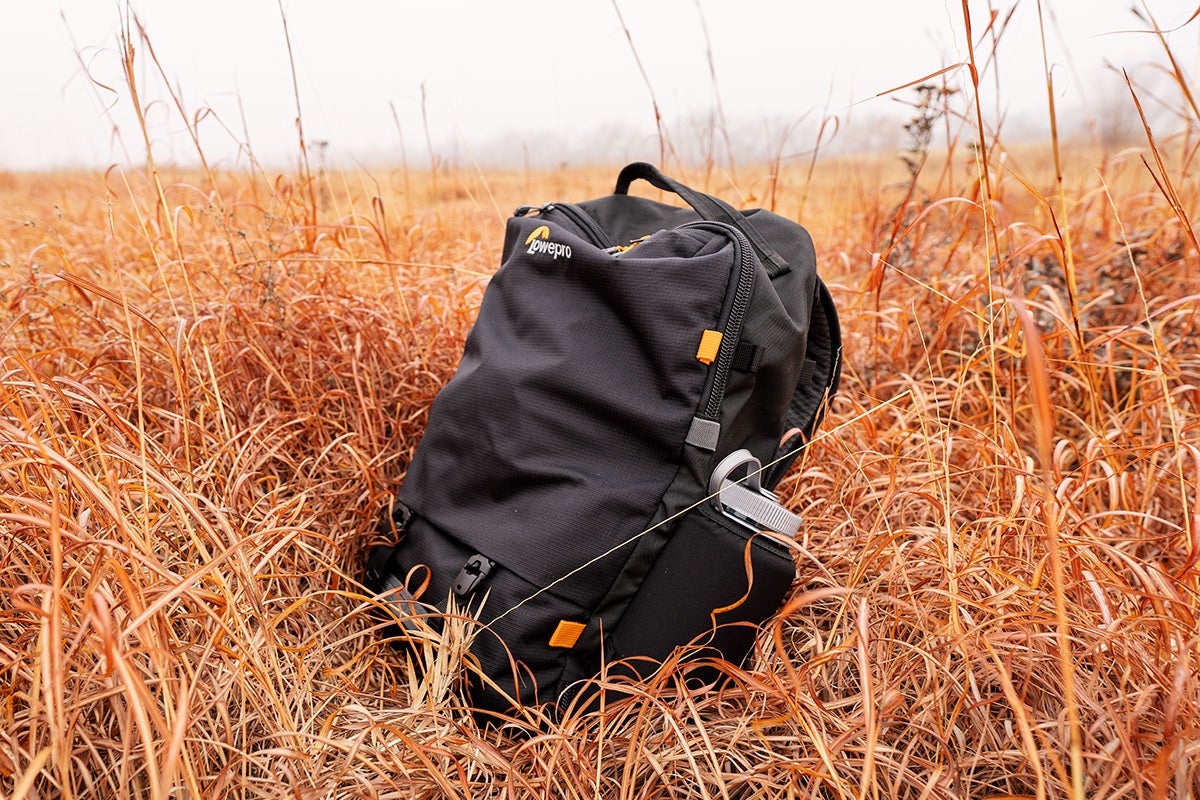
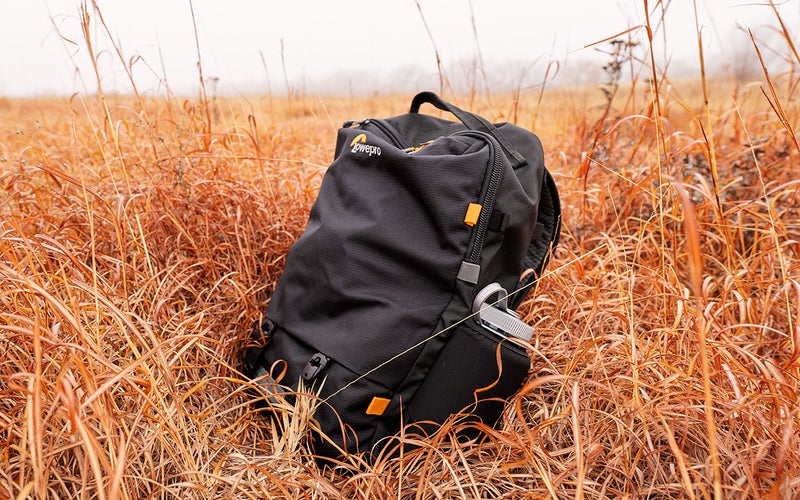
Best small: Lowepro Trekker Lite BP 250 AW Backpack
Abby Ferguson
Why it made the cut: The Trekker Lite is an extremely lightweight and minimal bag with room for gear beyond your camera. It’s an ideal option for short hikes and day trips.
Specs
- Capacity: 25 Liters
- Laptop compartment: Yes, fits 15-inch laptop
- Weather resistance: Weather-resistant fabric, all-weather cover included
- Exterior dimensions: 19.3 x 11.4 x 7.3 inches
- Weight: 2.2 pounds
Pros
- Very lightweight
- Versatile and modular
- Plenty of space for jackets and other hiking essentials
- Comfortable to carry
Cons
- Not convenient to get photography gear in or out
- Soft-sided design isn’t for everyone
You don’t always need a giant camera backpack on hikes. Sometimes, you want to go light and fast or are just taking a casual stroll that doesn’t require days of provisions. LowePro’s Trekker Lite series is a fantastic choice for those situations. The Trekker Lite 250 only weighs 2.2 pounds when empty, which is quite lightweight for a camera backpack. In typical LowePro fashion, it is well-made with recycled polyester 300d ripstop, and it comes with a waterproof cover in case you get caught in a downpour.
Like the Shimodo bag, this Lowepro Trekker Lite utilizes a removable GearUp camera insert to protect your gear. Despite being removable and modular, it fits solidly into the pack, so you don’t have to worry about it sliding around. Plus, the camera insert can be worn as a shoulder bag on its own with an included strap.
We’ve loved the Trekker Lite 250 for shorter day trips. It holds a Sony a7 III with a compact lens attached and an additional small lens or two. The design of the camera insert does make it tricky to get your gear in and out. And you have to unzip the bag nearly all the way to gain access. So, you may want to hike with something like the Peak Design Capture Clip if you like to keep your camera at the ready. But you can trust that your gear will be safe and secure, at least.
The space above the camera compartment is very roomy. It provides enough space for a lightweight jacket, an instant camera, and plenty of snacks. A separate pocket in there helps to keep things organized. An additional pocket on the exterior holds your keys and wallet. There’s a single water bottle pocket on the side, which will hold a 32-ounce Nalgene, but it is a snug fit. Plus, there is a dedicated laptop sleeve, making this a good option for short work trips as well.
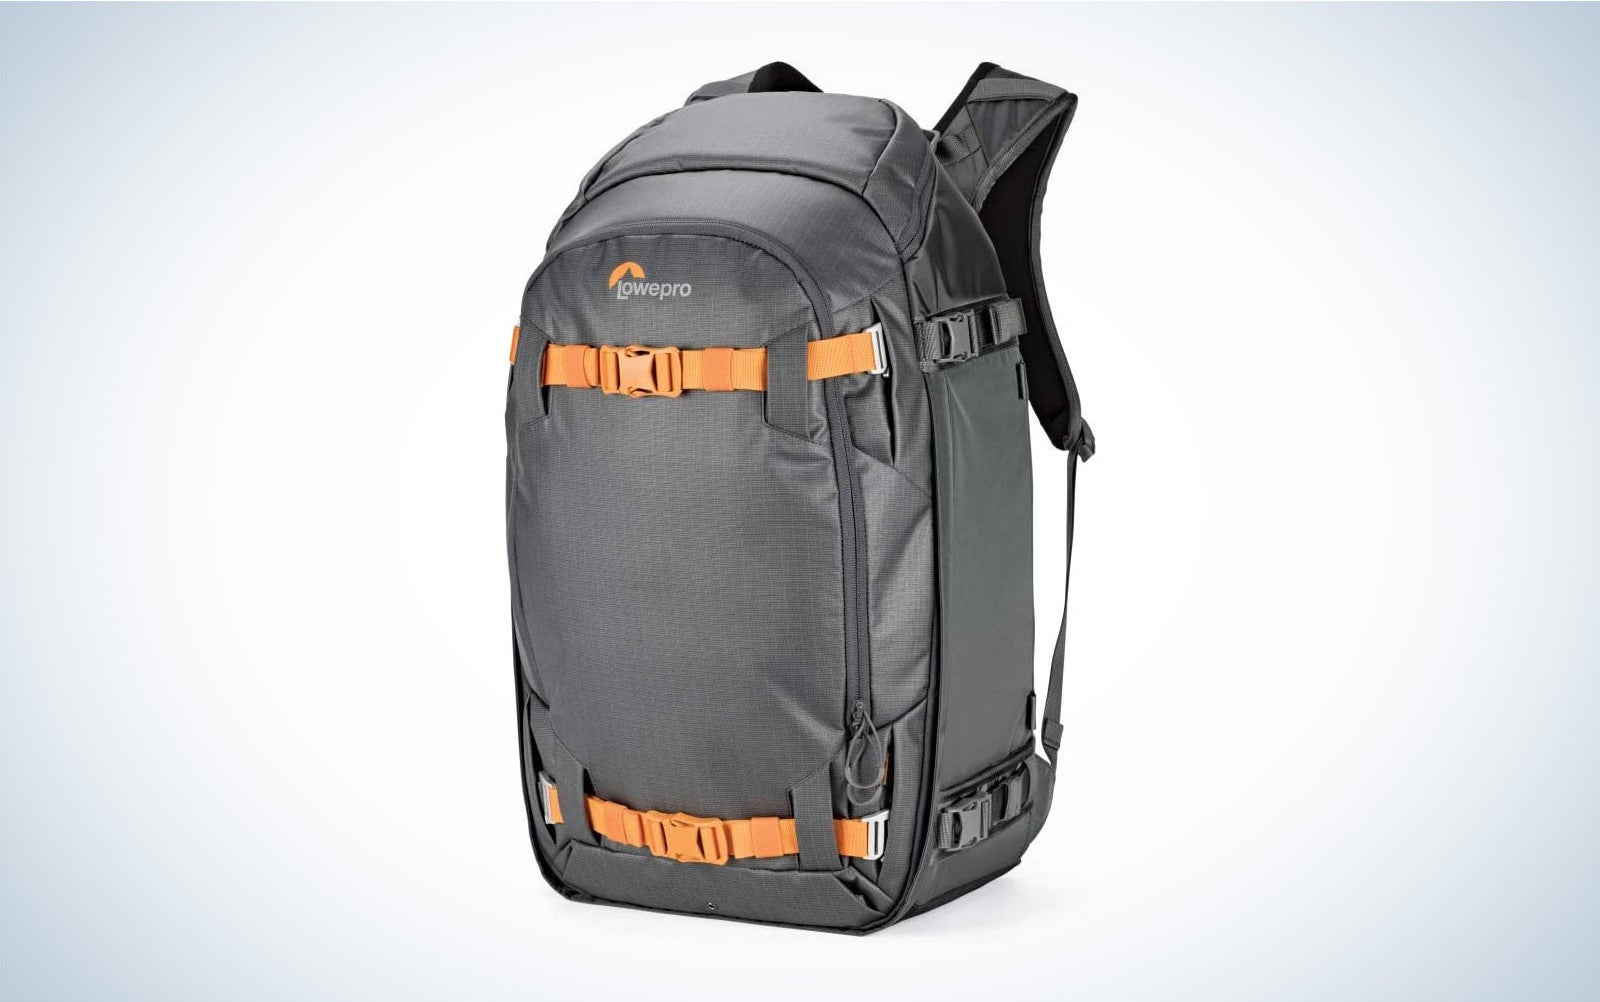
Best for winter trips: Lowepro Whistler Backpack 450 AW II

Lowepro
Why it made the cut: It’s winter-ready with a waterproof barrier protecting your camera equipment from your wet gear and loads of attachment points for skis, snowboards, or ice tools.
Key features:
- Capacity: 45 Liters
- Laptop compartment: Yes, fits 15-inch laptops
- Weather resistance: Weather-resistant fabric, all-weather cover included
- Exterior dimensions: 23.62 x 12.99 x 10.04 inches
- Weight: 6.83 pounds
Pros
- Large capacity
- Rugged, durable build
- Lots of attachment points for equipment
- Waterproof front pocket for wet gear
Cons
- Heavy and bulky
If you are a winter adventurer, your backpack needs will be slightly different than most. Winter hikes or trips require extra durability, weatherproofing, and more gear storage. Lowepro’s Whistler backpack provides all that, giving your peace of mind that your gear is safe.
I have owned the first version of this bag for at least seven years, and even after some big trips, it barely shows signs of wear. Though heavy and bulky, the bag itself has a rigid, tough frame with lots of protection. So even if you yard sale while bombing down the slopes, your camera equipment will be safe. The shell is water-resistant nylon that offers enough protection for most snowy days, but there is also a snug-fitting rain cover for those extra wet outings.
One of the features I love most about the Whistler is the front compartment. Lowepro included a waterproof, tearproof barrier between the camera compartment and the front pocket. It also has drainage holes, making it the perfect place to store ski skins or crampons. Or it’s a safe place to put your hydration bladder since no water can reach the camera compartment if it leaks, and there is a clip at the top to keep it in position.
The other winter-specific design is the straps on the front and side of the pack, intended for attaching skis or a snowboard. You can also use them to strap on a tripod or camping gear. The camera compartment is a removable insert, though it certainly doesn’t feel that way with how snug it is. The dividers are movable so that you can get the perfect configuration and best protection. And some even have pockets for storing small pieces of gear. And there’s a pocket on top for snacks or goggles as well. In all, it’s ultimate protection with lots of room for gear.
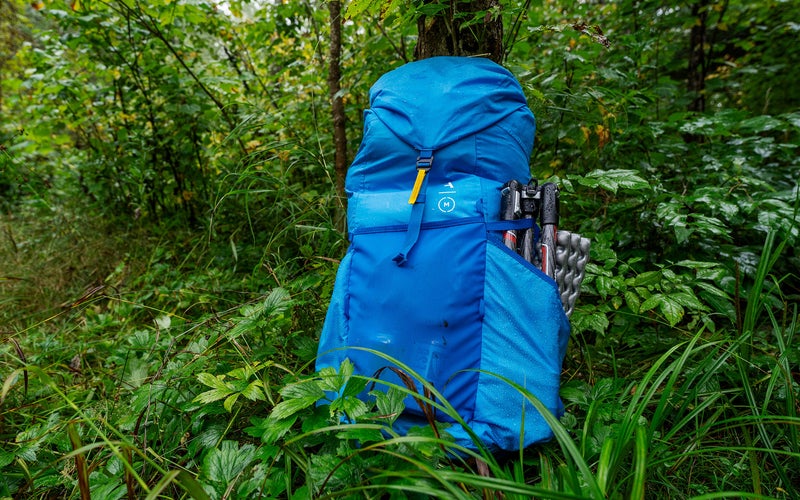
Best for backpacking: Moment Strohl Mountain Light 45L Backpack
Abby Ferguson
Why it made the cut: At only 2.7 pounds, it’s one of the lightest camera backpacks of this volume. Plus, it’s hydration bladder compatible and has attachment loops for gear, making it the best choice for backpacking trips.
Key features:
- Capacity: 45 Liters
- Laptop compartment: None
- Weather resistance: Waterproof
- Exterior dimensions: 31.5 x 10.5 x 10 inches
- Weight: 2.715 pounds
Pros
- Two sizes for different torso lengths
- Lots of attachment points for backpacking gear
- Fully waterproof
- Removable internal frame makes it more versatile
Cons
- Stuff sack style isn’t for everyone
- Clips on the removable brain compartment aren’t very secure
For many, backpacking is all about cutting as much weight from your gear as possible, sometimes to the extreme. The Mountain Light makes some compromises to cut weight but still has many excellent features to protect your camera and hold gear. At just 2.7 pounds, it is the most lightweight 45-liter pack available. And it weighs only slightly more than the much smaller 25-liter Lowepro bag mentioned above.
The bag is stuff sack style, meaning you don’t get pockets or organization. But that is part of what helped cut down on the weight of this pack, and it also allows you to pack more freely. You can simply shove your sleeping bag in the bottom to maximize space instead of worrying about where to put what. There is a dedicated spot for a camera insert, though that needs to be purchased separately. Once in, you access your camera via the back of the bag, which offers more protection for your gear.
There are two large side pockets for water bottles or a tripod, and it’s hydration bladder compatible. In addition, there are attachment points on the exterior for adding extra gear, and the roll-top style means it can expand quite a bit. Finally, the entire bag is made of waterproof material, which holds up well even in intense downpours. You may still want to get a rain cover if you know your trip has the potential for non-stop rain.
It’s worth pointing out that this bag is definitely for minimalists. Though there is a camera compartment, it is small and won’t hold much more than a small camera and a few moderate lenses. Long telephoto lenses won’t fit unless you put them in the stuff sack. Also, the clips that attach the brain compartment to the bag’s top or keep the top flap down aren’t all that secure. But, if going light is most important to you, you cannot beat this option.
To read more about this backpack, check out our full review.
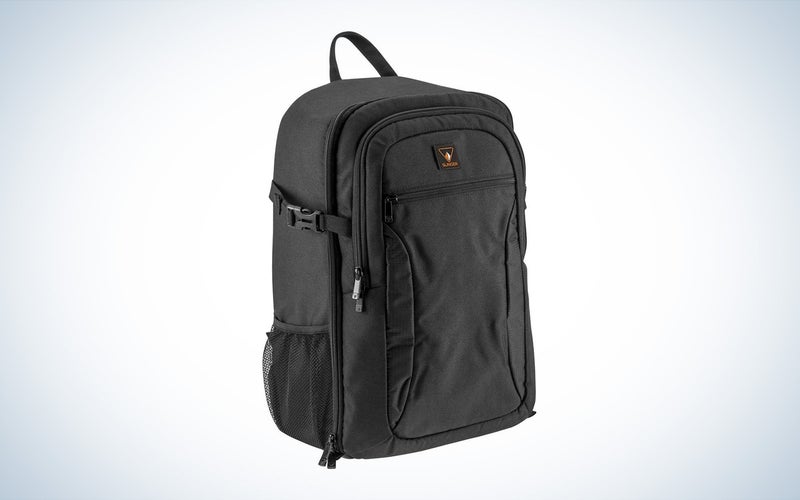
Best budget: Slinger Alpine 200 Lightweight Compact Camera Backpack
Slinger
Why it made the cut: At roughly $50, the price of this bag is hard to beat. Plus, it can hold a full-frame camera with a 70-200mm attached and comes with an all-weather cover.
Specs
- Capacity: 25 Liters
- Laptop compartment: Fits 8-inch tablets
- Weather resistance: Weather-resistant fabric, all-weather cover included
- Exterior dimensions: 12 x 17 x 7 inches
- Weight: 2 pounds
Pros
- Lots of pockets for organization
- Lightweight and compact
- Lots of room for gear with movable dividers
- Side pocket for a water bottle or tripod
Cons
- Not as much protection as other backpacks
- No compartment for hiking gear outside of camera compartment
For those wanting a basic camera backpack for short hikes, the Slinger Apline 200 camera backpack is a great choice at a very affordable price. Despite the low cost, it provides plenty of room for photography gear, including a full-frame camera with a 70-200mm lens attached and additional lenses. In addition, the dividers in the camera compartment are adjustable, so you can arrange them to best fit your equipment.
The exterior is made of water-resistant fabric, and the bag comes with an integrated rain cover. There’s a good amount of padding on the back to make it more comfortable, but there is no waist belt to take some of the weight off your shoulders. Throughout the bag, you’ll find plenty of pockets to keep even your small items organized and safely secured.
There is a side pocket for a water bottle or tripod, but it won’t accommodate a large bottle or a hydration bladder. There is no separate compartment for non-photography gear, so you won’t have a place to stuff your wet rain jacket. And while you can pack some clothes and snacks if you don’t use all the room for camera gear, it won’t hold much else. It’s definitely not the best bag for long hikes, but it will work very well as a simple, protective bag for short hikes.
Things to consider before buying a camera backpack for hiking
Depending on how much hiking you do, a camera backpack is something you could be spending a lot of time with, getting to know intimately. They generally aren’t cheap to buy, so it’s important to pay close attention and figure out what you need in a hiking backpack before clicking the buy button. What features you need depends on your kit and the types of trip you’ll be taking it on, but below are some overarching things to consider no matter what.
How big do you need?
How large of a camera backpack you need depends on three factors: How much camera gear you are bringing, the size of your equipment, and the amount of non-photography gear you need. If you’re the type who likes to pack your entire photography kit to have options on the hike, you’ll need to go with a bigger backpack to hold it all. Likewise, you’ll need a bigger pack for larger DSLRs and lenses.
The amount of non-photography gear you need largely depends on the length of your hike. Short day hikes of a few miles likely require little more than some water and maybe a small snack. But, if you are backpacking, you’ll need your tent, sleeping bag, food, water, clothes, and more. A backpack with lots of room outside of the camera compartment will be essential in that case.
Unfortunately, if you hike a lot with varying distances, you likely will eventually need two packs. But, to start, we’d recommend thinking about the types of hikes you will mostly be doing, the gear you’d most likely need, and finding a pack that fits that.
Camera compartment
No matter what size pack you go with, be sure to get a backpack with a specific camera compartment. Your camera won’t be protected enough to just throw in a standard backpack. Instead, a padded, dedicated compartment is critical to keeping your gear safe while hiking.
The best padded compartments are customizable, allowing you to change the configuration based on your exact gear on a given day, but not all are adjustable. And even when adjustable, there are still generally size recommendations and limitations. Some are designed specifically for compact mirrorless cameras or entry-level DSLRs, while others can hold larger, more professional gear. Double-check that your camera is compatible with the compartment size before purchasing.
Can it hold hydration?
Water is perhaps the most important thing to have with you on hikes. Unfortunately, one thing I see overlooked in a lot of camera backpacks for hiking is the ability to carry water. Many will have at least a single pocket on the side for a water bottle, but often those are on the small side. That’s fine if you are doing a short hike or will have access to water along the way. But, if you are on a longer excursion, that won’t cut it.
If you’re like me, you may prefer to use hydration bladders instead of water bottles. Luckily more camera backpack manufacturers have started including a pouch specifically designed for that, but many still do not. Some bags have pockets that can be modified to hold a bladder. But, read the specs and look at photos carefully if that’s what you want. And also, keep in mind that if there is no waterproof barrier between your camera gear and where the bladder is, you risk waterlogging your pricey equipment if something happens to the bladder.
No matter what style of hydration you like, check how a pack can hold water and how much you’ll be able to bring along.
Durability
Hiking can put you in some dicey situations. Whether it be a torrential downpour, sharp rocks, or fine sand, the weather or other natural elements on your hikes can wreak havoc on a bag if it’s not designed to stand up to the task. A basic camera backpack may not hold up to hikes, resulting in a ruined bag or potentially destroyed equipment.
To fully protect your gear, you’ll want to get a pack that is made of rugged, durable materials. Look for one that is waterproof or has a rain cover. You’ll also want a sturdy frame and camera compartment to keep your camera and lenses from getting crushed when packing up the car or maneuvering tight slot canyons. Rip and tear-proof materials are also important for the longevity of the bag. Lastly, sturdy, durable zippers are also key for keeping the bag secure and the elements out.
Of course, different hikes have different risks of damage. If you like light, easy hikes, you won’t need something as rugged as someone going deep in the backcountry.
Make sure it fits your body
While all the above features are important, none of them matter if a pack doesn’t fit you well. If your camera backpack fits poorly, you’ll never want to take it out. That could mean you wasted a decent chunk of money. Or, if you suck it up and use it, it could result in less-than-pleasant hikes at best or bad blisters or back problems at worst. A bag that’s too big won’t allow you to take advantage of the support system, so you could end up holding all the weight on your shoulders. Too small, and you could end up with circulation cut off to your arms while hiking, which is never good.
There are three areas you’ll want to make sure fit your body. First, check the torso length. While you may need a large camera backpack for your gear, it could result in a torso length longer than your body (speaking from experience). While the bag will still work, it isn’t very comfortable, and the weight distribution doesn’t work as well. If you can’t try a pack on before buying, you may want to measure your torso and compare it to the bag’s dimensions.
Second, if the bag has it, be sure the hip belt fits. One of my packs has a hip belt too large to take any weight off my shoulders, rendering it essentially useless. The same would be true if it’s too small. Most–if any–manufacturers won’t list the size of that, so it’s ideal if you can try it on first.
Lastly, check the shoulder straps. Shoulder straps tend to be more universal than the other two things, so you shouldn’t have to worry as much about them. But, the padding on the straps, where you can adjust them, and how big or small you can adjust them will impact how comfortably they fit.
FAQs
Q: How do you carry your camera while hiking?
There are a handful of ways to carry your camera while hiking. First, you can keep the camera in your backpack. Keeping it tucked away will protect the camera and leave your hands free, but it also means you aren’t taking photos as much.
If you want your camera out, you can simply hold it or use a camera strap around your neck or shoulder. But both options can be annoying, tiring, and put your camera at risk. The last option is to use a carrying clip, which attaches the camera to your backpack strap. It frees up your hands, keeps the weight off your neck, and makes the camera accessible for taking photos. Of course, it is still at risk for bumps and scrapes depending on the hike, but it should be fine if you’re careful.
Q: How can I protect my camera while backpacking?
You can protect your camera while backpacking by using a sturdy, rugged, and waterproof backpack with a padded compartment for your camera. Or, if you need a larger pack for long trips, you can get a standard backpacking backpack and use a separate camera cube. A camera cube may not offer the same protection as a built-in camera compartment, but it does provide more flexibility with your setup.
Q: Should I bring a camera backpacking?
You should bring a camera backpacking if you want to document the trip or create landscape and nature photos while out on the trail. Of course, you could use your smartphone for pure documentation, but you’ll get higher quality and more control with a dedicated camera.
Keep in mind that you’ll add weight to your pack with camera equipment. So, if you’re trying to go as lightweight as possible, you may want to find a compact camera option or leave the camera behind. Also, going on a backpacking trip with a camera does put the camera at risk of getting broken, so we’d recommend getting it insured just in case something happens.
Final thoughts on the best camera backpacks for hiking
- Best overall: Shimoda Explore V2 25L
- Best small: Lowepro Trekker Lite BP 250 AW Backpack
- Best for winter trips: Lowepro Whistler Backpack 450 AW II
- Best for backpacking: Moment Strohl Mountain Light 45L Backpack
- Best budget: Slinger Alpine 200 Lightweight Compact Camera Backpack
Knowing what types of hikes you will likely be taking is the first step in deciding what camera backpack is right for you. Since everyone is built differently, the best camera backpack for one person may be the worst for another. A bag that is comfortable for one person may not fit you well at all. So, whenever possible–especially if you are getting a camera backpack for long hikes–find a way to try on a pack before buying to ensure it fits you.
Why trust us
PopPhoto has a long history of delivering the opinions of some of the sharpest and most prolific camera dorks the world has to offer. Since 1937, we’ve been reviewing cameras, providing wisdom from well-known photographers, and generally just nerding out about all that goes into making great pictures. Our current crop of writers and editors have decades of professional photography and camera writing experience among them. Collectively, we’ve probably shot with just about every camera and lens combo you can imagine—as well as some obscure stuff you may not even know about. Remember the Casio Tryx folding camera? PopPhoto does.
We also get that buying a camera is a big decision, which is why we’re dedicated to helping folks choose the right one (or, in our case “ones”) for their needs. Case in point: Handing over top dollar for an expensive rig may leave you unsatisfied if it doesn’t fit your preferred shooting style. Sure, a $6,000 sports-oriented DSLR can capture landscapes, but do you really need to do it at 30 frames-per-second? No, you don’t.
