You Can Do It: Tips for Better Up-Close Flower Photography
Flowers are the perfect subject for learning the fine points of lighting, composing, and photographing small objects.
Flowers are not only beautiful, says Peter Samuels—a San Francisco-based pro who specializes in animals and botanicals—but they’re also the perfect subject for learning the fine points of lighting, composing, and photographing small objects. “They’re great for experimenting with light, [bringing out] texture, and evaluating the performance of new gear or software,” says Samuels.
Want to try for yourself? The photographer suggests that before you start shooting you give some serious thought to the flowers themselves. First, pick blooms that speak to you. “Know your subject, study up on it, and identify the correct season for finding it. Also try to locate growing enthusiasts in your area who may be able to help and advise you,” he says. For instance, Samuels is crazy about dahlias and the American Dahlia Society has more than 70 local branches across the U.S. and Canada—enough to answer any questions he may have.
As you get more serious about this project, you’ll need to find a good flower source. Most cities have a flower market that’s intended for trade only, says Samuels, but you can usually buy a special non-trade license that will allow you buy flowers there. These outlets offer the largest variety and the freshest specimens. “If you plan on visiting a flower mart, arrive early,” says Samuels,“Most florists buy first thing in the morning and the marts themselves start closing up by 10 a.m.”
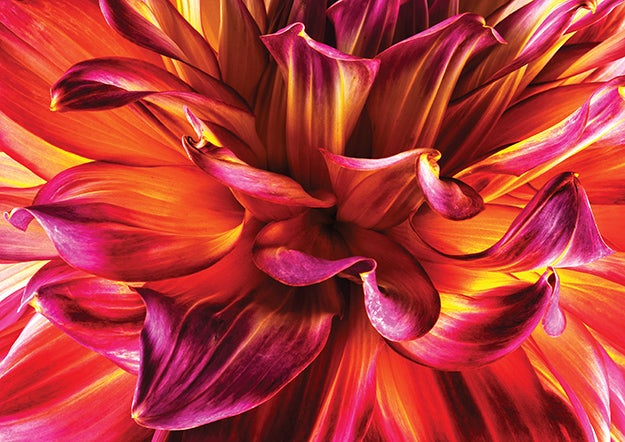
Step 1 Find your flowers. Ask local florists for species in season, which will be fresher, last longer, and give you more variety. “For the dahlias which come into season in early fall,” Samuels says, “I contacted the growers in July to find out which florists would carry their best specimens. Then I asked the florists when the growers would deliver.”
Step 2 Get the right gear. Work with a solid tripod and your highest-resolution camera to maximize detail and let you print big. A true 1:1 macro lens is a must. Samuels used one that let him home in on the dahlia’s petals to reveal their explosive, flame-like character.
Step 3 Set up your lights. “I like simple lighting for flowers and use just two strobes in strip banks on each side of the subject. I want each to do its own job, with little cross lighting. It gives me more control,” says Samuels. To make sure his blacks are “deep and rich,” he hangs black velvet behind the set.
Step 4 Make your exposures. Put the flower in a small vase to keep it hydrated and place it on the smallest table available. “I use a mini flat base on a C-stand,” he says. “I don’t want anything larger because it’s silly to put a tiny product on a large table. It forces you to move the lights farther away,” which adds contrast. Experiment as you shoot. “It’s incredible how subtle rotations of a light or the flower can impact the final results in such dramatic ways.”
Step 5 Perfect your image. Samuels always adds an S-curve adjustment in Adobe Photoshop CC to darken shadows and lighten highlights. If this harms the color (it can add saturation), he’ll boost contrast using a Levels move instead.