How To: Make a Simple Time Lapse Sequence
Speed up the world with loads of timed shots
Consider time-lapse photography the anti-slow-motion video: With it, you can watch morning turn to evening in a minute, see a structure being built to completion by superspeed workers, and be a spectator at a very fast snail race.
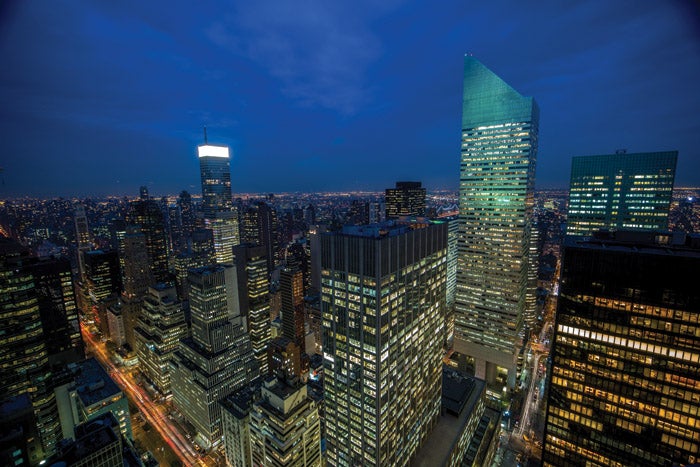
You probably already have everything, or most everything, you need to make a time-lapse sequence. “Really, all you need is a tripod, a DSLR, and an intervalometer,” says Andrew Geraci, who confesses to using a “very cheap” intervalometer with his Canon EOS 5D Mark III and 15mm f/2.8 Carl Zeiss ZE lens to make this time-lapse of the Manhattan skyline.
An increasing number of DSLRs and ILCs have built-in intervalometers that allow you to set the frequency and number of frames to be taken. If your camera lacks this feature, you can connect an accessory intervalometer to most any DSLR.
STEP 1: Size it down!
You will likely play your time-lapse sequence at standard video speed, 30 frames per second. This means that for every second of video, you need to take 30 still frames; for every minute, you will need 1800 frames (30 X 60 seconds). So don’t take 12- or 16- or 24-megapixel images, but JPEGs close to your largest playback resolution—640×480, 1280×720, or 1920×1080.
STEP 2: Time it out.
For a 1-minute (1,800-frame) video of an event unfolding over the course of 1 hour (60 minutes), 1,800 frames divided by 60 yields 30 frames in a minute—or one every 2 seconds. So set your timer to an interval of 2 seconds and a duration of 60 minutes.
STEP 3: OK, guesstimate it.
A simple guideline: For slow-moving subjects, use longer intervals, for faster moving subjects, shorter intervals. For a time-lapse of changes to a tree over a month, you might want to use an interval of a full day. For an hour’s worth of that morning-blooming plant, maybe 1 frame a second.
STEP 4: Power it up.
Your camera has a rated battery life of 500 shots per charge, and you’re shooting a 3,000-frame sequence. No go. If you’re shooting a sequence with long intervals, you can simply swap out batteries for fresh ones as they drain. Accessory battery grips can double or triple your shot capacity. Shooting near an AC outlet, your best bet is an AC adapter for power supply.
STEP 5: Set the camera.
For most subjects, keep the lens on manual focus. Use autoexposure, unless you want to record the changing light over several hours, in which case try a manual exposure for noon daylight. Andrew Geraci manually changed the aperture every time the light changed +/– 1 EV.
STEP 6: Put ’em together.
You may already have the software you need to assemble your frames into a video. If you have a Mac, you can do it in iPhoto. Many enthusiastic time-lapsers recommend Apple Quick Time Pro ($30 direct, for Mac or Windows). You can also do it in a variety of other still- and video-editing programs.
You may already have everything you need for a basic time-lapse shoot; plenty of recent cameras—including numerous point-and-shoots—have built-in intervalometers.