How To: High-Speed Action Photos Using Flash
All you need is a few flashes

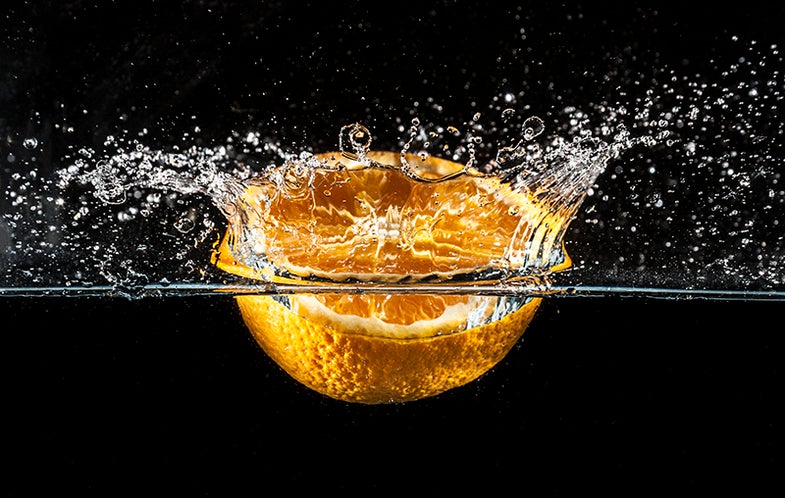
Thanks to an electronic flash’s ability to produce instantaneous bursts of light lasting about 1/15,000 sec or shorter, most photographers can capture a moving subject with absolute sharpness in ways that the human eye can’t see. Tom Smith, a 15-year-old from Lytham, England, did just that when he set up two off-camera accessory flashes in his Lancashire kitchen to capture this orange plunging into a fish tank.
While Smith timed the flash firings using his own reflexes (and lots of trial and error), electronic flash trigger kits make it much easier to photograph balloon pops, BB pellets flying through apples, or whatever else you can dream up. These kits work with sound cues (like a balloon’s pop) or infrared beams with controllers that let you fine tune flash firings to the millisecond in order to capture action at its most perfect peak.
STEP 1: Pick a subject
It could be a splash, like Tom Smith’s orange, a liquid droplet, or a water balloon in mid-pop. And once you get the lighting and trigger technique down, you can apply it to anything that moves fast.
STEP 2: Collect your gear
For a shot like this, you will need a camera that lets you manually set long (or Bulb) shutter speeds, a tripod, wireless radio flash triggers, a mid-range telephoto lens, remote shutter release, accessory flash units (two, with feet), a fishtank, black backdrop, and plenty of towels. For more consistent and predictable results, consider an electronic flash triggering kit like those from Cognisys.
STEP 3: Build your set
Work in a room that allows total darkness. Use your flashes in manual mode, at the lowest power for the shortest flash duration— usually 1/32 or 1/64 power. Place the flashes as close to your subject as possible, arranged so they light the subject evenly. Dial in a mid-range aperture (Smith used f/11) and the lowest ISO that you can.
STEP 4: Fire away
Turn off the room lights, open your camera’s shutter, and set your subject in motion. If firing the flashes yourself (with radio triggers), perform test drops to fine-tune the timing. Smith was rewarded with a handful of keepers across hundreds of exposures. With a flash trigger such as the IR-based StopShot, you can up your success rate—set it up according to the manufacturer’s instructions. If you’re working with water, protect your flash units with plastic wrap.
STEP 5: Fix things later
Smith applied a few basic adjustments such as increasing Clarity (for more midtone contrast), adding Vibrance, sharpening, and cropping to a tighter composition. His most time-consuming task was cloning out debris, out-of-focus bubbles, and grit as he retouched in Adobe Photoshop CS6.
A typical strategy for capturing a fruit splash involves a darkened room and a tripod-mounted camera (A) with its shutter held open by a remote shutter release (B). The photographer then drops the fruit into a tank, breaking an infrared beam (C) cast by an infrared transmitter/receiving sensor (D). When the beam is broken, an electronic controller (E) fires two hardwired flash units (F) after a user-set delay measured in milliseconds.** Graphic: Kris Holland/Mafic Studios**