Tips for Getting Started in Infrared Photography
Produce special effects with almost any infrared-converted digital camera
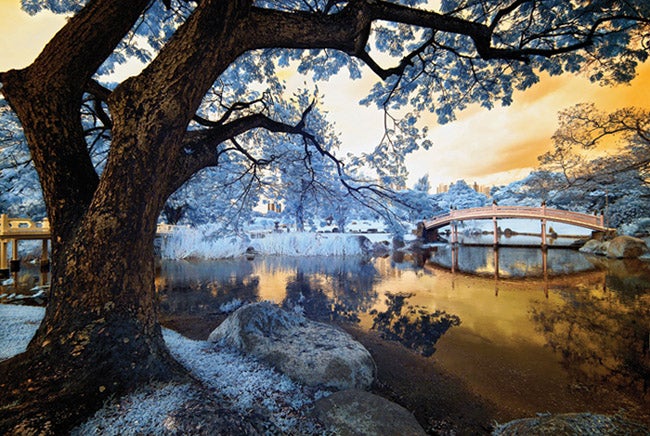
Glancing at this surreal landscape, you might think that it required hours of editing. But you would be wrong. Conjuring the magic of infrared imaging can be done with minimal assistance from a computer. Created in the camera during exposure, these special effects depend on capturing light waves that are outside of the visible color spectrum, and you can produce them with almost any digital camera.
Nathan Hayag, a 34-year-old pro photographer based in Singapore and the Philippines, shot this photo at Singapore’s Japanese Garden using an infrared-converted Sony Alpha 230. Many conventional digital cameras, says Hayag, “can be converted for infrared use by removing the image sensor’s low-pass filter and replacing it with an infrared filter.” Conversion is a tricky business, so he suggests leaving it to companies that specialize in it (see Step 1).
While conversion can cost several hundred dollars, conventional lens-mounted infrared (IR) filters can also work for cameras that are sensitive to IR light. To test yours, aim a TV remote control at the camera, photographing its emitter as you press any button on the remote. If the emitter glows in your pictures, the camera will capture IR light.
The problem with IR filters? They block all visible light, turning your viewfinder completely black, which makes composing and focusing a challenge, though live view offers a work-around.
Interested in IR? The web can help. Try myinfrared.com, www.lifepixel.com, and kolarivision.com for a fascinating introduction.
Step 1
Get your IR capture device. Option 1: Convert a DSLR, ILC, or compact to IR capture. Some firms that will do this are Lifepixel, MaxMax, or Spencer’s Camera. Option 2: If your camera “sees” IR light (see main text for how to tell), get an IR filter such as the Hoya R72 or Cokin P007. Option 3: Scour the used market for an IR-sensitive camera such as the Fujifilm IS Pro or Sigma SD10.
Step 2
Choose a subject. “The best subjects for color infrared photography are foliage and people,” says Hayag. “Healthy green leaves strongly reflect IR light, and IR can do ghostly things to human skin.” For lighting, he recommends shooting on bright cloudless days with the sun at its zenith or at your back.
Step 3
Set your camera. Capture your images as RAW files, with your white balance set to Auto and ISO to the lowest sensitivity possible. Hayag shoots in aperture-priority mode at f/9.
Step 4
Focus with care. Infrared light focuses to a different plane than visible light. Converted cameras are often recalibrated to focus at the IR wavelength, but if you’re using a threaded IR filter, focus before mounting it, then test with the filter in place, touching up focus manually.
Final Step
Touch up in processing. Hayag fine-tunes the color in his landscapes by clicking on leaves with the Sony RAW converter’s Custom White Balance eyedropper.
For more of Hayag’s infrared photography magic, visit nathanhayag.wix.com/photography.