Software Workshop: Photoshop CC’s Filters Take the Blur out of Shaky Shots
Magically sharpen your images and bring back the detail you didnt think you had using Photoshop Creative Cloud's Shake Reduction filter


Debbie Grossman
Created in part for forensics, the new Shake Reduction filter in Adobe Photoshop CC makes the ridiculous “enhancing” that happens in crime shows seem plausible. The cool tool maps the way your camera shifted due to a too-slow shutter speed, and can bring back detail that you thought you missed.
In our experiments, the sweet spot for photographers seems to be images that are a bit soft, where you should have used a shutter speed 1 or 2 stops faster. Sometimes, the tool adds sharpness without improving aesthetics. And while it can make a shaky license plate legible, it’s not always pretty.
Here’s how to use it, plus info on the newly enhanced Smart Sharpen.
Step 1
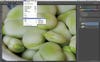
Open your image and duplicate the Background Layer. First and foremost, you should never work on the Background Layer. It’s also really fun to turn the sharpened layer on and off to see the radical difference this filter makes when you’re finished. Then go to Filter > Sharpen > Shake Reduction to get started.
Powerful Tool
Shake Reduction requires plenty of processing and can run slowly on big files. To see if it will help your image, try testing it using a low- resolution version first.
Step 2
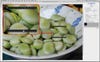
The larger your image file, the longer the filter takes to load. You can speed things up by unchecking the box for Preview. Then pull out the Detail tool to inspect your image. To do so, click on the Unlock Detail button in the bottom left corner of the Detail tool. Move it around your image to see a preview of your sharpening effect.
Step 3
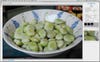
If it looks like the filter is introducing halos or other strange artifacts, check the box for Preview and wait for it to process—you’ll need to be able to see your whole image to make adjustments. In the Advanced section of the dialogue, you’ll see the Blur Estimation Regions. The first one appears automatically, but you can add more. These can be useful if you have unevenly distributed blurred areas or if you just want to make sure the sharpness occurs in a given region. Click the plus to add a region, then drag it to the area of the image you want to affect.
Step 4
After sharpening, you may notice that your image suddenly looks a lot noisier than it did when it was blurred. To fix this, use the drop down menu in the Blur Trace Settings box to choose the amount of noise that was present in your image when you shot it. You’ll need to play around to see which level works best. Adjust this setting for each of your Blur Estimation Regions.
Step 5

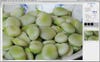
Take a look at your whole image in preview. If you’re getting artifacts, try increasing the Smoothing and Artifact Suppression sliders. These sliders can help get rid of larger noise and “ringing” where you see what looks almost like a ripple effect proceeding outward from your sharpened area. If you see halos, select one of your regions and dial down the Blur Trace Bounds slider. This essentially reduces the overall amount of sharpening. Finally, click OK to render your filter and check out your results.
Finer Adjustments This tool often works automatically, but if it doesn’t, use the Advanced area to add regions and the Blur Trace Settings sliders to adjust the power of the filter.
Final Step

The best part of the enhanced Smart Sharpen filter is its new noise reduction slider. So if there is a marked increase in noise after you apply Shake Reduction, go to Filter > Sharpen > Smart Sharpen. First, employ your brand-new ability to enlarge the preview window to a size that makes sense for your image. Then dial down the Amount and Radius, since you probably won’t need much sharpening at this point, and dial up Reduce Noise. You’ll soon see some softness return to your smooth areas.