Software Workshop: Preview How Your Images Will Look In Print Using Lightroom 4
Tips for getting more accurate color and truer print previews in Adobe Photoshop Lightroom 4
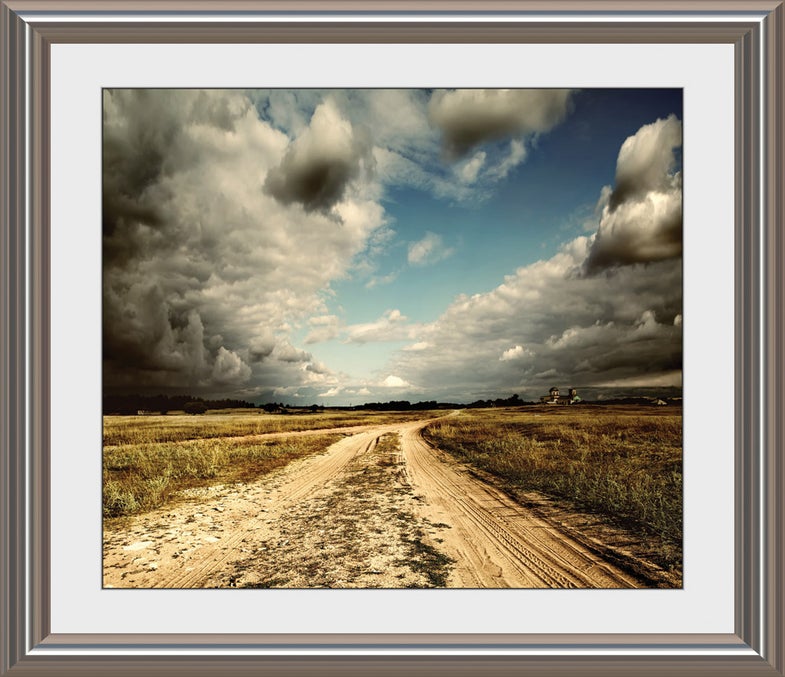
metal frame
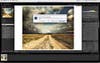
Step 1
Start by importing and converting your file. While still in the Develop module, view your picture in Soft Proof mode, which will give you a better idea of what your image will look like on paper. To do so, check the box for Soft Proofing in the bottom-left corner of the interface. You’ll see a new panel pop up in the top right corner. Then use the Profile pulldown menu to pick the profile for the paper you’re using.
Step 2
If you don’t see the profile you need, choose Other, check the box for your printer/paper combination, and click OK. To preview the full effect of your paper and ink combo, click to check the box for Simulate Paper & Ink. To see if you have colors that are beyond the capabilities of your paper and ink, click the box in the top right corner of the histogram—you’ll see a visual warning on your image of all the colors that won’t get represented.
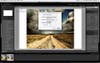
Step 3
This is an image that’s being printed on matte paper, so it will lose some contrast in the process. Check and uncheck the Soft Proof box to see the difference. The beauty of soft proofing in the Develop module is that you can adjust your actual RAW file while getting a visual preview of the print. Head up to the Contrast slider in the Basic Panel to add contrast back in. As you go to move the slider, Lightroom will interrupt you to ask if you want to make a Proof Copy. Usually it’s a good idea to say yes; doing so will ensure that your revised conversion applies only to this print.
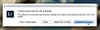
Create a Proof Copy
When making print-specific adjustments, a proof copy is a good idea.
Step 4
Once you’ve made your adjustments, head over to the Print module to output your image. Click on Page Setup to start. (Note that, despite the fact that on the Mac there are two buttons and on the PC there is one, you can adust the same settings on both systems.) If you’re on a Mac, begin with Page Setup to choose your paper size and printer.
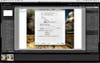
Start with Page Setup
On a Mac, you create a custom paper size (if needed) during this step.
Step 5
Head to Print Settings and choose Printer Settings from the pulldown menu (the dialog box varies with the printer driver and OS). Select the paper type that suits the profile you used for soft proofing and that you’ll choose in Step 6. If your paper type is grayed out, see if you need to set it for manual feed; Epson’s driver for the Stylus Pro 3880, for example, often requires manual feed for its Fine Art papers. Then fill in the rest of the settings: Make sure Color Mode is turned off so you can pick your own profile later. Choose the best resolution and uncheck High Speed if the print will be framed. Click to save your settings.
When to Print 16-bit
Some printers can print 16-bit. If yours doesn’t, you won’t see an option. If it does, check the box—even if you didn’t shoot with a camera that captures 14-bit files. Depending on your conversion, you might still see a benefit.
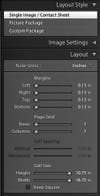
Step 6
On the right side of the interface are all the options for this print. Choose Picture Package under the Layout Style menu to print multiple images on a single page. Image Settings has an option that lets you add a border of any color; Layout lets you pick the margins. Since this photo will be framed, add some border. This is a single image, so slide the Cell Size to the left until you have enough border, or type in the numeric value of the size you need.
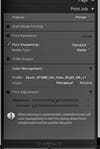
Final Step
Finally, send it to print. Uncheck Draft mode unless this is indeed a draft. In most cases, uncheck the Print Resolution box and let Lightroom calculate it. If you happen to have resized and sharpened for a specific resolution in Photoshop, though, input that resolution now. Pick your media type (matte or glossy) and set the sharpening. The amount is subjective, but it’s a good idea to err on the side of less sharpening; we usually set Low or Standard. Color Management is key—as with soft proofing, you’ll see only the profiles you’ve chosen. Click on Print One. If you’ll want to print this photo again the same way, hit the Create Saved Print button in the top-right corner of the screen.
Print Adjustment
On some systems, you’ll find that prints always come out too dark or too flat. This can happen even when you’re calibrated, especially if your display doesn’t allow you finer brightness and contrast controls. If this is true of yours, adjust before printing, though you won’t see an on-screen preview.