You Can Do It: Capturing After-Dark Scenes With HDR Photos
Commercial photographer Kai Wang merges separate exposures to tackle nighttime contrast
“I moved to New York City in 2010 to get my MFA in photography and was at once overwhelmed by the city,” says Brooklyn-based commercial shooter Kai Wang. To this newcomer from Taiwan, the experience was a paradoxical mix of large rushing crowds and personal loneliness.
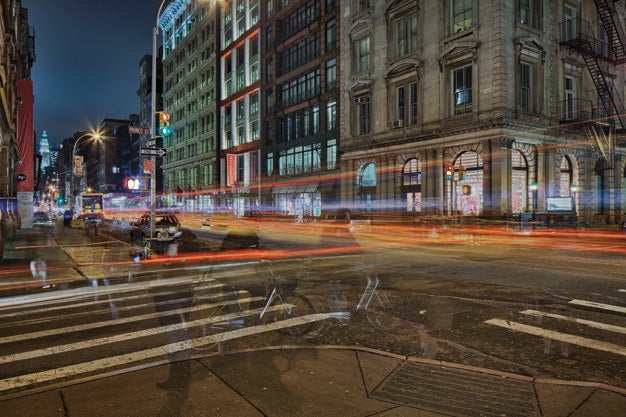
“I began shooting street scenes at night. They somehow mirrored something I was feeling,” he says. “The saturated colors, solid masses of dark buildings, the light trails, and ghosts of hurrying people suggested communal energy and personal estrangement, two forces that alternately brightened and darkened my life at the time.”
The project forced Wang to deal with a problem that every night shooter faces: high contrast. Typically, a city’s well-lit commercial and residential spaces—including street and car lamps—are many stops brighter than the shadowed areas. He solved this problem with high dynamic range (HDR) imaging. By making separate exposures for highlights, midtones, and shadows, and then merging them, he has found an effective way to tackle nighttime contrast.
Wang offers you the following steps to get your creativity flowing:
Step 1
Scout locations. “For me, the best sites are free of tourists, but still highly active and well lit,” Wang explains. He picked a point of view from which only automotive tail lights were visible. Headlights would have been blown out and colorless.
Step 2
Setting up. As with all HDR compositing, you must maintain alignment of stationary subjects between exposures. This generally requires a tripod—and it’s a must with an exposure this long.
Step 3
Nail the exposure. “I recommend capturing RAW files for the most latitude during postproduction,” says Wang. “I set the exposure mode to manual, with shutter speeds from 1 to 30 sec.” He exposes darker backgrounds at about 30 sec and the light trails from passing cars at about 8 sec.
Step 4
Process RAW files. Wang does his overall color adjustments in Adobe Photoshop Lightroom, making sure that the corrections are identical for all files. He then exports the RAW files as 16-bit Adobe RGB TIFFs, which he views in Adobe Bridge, then merges with a plug-in by navigating to Tools > Nik Software > Merge to HDR Efex Pro.
Final Step
Fine-tune tone. After merging the exposures, Wang tone-maps the composite using the HDR Methods tool in Nik’s HDR Efex Pro. “I start with Method Strength at 50% and toggle thorough all the HDR Methods to see which looks best,” he says.
For more of Wang’s night photography visit www.kai-wang.com.