Do some research beforehand
Before heading out to any event you are shooting, whether it is a basketball game or a concert, it’s always a good idea to do a little research on your subjects. Search through past photos, videos and stories on the team and identify the key players. Write down a list of numbers you want to follow on the floor. You may also learn an interesting tidbit thanks to your research, like discovering that the coach likes to throw tantrums which include chair-kicking—definitely a good thing to know beforehand.
Set a custom white balance
The first thing I always do when I sit down on the floor of any gym for any indoor sporting event is set a custom white balance. Yes, if you’re shooting RAW you can tweak it after the fact, but nailing it right off the bat will save you processing time. They are two ways this can be done: The first is to hold a white piece of paper out in front of the camera under the stadium lighting and save a white balance preset. Nearly every camera allows for users to do this (consult your manual if you don’t know how). So, when I’m shooting in Madison Square Garden, I just have to use my MSG preset and I can be pretty confident the white balance will be right on. You can also eyeball it, but it’s important to remember that what you see on your camera’s LCD screen doesn’t always accurately reflect what you’re going to find once an image is blown up onto a big monitor.
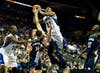
Switch on focus tracking and high-speed burst mode
The fast action of a basketball game is a perfect opportunity to let your camera flex its FPS and AF muscles Focus tracking (continuous focus if you’re a Nikonian and AI servo if you’re a Canonite) locks onto your subject and keeps them sharp even as they move around. It won’t always get it right, but it can be very helpful, especially if your subject is coming toward or going away from you. Using your camera’s fastest burst mode will likely result in an extremely large take at the end of the day. Many of these photos will be similar, especially if you rattle off 10 in a row of a player driving down the court, but there will be subtle differences in each. Small things like facial expressions and body positions change frequently, and it’s those little details that can help push a good photograph to be great.
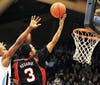
Set the proper exposure
In order to safely freeze action, I like to use a shutter speed of about 1/300 sec. It’s possible to get sharp images below that, but that’s a good comfort zone for many basketball games. In order to get that kind of shutter speed, you’re likely going to be shooting wide open, or at least close to it. You’ll likely have the most luck using manual exposure mode and adjusting your ISO accordingly. It’s important to remember, however, that the lighting on the court won’t always be totally consistent. If you can get on the floor a bit early to shoot practice, you can often find out where the trouble spots might be and take mental note of them.
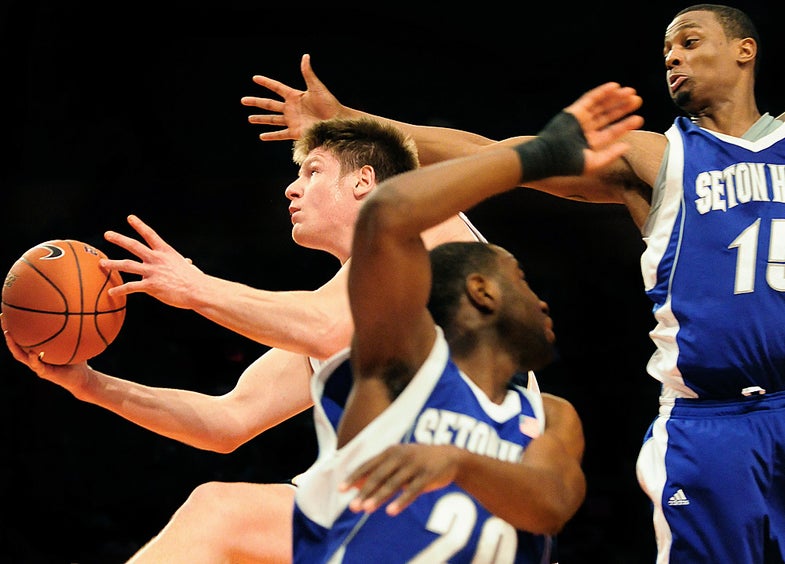
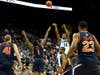
Get low
Basketball is a very vertical game, but you’ll likely want to get both vertical and horizontal shots. Regardless of the frame’s orientation, though, getting a low perspective will often add drama to your images. It will make the players look larger and make jumps look higher. If you’re sitting on the floor during the game, this won’t be a problem, but it applies from the stands as well. The higher up you are, the less elevation the players will look to have on the court. Just don’t get so low that the faces are obscured by their hands or bodies.
Shoot from either the corner or under the net
One thing you will constantly hear basketball photographers complaining about is that referees often get in the way of the action. One easy way to avoid this (assuming you are sitting on the baseline) is to either position yourself right under the basket, or all the way out in the corner. This will give you the best vantage point of the action, without obstruction.
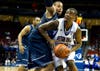
Pick the right lenses
When you get to the floor, you’ll find many basketabll photographers shoot with two bodies. While not completely necessary, having immediate access to two lenses can come in very handy. The 70-200 f/2.8 lens is a staple, whille the other body is typically equipped with a wide-angle lens like a 24mm f/2.8 or a 17-55mm f/2.8. I personally like to keep a 50mm on my secondary camera. The 70-200mm lens gives you plenty of focal real estate to stay tight on the action, regardless of which end of the court it is on. And thanks to your continuous auto focus, the action will stay sharp and clear even as you zoom in and out on players. While a tight crop is nice, there will certainly be moments in which a wide-angle lens will be the right fit. This is especially true if you are shooting from right under the net. Wide angle lenses are also very good at documenting the post-game celebration or melancholy walk off.
Try shooting with both eyes open
Some of the best sports photographers keep both eyes open at all times. While awkward to get a hang of at first, this is something that can greatly help you anticipate the next play or basket. Watching the entire game through the viewfinder limits your field of view to that of the lens, but taking the camera away from your face could also cost you a great shot. It’s not for everyone, but it’s worth a shot.
Look for great shots outside of the game play
The vast majority of your shots will, of course, depict the game and its players. Be sure to take in everything from the cheerleaders and the coaches to any interesting fans that might be there to watch. Fans reacting to exciting plays can make for some great frames.
Respect the other photographers on the floor
BONUS TIP: If you do happen to get lucky and find yourself sitting on the floor at the next home game, be sure to be courteous to the other shooters around you. Many of them are full-time newspaper photographers doing their daily jobs. While many of them will offer you great and advice and tips if you ask, they will also likely be just as quick to chew you out if you get in their way or mess up their shots. And they’re right to do so.