You Can Do It: Selective Focus
With the help of a wide aperture and some post-processing, you can achieve just the right amount of softness
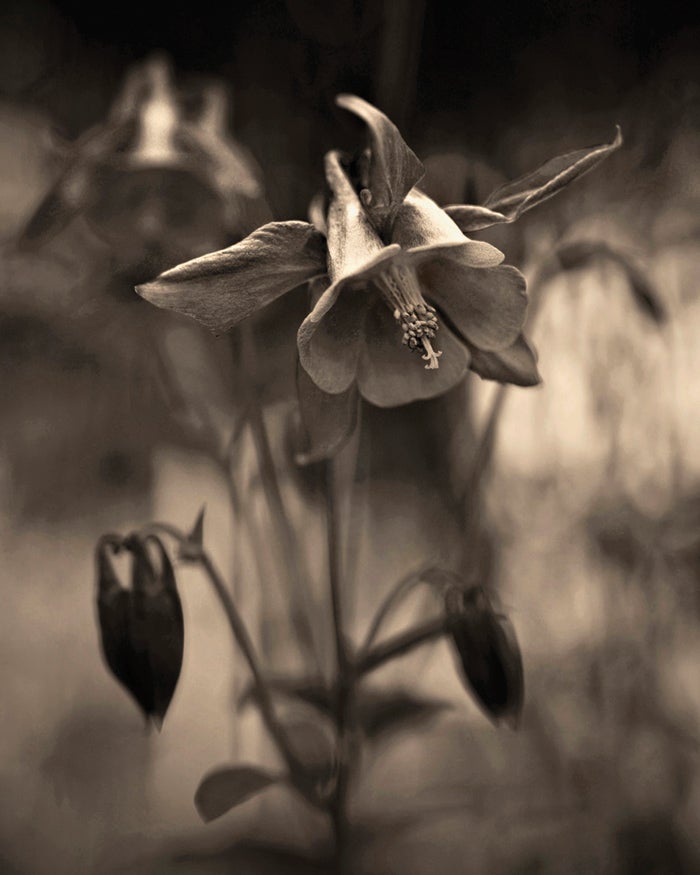
Using a wide aperture to throw foregrounds and backgrounds drastically out of focus to highlight a sharp subject—or just part of a sharp subject—is a common technique. It’s called selective focus, and Karena Goldfinch of Melbourne, Australia, used it for this lovely toned floral study of a columbine blossom.
But as she can attest, throwing a background into a creamy state of defocus is only half the selective-focus battle. For the picture at left, Goldfinch paid just as much attention to the blurred background as she did the sharp subject.
In fact, the subject was the easy part: She composed her photograph following traditional Rule-of-Thirds guidelines. “Only part of the hero flower needs to be sharp, preferably the stamen. From there, the viewer’s eye can wander off to other parts of the image,” says Goldfinch.
Once she’s placed her hero, the real challenge is working the camera angles to maximize the impact of her defocused background—as she did here. “I want the flowers in the background to be soft echoes of the main flower,” she explains.
These need to be clearly visible and recognizable, not just defocused blobs. She wants them to stand demurely “like out-of-focus bridesmaids in a wedding portrait.”
Equally important were the placement of defocused highlights and shadows in the background.Goldfinch selected her camera angle to place shadowed areas along the top and bottom of her picture, where they framed her subject and keep the viewer’s eye from leaving the image. She positioned highlights toward the frame’s center to hold the viewer’s gaze.
In addition to carefully composing her defocused backgrounds, Goldfinch offers the following tips for better floral studies:
Scout at ground level. “When searching for flower studies, I try to get down low to the ground to find views that you don’t normally see from a standing position,” says Goldfinch.
Look for flowers in shade. “I liked the positioning of these columbines because they were in the shade of a large tree, but not so close to its trunk as to be in total shade. It gave me the ability to play with gently glowing background highlights on a lightly overcast day.”
Convert your image to black-and-white. Rendering it in monochrome can act as a visually cohering force in your scene. Once she’s made the conversion using an adjustment layer in Adobe Photoshop, Goldfinch likes to apply a red filter, which, as she says, “brightens the foliage nicely.”
Now that you know Goldfinch’s tips, try it yourself, by following these steps:
Step 1
Gather your gear. For selective focus of small flowers, your best chance of success is with a high-speed macro lens, a tripod with a reverse-mounting center column (for ground-level shooting), and a ballhead for quick and easy composition. Goldfinch also recommends using something like a foam gardener’s pad to kneel on and a right-angle finder for ease of viewing.
Step 2
Wait for perfect conditions. The day should be lightly overcast and wind-free. Avoid working in direct sun or allowing strong sunlight to create harsh highlights and shadows in your backgrounds.
Step 3
Find your flower. “I often look for one strong, perfectly formed subject with a background that includes other flowers that reinforce or strengthen the composition,” says Goldfinch.
Step 4
Compose for the background. For an effective background, you may need to pin other flowers or foliage out of the shot using gardening staples, or to carefully position defocused elements in your frame by propping or pushing flowers or foliage into position with sticks.
Final Step
Finesse in postprocessing. Goldfinch converted this image to black and white in Adobe Photoshop, and then gave a warmer tone to the midtones and highlights for a softer look.