8 Tips for Perfect Prints
Great photos deserve great prints, here's how to do it like a pro
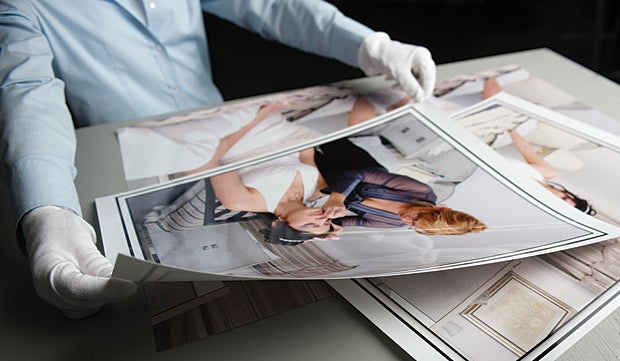
Mpix, MpixPro, and Miller’s Professional Imaging, all part of the same family-owned company based in Kansas, offer different levels of products and services to different types of clients. Above, a poster-sized image comes out of the printer. Photo: Steve Herbert
Printing at home can be a good thing, but sometimes it’s best to let someone else do it. Maybe you want to make a whole bunch of 4×6 prints, or you need a print larger than your home printer can produce. Or maybe you have an image you love, but you can’t seem to make a print that matches your vision of it. A lab, whether accessed online or in person, can even obviate the need for a printer of your own; if you don’t print much, it can be more economical to have your prints made for you.
There are lots of labs to choose from, ranging from consumer-friendly, automated online systems all the way up to high-end labs where you can work one-on-one with in-house master printers. The higher up the scale you go, the more control and, most likely, the more printing options you will have. And, of course, the more you will spend.
1. Find the right lab for you.
Before you print, decide which kind of lab you will need. You may even want to work with several, depending on your requirements at the time: It could be that you’ll use a consumer-friendly lab, such as Mpix, for quick, small prints; order your bigger prints from a site like AdoramaPix that will allow you to download profiles; and save your big, serious prints for a master printer such as the Icon lab in Los Angeles. Or you might stick with a do-it-all site such as Kodak Gallery, which takes care of color management for you, makes prints from small to large (including posters), and also offers the typical mugs and mousepads you’d expect from an online lab.
If all you need is big, an online lab might do it. But if you choose to work in person with a high-end lab (most major cities have one), you’ll get hands-on guidance the likes of which you could never match working remotely. Says Bonny Diadhiou of the Icon, “It takes about five people to make one beautiful print. There’s no just pressing a button—it’s even hand-trimmed. There’s so much love and labor that goes into making a single print.”
A custom lab like this will make an appointment with you to sit in a gray-walled room with optimized lighting while a seasoned printer works on your image on a color-correct monitor; the printer may even rework your RAW file if need be.
If you plan to begin a long-term relationship with a given lab, try calling customer service and see how long it takes to get a human on the phone. Ask for its policy on unsatisfactory print quality. Find out if the lab takes rush orders. Consider its output sizes: Is there enough variety? How big do they go? And finally, of course, consider the cost. Is the lab a good value for the money? Bear in mind, though, that some pro-level print services such as MpixPro require that its clients make at least some portion of their income from photography to access the professional site.
Kole Montross, a retouching artist in Icon’s fine-art department, looks over a restoration project for a client. Photo: Bonny Diadhiou; Gabe Palacio Photography
2. Calibrate and profile your display.
We’ve said this before, and we’ll say it again: A good-quality, calibrated, and profiled display is essential for making great prints, particularly if you plan to do any image editing at home. When you standardize your monitor’s color and contrast using a calibration device, such as X-Rite’s i1DisplayPro or Datacolor’s Spyder3Pro, you can have more confidence that the edits you make to your images will reproduce in prints the way you expect them to.
Labs that cater to more digitally adept photographers, such as AdoramaPix, will often allow you to download profiles for the printer/paper combinations they offer. If your at-home setup is color-managed, and you are comfortable using those profiles to soft-proof and preview your result in Adobe Photoshop, you can take on the job of color correcting your images yourself. You may even be able to take your setup for a hard-proof trial run: MpixPro’s service, for instance, will use your images to make five test prints for you to see how well the systems match.
3. If you can’t calibrate, let the lab do the color correcting.
Most labs catering to enthusiasts, advanced amateurs, and even pros will fix the color for you, so you don’t have to worry about it. This is a good option if you don’t have a calibration device, or if you are simply not so great at making color corrections. The benefit of letting the lab handle it is that its technicians are intimately familiar with the vagaries of its printers and papers.
Consider a service like Kodak Gallery’s Professional Prints option. When we asked Mark Cook, vice president of products for Kodak Gallery, about color management, he replied, “There’s a setting where you can turn it on or off. Color management is done by a human.” In other words, this is not the service for those who want to manage their color with soft-proofing and profiles. If you want your color or exposure corrected before your prints get made, a Kodak technician at the lab will make the call for you.
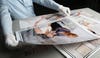
An Mpix technician applies a surface layer to a photo by hand. Photo: Steve Herbert
4. Set the right color space.
Can your lab accept Adobe RGB or Pro Photo RGB, or must you submit your files in the smaller-gamut sRGB color space? Similarly, consider file type and size. Some labs have file-size limits, and some accept only JPEGs, not TIFFs.
5. Pick your medium.
Unless you go for a high-end lab, your prints probably won’t be made on inkjet printers. Instead, you’ll get what’s commonly called digital c-prints. These are made using a chemical process in which your images are projected onto photo paper using a series of lasers. This affords different paper options: Lots of labs offer Kodak’s papers such as Endura, a matte surface that works best for portraits, or Metallic, which works well when your shot includes metal, water, or sky.
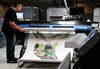
However, high-end labs often print with inkjet machines as well and can help choose the best method and medium for output. The Icon, like many such professional printers, offers more than 25 kinds of paper, and can print using a wide variety of methods. They can also print extremely large—Icon recently had a job making prints nearly 60 inches wide by 15 feet long. Try ordering a print that big online. Finally, consider archivability. How long do you want your prints to last? According to Diadhiou, black-and-white pigment-based inkjet prints can last as long as 200–300 years, and color 100–200, depending on how they’re stored and displayed. A digital c-print, however, probably won’t last more than about 60 years.
6. Order your own test strips.
If you’re planning to have a bunch of images printed, but you’re not sure of the best paper type to suit the pictures, order test strips. Use your editing software to gang a bunch of them up on a single big print, and then have it made on various papers to compare how the same set of images look on each. Or, if you’re not sure how much contrast or brightness will work best on the paper you’ve chosen, send out a similar big print with five or six variations of the image on a single piece of paper. Once you figure out what works best, order away.
One of the print specialists at AdoramaPix inspects prints for a wedding shooter. Photo: Bonny Diadhiou; Gabe Palacio Photography
7. Find out about black-and- white.
If you’re working with a lab that can make inkjet prints, you’ll have more paper options than you would with digital c-prints. For instance, you’ll likely be able to print on fiber-based papers in a range of finishes from matte to glossy, which can give you a more traditional darkroom look. You’ll also be able to send RGB files that contain some tone.
Labs that make digital c-prints sometimes offer printing on true b&w resin-coated paper; both Kodak Gallery and Mpix are two examples. But it is essential that you find out what kind of b&w file your lab recommends.Some labs prefer to do the conversion for you using their own software, others request you send a grayscale (rather than an RGB) image. If you don’t give the printer what it expects, you could end up with strange color casts you don’t want, or a neutral image when what you were expecting was a nicely toned one.
8. Consider your image’s aspect ratio.
If your photo doesn’t fit the same dimensions as a lab’s print size, its technicians—or automated program—may do the cropping for you. To control this yourself, you can crop your own image before uploading. Or, to get the aspect ratio you want at the largest size, open the image in your image editor, then make a white border around your shot so that the total image area, including the border, matches the print size you’re ordering. If you want to display your print without the border, you would then need to trim it yourself or frame it using a mat that covers the border.