How To: Create an Audio Slideshow from Start to Finish
Audio slideshows are the perfect marriage between multimedia, sound and still images
The inclusion of HD video capture on most modern DSLRs has given birth to a whole new generation of photographers who are fascinated by both stills and moving pictures. Both formats offer the viewer a unique experience. Video gives a chance to both see and hear, while photographs provide an opportunity to study a single moment in great detail. Choosing between the two can be difficult, but audio slideshows help bridge the gap.
So what exactly is an audio slideshow? As the name suggests, it’s a series of pictures, presented one at a time, with an accompanying audio track. It’s an often overlooked, yet intimate and effective form of multimedia that offers something both stills and video cannot. It’s not right for every sitaution, but things like sports events, protests, weddings, concerts, and speeches all make for interesting audio slideshows. You can still let your photos do the bulk of the story telling, but the audio provides some key sensory elements that help capture the scene.
What you are going to need
First, you’re going to need a camera. And while even most compact cameras have video mode, it’s not necessary for this project. Heck, you could even use film if you really wanted to. You will need an audio recorder, though. Zoom makes some fantastic high-end audio recorders that can be picked up for as little as $100. For a little more, you can get something like the Zoom H2 ($140 street), which offers the option for dual-mic and four channel recording for more advanced recording.
Since the final output will be a video file, you’ll also need some video editing software on your computer. Both Macs (iMovie) and PCs (Windows Live Movie Maker) offer free video editing programs bundled with any new machine. If you want something more robust, you can step up to something like Apple’s Final Cut Express ($200, street) or Adobe Premiere Elements ($99). You will also need some software to edit your audio. Audacity is a free yet powerful audio editor that will do the job nicely.
Getting the photos

When shooting an audio slideshow, it is important to remember to get both wide overview shots (above) as well as detail shots. Photo: Dan Bracaglia
When shooting digital, shoot a lot! The more options you have once you get back to your computer, the better. It’s important to strive to tell the story with as much detail as possible. Be sure to look for both detail shots and overview shots. Even shots you might otherwise skip could become helpful when painting your overall multimedia picture.
Let’s say you’re shooting a protest, as I did in the sample audio slideshow above. Shots of the crowd, individual protestors, and the police are all good, but pay attention to the small details that are often overlooked. Get shots of specific signs, the expressions on the faces of protestors, the police officers and the bystanders. Be aware of what people are doing with their hands and feet and look to capture movement and emotion. The last thing you want is to be sitting in front of an open editing program saying, “I wish I had gotten a shot of…”
Be sure to change perspective often. You’re going to be presenting these images together, and if it gets overly repetitive, you’re going to lose your audience fast. Be creative and be bold. Include the stuff that helps you tell the story and exclude everything that doesn’t. It sounds simple, but it takes practice.

_No matter what the subject of your audio slideshow may be, remember to pay attention to what people are doing with their hands and feet; it can reveal a lot about a scene. __Photo: Dan Bracaglia_
Getting the sound bites
Most photographers find that capturing audio is actually pretty simple. In most cases, you’ll likely be pulling down audio in an unobtrusive way with a recorder that’s out of view. You won’t even have a camera up to your eye to give away the fact that you’re recording.
Just like capturing stills, the key to getting good audio is to record a lot, getting both detail and overview sound bytes. For my Occupy Wall Street project, I got some audio of the chatter before the protest starts, the sounds coming from the drum circles, individual shouts as well as the crowd’s unified chanting. Don’t record the entire event from start to finish; it will make your job much easier later if you record targeted individual sound bites. It will also keep you in the story-telling mindset if you’re picking and choosing the moments you want to convey. It also helps to keep notes on what you’re recording in a notebook so you can easily reference them later.
Remember, the more detail sound bites you get, the more interesting your audio slideshow will be. Get the sounds of individual instruments, like the trumpet and trombones in the drum circle. When it comes time to finally put the whole package together, the more individual audio that you can match up with a specific photo, the better.
Putting it all together
?This can be the most overwhelming portion of the project. However, you can maintain your sanity by breaking it down into three individual steps. If this is your first audio slideshow, we recommend keeping it under one minute in length.
Listen to and edit your audio
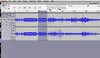
Audacity is a free, easy-to-use audio editor.
The first step is to closely listen to what you have. Then go back and cut a small portion of each track that you want to use. If there’s one key piece of sound you want to build around, it’s important to identify it early so you can build around it.
If you are using Audacity, you can go to File>New to your open your tracks. The tool in the upper left corner that looks like a capital “I” will allow you to listen through and highlight specific portions of the track. Use the “Delete” key to trash anything you don’t want. Once you have narrowed down a good sound bite, copy and paste it into a new project timeline and be sure to not overwrite the original audio files.
Let’s say you have a solid 30 seconds of protestors chanting. You may want to throw 5 to 10 seconds of chatter–or in my case, the drum circle–before you cut into the full-on protest. I ended up using two different audio clips of chanting and finished off the slideshow with the sounds of cheering recorded when the protestors reached their final destination: Manhattan’s One Police Plaza.
Audacity will allow you to build multiple tracks over one another that can be flattened on export, much like Photoshop does with Layers. This works well when laying one sound over another. Simply click Project>New Audio Track. Also, be sure to use the “Fade in” and “Fade Out” options in Audacity to keep choppiness to a minimum. You can do this by simply highlighting the area you want to fade, using the “I” tool, and going to Effect>Fade in/Fade out. The program will let you decide just how much you want to fade the track; play with it until you get it just right. If there’s a person talking, it’s paramount that you can understand what he or she is saying.
Once you are happy with your track, go ahead and export it. Exporting as a .wav file is usually easiest, and gives you uncompressed quality.
Sorting and importing the photos

Shots that show movement help tell your story. Photo: Dan Bracaglia
Now that the audio track is done, looking through and selecting photos should be the easy part. Select ones that will correspond well to specific sounds in your track. Remember, it is better to go into your video editor with too many photos rather than too few. For a one minute audio slideshow, start with 30 to 40 images and add or subtract depending on what you think works.
Once you have narrowed down your selection of images, it is a good idea to order and rename them to match. That way when you import them to your video editor you will have no trouble laying them over your audio track.
Finishing the piece
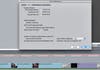
If you are editing your audio slideshow in Final Cut, go into User Preferences>Editing to toggle the duration for which your photos will appear.
Start by importing your audio track. Before importing your images, it is a good idea to set a uniform length that they will appear once placed on your video timeline. Go to User Preferences>Editing and change “Still/Freeze Duration” to three seconds.
Now it’s time to import your images. You can start by either tossing all of the photos over your audio track or pulling them in one at a time. I prefer to go one at a time; ordering your photos and timing the switch from one to another to correspond with your audio can be the most difficult part of the whole process. It is OK to take your time with it.
If your audio has a consistent beat or rhythm, try to use that to your advantage by switching from photo to photo in time with the beat. In situations like a concert or protest, where there is rhythmic chanting, this is usally pretty easy.
Finally, remember to match your detail shots with your detail audio. If there is a trumpet sound that comes into the track at 25 seconds, be sure to show some images of the trumpet player at the same time. When finished, be sure to export at the highest quality so as to not degrade your images.
Publication is surely the easiest part; just upload to Vimeo or Youtube and share with your friends!
