Software Workshop: Adding Selective Greyscale to a Photo
Five tips for painless tones shifts
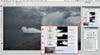
The Final Product

Photo: John Paul Caponigro
Colorless black-and-white images are beautiful, but sometimes it’s nice to add a little bit of tone. By adding color to your b&w photos, you can enhance their expressive qualities.
Historically, photographers added color by choosing specific materials when they made prints. Different papers and toners created different looks for silver gelatin prints. Processes like platinum and cyanotype created warm-toned images or cool-toned prints. In addition to its aesthetic impact, toning could enhance the longevity of a print. Color could be added selectively by hand, not to mention many other alternative processes.
These days, you can add color to your black-and-white digital images in virtually unlimited ways. Sure, the choices before you can be dizzying. Fortunately the techniques are simple, and the experimentation process for determining which tone qualities work with specific images is easy and fun. Here are five go-to ways for bringing color back into monochrome images in Adobe Photoshop.
Method 1: Colorize with Hue/saturation

Here’s a way to add a wash of color to an image. First, make a Hue/Saturation Adjustment Layer and set its blend mode to Color. Check the box for Colorize, then use the Hue slider to choose the color you’ll add. To adjust its intensity, move the Saturation slider. Disregard the Lightness slider. Potentially the most intense, this toning solution affects images uniformly.
Method 2: Split Tones with Curves
Use this technique when you want to add two different tones—one for highlights and one for shadows. Make a Curves Adjustment layer and set its blend mode to Color. Then use the pulldown menu to choose the Blue Channel rather than RGB. Make a subtle S-curve, lifting the shadows and pulling down the highlights. This will bring a blue tone into your shadows and blue’s opposite, yellow, into your highlights.
Method 3: Bring Back Some Original Color
As an alternative to converting a color image entirely to black-and-white, consider desaturating overall color until you have a subtle wash of tone. Using a full-color photo, create a Black & White Adjustment Layer, and move the sliders until you like the conversion. Then reduce the opacity of the Black & White adjustment layer to restore a trace of the image’s original color.
Method 4: Add Color by Hand
Here’s a way to add any color you like to any area of your image. Make a new, blank layer, and set its blend mode to Color. Grab a soft-edged brush, and double-click on the foreground color in the toolbar to choose the tone you want. Paint it in where you want it. If the color is too intense, reduce the opacity of the brush (not the layer) to control the effect. If you find you’ve built up too much color, use the Eraser tool at any opacity to reduce or remove it.
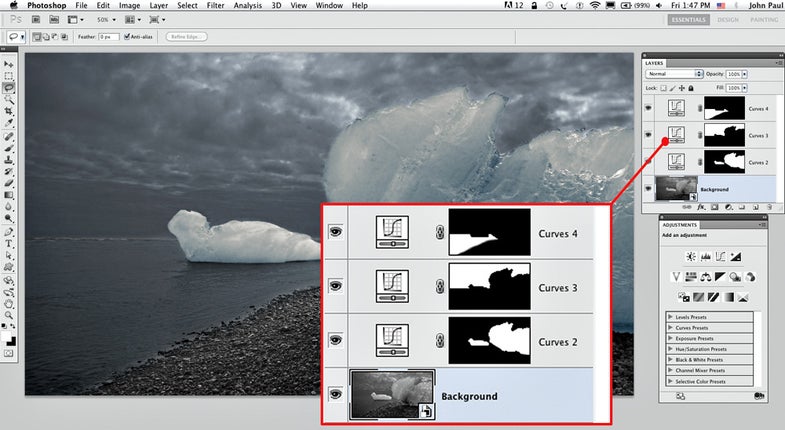
Method 5: Selective Toning with Masks
The prior four methods can work even better when combined, using masks. Click on a layer or adjusment layer to select it, then click the mask icon at the bottom of the Layers panel to add a layer mask. With the mask selected, paint on your image with a soft-edged black brush to hide a previously applied tone effect; use a white brush to restore it. Vary brush opacity as needed