How to photograph neon signs
Learn how to capture a burst of color in the night.
Nothing tempts a photographer’s eye more than an arresting mix of light, color, and shape. And few subjects combine those elements more intensely than a neon sign: from vintage motels on Route 66 to the glitter gulch of Fremont Street in Las Vegas.
Exposure settings for photographing neon signs
To capture these colorful night lights, trust your camera’s evaluative meter setting for exposure. Use a low ISO of 100 or 200 to avoid noise, a tripod or a lens or camera with image stabilization tech to allow slower shutter speeds. At ISO 200, a close-up shot of a single neon sign will produce an exposure at f/11 of anywhere from 1/20 sec to several seconds.
When to use HDR mode
HDR imaging works well with complex compositions, such as Times Square’s neon canyon—scenes with static, rather than blinking lights are easier for this. Those with movement (e.g., people and traffic) will reveal ghosting—subjects that appear in some layers but not others. This can be a cool effect, but most HDR programs offer deghosting tools.
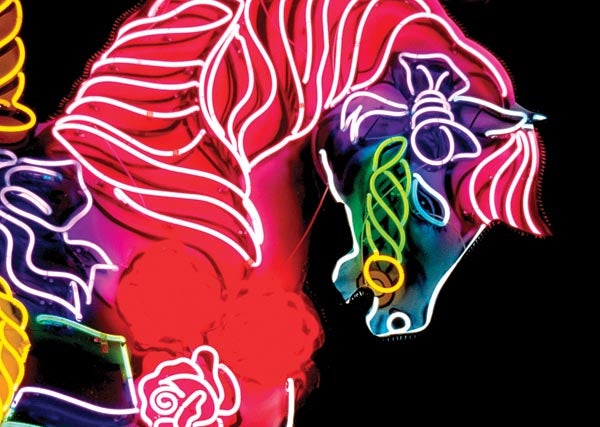
Consider color when photographing neon signs
Twilight skies make sign colors pop. Saturate the sky further with a tungsten white balance, but note that this will cool the sign colors. “Neon” signs are filled with different gases: neon for red and argon for violet. You can set your camera for high color saturation for this, but exact colors are tough to predict, so your best bet is to shoot in RAW mode and adjust later.
Play with composition when photographing neon signs
Zoom in tight to exploit lines and patterns for abstract designs, or use the longest setting (at least 200mm equivalent) to compress perspective and capture multiple signs. Multi-exposures also make great images—try doing it in the camera or by montaging single signs that you’ve shot surrounded by black space.