How To: Use HDR With Sports
Photographer Chris Park shows us how to make HDR work well at stadiums events.
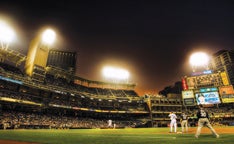

Baseball HDR
The best high-dynamic-range (HDR) composite images are usually those you can’t immediately tell are HDR. That’s why we like sports photographer Chris Park’s work so much. As the Associated Press contract shooter from San Diego (www.cparkphotography.com) proves with this three-image composite from a 2008 Padres/ Rockies game, HDR doesn’t have to look silly or surreal.
Park’s approach is particularly well-suited to capturing a highcontrast subject such as a nighttime stadium baseball game. By combining normal, over-, and underexposured images in postprocessing, he conveyed full detail in the brightly lit scoreboard and white uniforms, as well as in the shadowed sections of the stands.
How did he do it? First, by mastering the basic techniques for covering stadium sports:
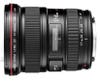
– Using the fastest lenses possible, but none that are physically too large—many stadiums place a limit on the size of the lens that fans can use.
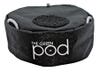
– Stabilizing your rig with monopods for large, long lenses, and bean bags for smaller wideangle lenses. (Stadiums usually ban tripods from the stands.)
– Getting great seats. Field level is expensive, but it’s worth it. If there’s nothing left at the box office and you really want a shot like this, try scalpers.
– Roving the stands for good angles. “Usually my bread-and-butter shots come at field level along the first-base line,” says Park. “But I’m often rewarded when I try different shooting angles around the park. This is especially true during the ‘magic hour’ of sunset, when the sky can put on quite a light show.”
Step 1: Shooting for HDR, use as low an ISO as possible. You want to keep noise out and sharpness in. That can be difficult if you have to run your files through a noise reduction filter. Park shoots at ISO 100. “The amount of noise at ISO 200 or 400 can be completely unacceptable,” he warns.
Step 2: For clean HDR composites, shoot in RAW and avoid auto white balance. Your goal is consistent color temperature between the three or more exposures.
Step 3: While shooting, keep the camera stable by using a monopod or bean bag, plus a self-timer or a cable release. So that the three images match, wait to shoot until there’s a lull in the action.
Step 4: Bracket your brackets. Start with increments of 1/3- or 1/2-stop between each of the three exposures, then reshoot with brackets of 1 and 2 full stops. The three images that comprise park’s photo at left were each 2 full stops apart. in general, smaller increments produce subtler, yet very effective, HDR images.
Final Step: Composite the frames. Park often starts with adobe photoshop CS4’s Merge to HDR tool, which you’ll find in File > automate. a dialog box asks which images he wants to merge, and then Photoshop creates a single 32-bit file. he saves it as a TIFF file and reopens it in the HDRsoft plug-in photomatix. This popular program offers a number of preset sliders that give him extensive control over image quality.
Submit Your Own Stadium HDR Images
– Send your best high-dynamic-range (HDR) composite images to hdrsportsimages@gmail.com and be featured in a reader’s gallery on popphoto.com.