6 Ways to Stop Ruining Your Inkjet Prints
Quit wasting paper, ink and time churning out prints that don't make the grade.

Calibrate, Calibrate, Calibrate
If you take your digital photography seriously, you know that a properly calibrated monitor is absolutely essential to the process of making pictures. If you’re currently eyeballing your settings, it’s worth noting that there are several affordable solutions now available. Datacolor’s Spyder 3 Express calibration system checks in at just $89 and uses an easy software suite that automates the calibration process from start to finish. If you’re using a higher-end printer, the manufacturer often provides ICC profiles that help lock in the proper settings specific to the type of paper you’ve chosen. And remember to re-calibrate your equipment every two-to-four weeks. Things like monitor use, temperature change and humidity levels can affect how your screen looks.
Clean Your Printer
Dirty print heads or clogged ink tubes can play havoc on your prints and your supplies budget. The software included with many printers includes a utility designed for cleaning print heads. The process generally uses a lot of ink, however, so it’s best to check your printer’s manual and follow their recommendations about how often they need to be cleaned. If you’re planning on letting your printer sit for an extended period of time, it would benefit you to run a few normal prints through it periodically. Pick something that will utilize all of your cartridges and look for banding or fading in the results.
Pick The Proper Paper
It’s good to have a go-to paper that you know will look good coming out of your printer no matter what kind of image is printed on it. But, as you mature as a printer, you’ll start to get a feel for what kind of paper makes your images pop. Black and white images tend to fair better on paper with a matte finish since viewers won’t be fighting their own reflections when observing large sections of shadow detail. Plus, matte paper is less susceptible to finger prints. If you’re focused on making your colors come out as vibrant as possible a high-gloss finish is probably the way to go. Swap some sheets with another local photographer and try out something new. Actually seeing your photos printed on it is by far the best way to test out a new paper. You’ll use a few extra sheets in the process, but you’ll save in the long run.
Turn Off The Printer’s Enhancements
You probably won’t have to worry too much about this one if you’re using a high-end model, but there are many photo printers out there that assume you don’t know what you’re doing when it comes to color. So, they come with a default setting the “optimizes” or punches up the color and sharpness of your prints. If you have spent painstaking hours tweaking your picture, that extra change to make it all for naught. Be sure to check your printer’s manual and poke around in the software settings to make sure your printer isn’t putting its own personal touch on your work.
Mind Your Climate
The air surrounding your printer can have a tremendous effect on its output, so it’s worth stepping back and taking a look at the spot you picked, especially if you’re having issues with print quality. Try not to keep your machine near a window or vent that will cause frequent fluctuations in temperature and humidity. Different inks react uniquely to changes in environment, but you’re always going to get the best results if ink is being applied to paper in an environment that’s cool, dry and free from a lot of dust that might be flying around in the air just waiting to get stick in a layer of freshly-laid ink.
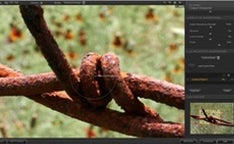
Be Smart About Sharpening
Like with color management, you want to be the one in charge of your sharpening. You’ll want to make sure your printer software isn’t applying any extra sharpening effects to your image before applying it to your paper. The same goes for your capture device, whether it’s your camera or a scanner. You can use the unsharp mask or Photoshop’s Smart Sharpen filter to get the job done, or opt for a stand-alone piece of software like the Sharpener Pro from Nik.