You Can Do It: Flower Art
How to bring out all the richness of flowers and plants with a flatbed scanner.
Photographers tend to approach plants in two ways: They go for the soft, romantic look, or they take the clinical high road, bringing parts (if not all) of every petal, fold, pistil, and stamen into focus. For the former, I find a camera works best, but for the latter I like my Epson Perfection 4990 flatbed scanner.
To succeed as a scanographer, you need a sense of composition, an understanding of how scanners work, and knowledge of image-editing programs such as Adobe Photoshop, whose tools often turn mundane scans into magic. But the real trick is recognizing good subjects.
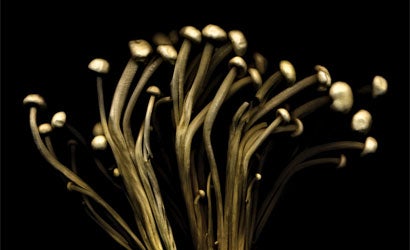
Pretty doesn’t always do it. Look for strong lines, shapes, and textures. You can find them almost anywhere. (I noticed the enoki mushrooms on the previous spread hiding in my fridge!) Plants with flat surfaces and bold, well-defined lines work well — birds of paradise, for example. Flowers should have firm petals and not collapse when laid flat on the scanner. (Poppies collapse; marigolds hold their shape.) Before scanning, examine your subjects for bruises, tears, and other imperfections.
Set your scanner for high resolution, but not too high. My Epson’s 1200-dpi and 1600-dpi settings work for me; scanning at its 4800-dpi maximum nets more detail than I need. I recommend using an 8×10-inch transparency adapter, which bounces light through translucent petals as well as at them. The X-ray-like effect can give petals an ethereal quality.
Start by cleaning your subject well, then remove dust and spots from the scanner’s glass. (Spray cleaning fluid on a lint-free cloth, not directly on the glass.)
My scanning software, VueScan (www.hamrick.com), allows me to easily view and manipulate images in its prescan mode, the most important scanning stage. Here, you can select the area to scan. (Select more than you think you’ll need so you’ll have freedom later for cropping or straightening.) In prescan, you also can adjust density, color, sharpness, highlight and shadow clipping points, and contrast. Experiment with each and gauge its impact. Study the image’s histograms to make sure highlights and shadows are within an acceptable range. At this point, if the outer edges of the subject appear too dark, I place supplemental lights around the Epson, and rescan.
The actual scan takes moments. The real work begins in image editing. I use Photoshop to remove dust and spots (always a problem), fix flaws, and fine-tune color, saturation, contrast and/or lighting.
Trial and error is the way to success. Want a richer, darker background? Scan with the lid up. Balance a colored board behind the subject to get a colored background. For every image that works, you’ll create 50 that don’t. The good news: Failures are free.