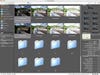
Step-5-This-simple-organizational-trick-saves-so
Step 5: This simple organizational trick saves so much time and cuts the chance of erroneously putting photos in the wrong subfolder.
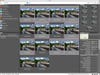
Step-7-Select-File-Scripts-Load-Files-into-Stac
Step 7: Select File> Scripts> Load Files into Stack.
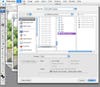
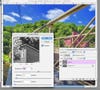
Step-9-The-Smart-Object-will-open-in-CS3-Extended
Step 9: The Smart Object will open in CS3 Extended. Select Layer> Smart Objects > Stack Mode > Median.
Step-11-Repeat-Steps-7-10-with-each-exposure-leve
Step 11: Repeat Steps 7-10 with each exposure level folder.
Step-12-We-ve-now-got-an-HDR-source-folder-that-w
Step 12: We’ve now got an HDR source folder that will contain all of our Smart Stack HDR source images.
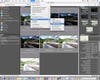
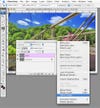
Step-13-Once-each-exposure-level-has-been-success
Step 13: Once each exposure level has been successfully Smart Stacked and saved, it’s time to make our 32-bit HDR image. Open the HDRSourceFiles folder in Bridge and highlight all 7 images. Then select Tools> Photoshop > Merge to HDR.
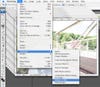
Step-16-Since-we-re-already-working-in-Photoshop
Step 16: Since we’re already working in Photoshop, we’ll now merge our identically sized source images to HDR via Photoshop under File> Automate > Merge to HDR.
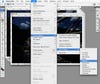
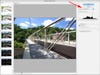
Step-19-The-HDR-preview-window-will-appear.-If-it
Step 19: The HDR preview window will appear. If it looks good, make sure the Bit Depth is set to 32 bit/Channel and click OK.
Step-27-We-ve-now-got-two-Tonemapped-output-image
Step 27: We’ve now got two Tonemapped output images, the top from FDRTools, and the lower from Photomatix Pro. We’re a little worried about the sky looking overdone in the FDRTools version, so we select the Photomatix Pro version for final work-up.
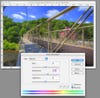
Step-28-First-we-re-going-to-boost-the-saturation
Step 28: First we’re going to boost the saturation by a few points to make the colors snap more.
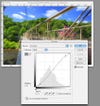
Step-29-Next-we-add-a-subtle-shadow-highlight-S-c
Step 29: Next we add a subtle shadow/highlight S-curve to add some contrast to the scene. We still want to make some final image adjustments, but with a very light touch, so we’ve got to get a little creative.
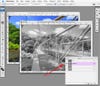
Step-30-We-re-going-duplicate-the-image-under-Ima
Step 30: We’re going duplicate the image under Image >Duplicate. We convert the duplicate image to Lab Color under Image> Mode > Lab Color. Select only the Lightness Channel in the Channels Palette and Select the entire image (Select > All, or CMD+A).
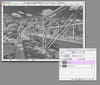
Step-31-Going-back-to-the-original-image-we-past
Step 31: Going back to the original image, we paste in the Lightness channel, which becomes a monochromatic layer.
Step-34-Add-some-Unsharp-Mark-to-Layer-1-and-we
Step 34: Add some Unsharp Mark to Layer 1, and we are just about finished.
Step-35-We-flatten-the-image-via-the-Layers-Palet
Step 35: We flatten the image via the Layers Palette and we can then save our full-resolution image. We’ll then resize for the web, but before we do that, check out the next slide.
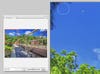
Step-37-A-couple-of-quick-swipes-with-the-Clone-t
Step 37: A couple of quick swipes with the Clone tool removes this distracting element. Preferably, we would have done this step earlier in the workflow, but since there’s not critical detail in cloning in some blue sky, it’s OK to do it after Sharpening.
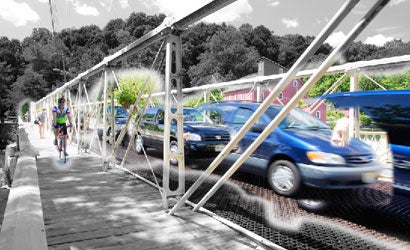
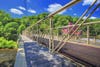
Step-38-Here-s-our-final-result-from-63-photos-co
Step 38: Here’s our final result from 63 photos combined in Smart Stacks to eliminate the traffic, and merged in HDR to show detail throughout the scene. It takes some time both in the field and on the computer, but we think it’s well worth it!