Top 25 Tips of 2007
Our favorite tips of the year from PopPhoto Flash.
The Editors of Popular Photography & Imaging have posted a tip a day, every weekday since April, on our blog PopPhoto Flash. Some tips came from our editors themselves, while others were pulled from books, blogs, websites, or donated from ingenious readers. Listed here are our favorites, the top 25 tips of 2007.
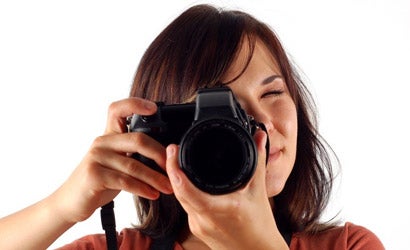
1) How to Hold Your Camera
| Photo by Matthew Panzarino |
With shiny surfaces, lots of reflections, and so many angles to shoot from, cars can be tough to photograph. Here are a few tips to get you started:
1. Shoot at a low angle. Unless you can shoot from 3 or 4 feet above the roofline of the car, taking a slightly-to-dramatically lower angle can make the car look more impressive.
2. Never fire your flash directly; every flaw in the paint will show up in high relief. Instead, move the flash off-camera and use side lighting to accentuate the lines of the car.
3. Wet the ground. Water increases the levels of contrast in the image and adds a reflection of your subject, creating a feeling of dimension.
4. Shoot with a telephoto or wide-angle lens. Wide-angle lenses are good for getting a sense of place into your shots, showing the car in context. Telephoto lenses are great at accentuating the lines of the vehicle and maintaining a good sense of separation between subject and background.
5. Bring along a bin of cleaning supplies. Even on a freshly washed and waxed car, there’s always some spot you miss.
Read more here
10) How to Make Your Own Snoot
We found plenty of great tips on Strobist.com in 2007, this one — how to make a snoot for your flash out of a cereal box — is pure genius. Here’s how to do it:
Take the cereal box and cut of the top and bottom and down one side, making a large rectangular piece of cardboard. Next, mark it on the inside as you fold it around the light end of your flash. Just mark where it needs to be folded, and use a ruler as a straight edge to make the fold crisper, making a rectangular opening that just fits the flash head. Tape or glue the open side along the length of the snoot, and you’re ready to start shooting.
Read more here
11) How to Make Your Subjects Look Thinner
The camera doesn’t add 10 pounds — the photographer does. But you don’t have to, with the right poses, lighting, and angles, you can make your subject can look thinner. Here’s how:
Do the twist: If your subjects are standing, have them take a step back with either foot. If seated, have them sit at an angle. This forces them to twist to face the camera — stretching their torso and hiding bulges.
Get high: Shoot from a little above your subjects’ eye level. This elongates the face and makes them face up just a tad — helping conceal a double chin.
Narrow down: Short or narrow lighting involves illuminating the side of the face that is turned away from the camera. This puts a large part of the face in shadow, making it look quite a bit thinner. You can use a window, a lamp, or an off-camera flash to do this.
Read more here
12) How to Let the Gear do the Work
| Photo by Chris Evans |
Photographer Chris Evans posted a link on the PopPhoto Forums to some great squirrel close-ups without a long lens. The catch? He didn’t take the shots personally — he used a Gorillapod and the camera’s timer to get close to the animals without actually being there (the camera was timed to take a photo every minute). Pretty smart, and the results aren’t bad either.
Read more here
13) How to Use Household Items to Spruce Up Your Photos
Cameras, lights, and lenses can be expensive, but not everything in your bag has to cost a fortune. In fact, some of the most valuable gear might already be in your house.
Garbage bag: Caught in a sudden downpour while shooting? Use a garbage bag to cover up. If you really want to keep shooting, punch a whole big enough for your lens and you’ve got a raincoat for your camera. Aside from this, you can spread the bag on damp ground to kneel, sit, or lie on.
Clips and clamps: Need to make your model’s outfit fit better? Tighten it with a butterfly clip.
Duct tape and masking tape: If something moves when it shouldn’t, you need to tape it down. That’s only the beginning though, use it to cover a window with white sheets, or to stretch a cloth background taut. Don’t forget — you can also mark your model’s place with a bit of tape.
Adhesive clay: If an object is too small to tape down, don’t worry — that’s what adhesive clay is for. It keeps mirrors, reflectors, and other little things in place while you shoot.
Read more here
14) How to Get Big Families in One Photo
Avoid the wide-angle table view of your family after dinner. The distortion will make you family — already fat and happy — look even fatter. Instead, make a more natural and flattering photo by shooting each person individually at about 50mm.
If you need flash, use a hot-shoe unit turned backward and slightly up, so that the light bounces off the wall behind you (bounce it off the ceiling if the room has dark walls).
Now that you have all of these individual shots of everyone at the table, use basic panorama software to stitch them together into one big, happy photo.
Read more here
15) How to Shoot Fireworks
| Photo by Pop Photo Staff |
We received another “why didn’t I think of that!” tip from Reader Tip Stephen Uber of Manchester, CT:
If you’ve visited YouTube, you know of the hordes of snap shooters using digital compacts to make videos. While these cameras offer good image quality and can be super-compact, their audio pickup leaves something to be desired, especially when shooting in windy conditions. To control wind noise, I made a windscreen for my compact’s microphone from the gauze-like padding of an adhesive bandage. Taped over the mic’s tiny port, the “screen” does an admirable job of muffling, even eliminating, the sound of wind from my videos.
Read more here
18) How to Get Better Macros
Reader Geng Li of Brooklyn, NY, offered us this simple but brilliant macro tip:
When you’re shooting macro pictures, a background of a contrasting color can make your pictures look great. Here’s a background you already own that can reproduce thousands of colors: your computer monitor. The larger, the better. Use image-editing software to create a full screen in almost any color, and then put your close-up subject 2 or 3 inches in front of it. Just watch out for reflections.
Read more here
19) How to Fake a Sunrise
Simulate the subtle shades of sunrise and sunset by adjusting the preset white balance on your digital camera. Choose the Tungsten setting (light bulb icon) to add a bluish morning cast, or the Shade setting (cloud icon) to add the warm brownish tones of dusk. You’ll see a preview on the LCD monitor. The effect will be mild, but can be exaggerated by underexposure.
Read more here
20) How to Hide Fill Flash
| Photo by Matthew Panzarino |
In this tip from Strobist.com, a reader called “footcandle” shared a method of placing small flashes in a large outdoor scene to fill in the darker areas of the exposure, or to balance foreground and background exposure. You then retouch the flashes out in post production.
Read more here
21) How to Soften Photos with Breath
Another great reader tip from Michelle Harbour of Hayes, VA:
When shooting an impromptu portrait that could use a little softening, try breathing on the lens right before releasing the shutter. The effect is like a soft-focus filter’s, but variable: The longer you wait to fire the shutter, the less the softening effect.
Read more here
22) How to Shoot Football
| Photo by Melissa Macatee |
A few tips on getting good football shots from the sidelines.
1. Set your focus to the center point
2. Set your camera mode to Sports or Aperture Priority depending on your comfort level (if you decide to use aperture priority, set your aperture wide open).
3. Make sure your shutter speed is at least 1/300 sec to freeze the action.
4. If you want multiple bursts, be sure to set your camera accordingly.
Read more here
23) How to Photograph Amusement Parks
How to Photograph Absolutely Everything: Successful Pictures from Your Digital Camera By Tom Ang (DK Publishing, 2007; $40) offered these tips on getting shots in the low light of amusement parks:
Wide-angle views, a medium ISO, and a tripod will help capture the excitement. Follow this advice on shutter speeds to get the shot you want:
• A short shutter speed (less than 1/15 second) will give a static view of the scene, without any motion.
• A fairly long shutter speed (about 1/2 second) with flash will give both motion blur and sharpness to the rides.
• Very long shutter speeds (1 sec +), without flash, will turn the rides into abstract light traces.
Read more here
24) How to Make Your Own Batteries