The Report
How to turn your high-def TV into a glorious display for your photography.
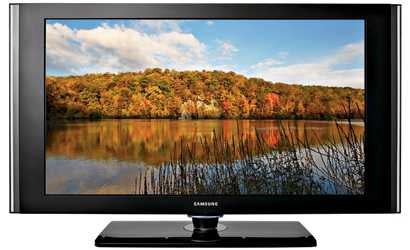
Want to show your photos on your new HDTV? Great idea, but it’s not as easy as it sounds — your digital camera doesn’t store files the way HDTVs display them. Here’s advice and tools to help you streamline the HD slide show process.
Most 6-12-megapixel cameras capture images that contain far more pixels and detail than you need for even the most colossal HDTVs, which have 1920×1080-pixel resolutions (approximately 2MP). Those images also have a different shape: Most compacts, as well as Olympus and Panasonic DSLRs, shoot photos with a 4:3 aspect ratio; other DSLRs capture 3:2 images. But HDTV screens have a 16:9 aspect ratio and display uncropped photos with wide bars on either side. So start by cropping your images to 16:9 at a resolution of approximately 2MP.
| Ask MikeQ. Should I select the 2- or 3MP setting on my 8MP camera if I plan to display the images on an HDTV?A. Neither! If you do that you won’t be able to make 5×7-inch or larger prints of your audience’s favorites. Shoot at the 8MP setting, then crop and resize later. |
Another problem? Most HDTVs are optimized for the color and image quality of video and TV signals from HD-enabled cable or satellite boxes and DVD players. (Only the latest Blu-ray and HD-DVD players can display still images in true HD resolution.) These signals typically look better with higher color saturation, contrast, and sharpness — all of which you’ll find as HDTV default settings.
Unless you change the settings in the TV menus, print-optimized photos from a digital camera will appear too washed out or contrasty. Luckily, you only have to change the settings once and save the new ones for slide shows. Saving your images in the sRGB color space will minimize the color difference.
Only a few HDTVs have built-in card readers — and they’re slow, take only SD cards or Memory Sticks, and don’t optimize image size and color. Most cameras have video output, but it’s usually limited to VGA (640×480-pixel) resolution, which looks horrible on an HDTV.
Fortunately, several inexpensive devices, such as the Kodak EasyShare HDTV dock ($100, street) and the Sony Cyber-shot Station CSS-HD1 ($70, street), can be attached to your HDTV and enable slide shows at 720p, 1080i, or 1080p resolutions. These docks also charge compatible cameras and include remote controls, but neither provides sophisticated transitions or plays multimedia slide shows with music.
To create a dazzling multimedia extravaganza, you’ll need a computer and software. Movie-editing programs for PCs, with support for HD slide shows, include CyberLink’s PowerDVD 7 Deluxe ($70, direct; www.cyberlink.com), InterVideo’s WinDVD 8 Platinum ($50, direct; www.corel.com), and Adobe’s Premiere version of Photoshop Elements ($90, street). For Macs, Apple’s iLife 08 suite ($70, street) has iMovie, iDVD, and iPhoto software, plus other useful programs.
Connect your computer to your HDTV with an HDMI or DVI cable (most HDTVs have jacks), then connect the sound cables. To access images stored on multiple computers or on DLNA-certified network storage devices, tap into a Wi-Fi home network with the MediaGate MG-350HD wireless HD player ($220, street) or the D-Link MediaLounge DSM-320 with built-in DVD player and multi-card reader ($170, street). Hewlett-Packard’s MediaCenter HDTVs provide Wi-Fi connectivity directly. For optimum wireless streaming of multimedia content from your computer to your HDTV, use a fast 802.11G network or router.
Now all you have to do is lower the lights, crank up the sound, and get the popcorn out of the microwave!