Photoshop How-To: The Ultimate Test Strip
Using Photoshop to make variations on a theme.
Click to download the May 2006 Digital Toolbox Podcast
Miss the test strips of your darkroom days? Sick of making piles of prints just to get the right skin tone or contrast? Use one of Adobe Photoshop’s automated features to quickly create a layout that lets you test various changes, print them all on one page, pick your best, and then quickly apply your favorite fix to your final image.
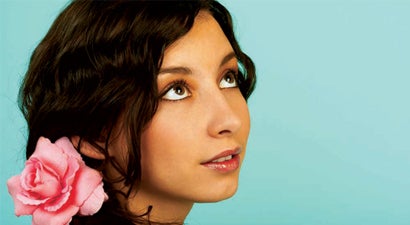
Before
After
1. Open the image you want to print. Even if your system is color-managed well, your printed picture will never look exactly the same as it does on screen. Here’s a way to try out some variations to get the color you like-without wasting paper. Go to File > Automate > Picture Package.
2. Picture Package normally helps you print multiples of a single image on one page, but we’ll use it for our test strip. Choose your paper size, fill in 300dpi for your resolution, and use the pull-down Layout menu to set your page for four shots. Uncheck Flatten All Layers, and click OK.
3. Now you have a layout with four images on a single page. To make it easier to work, go to Image > Rotate Canvas > 90° CW. Check out your layers: each copy of the image is on its own layer. Picture 3 is the one at top left-go to the Layers palette and click that layer to select it. Then hit M on your keyboard for the Rectangular Marquee tool, and draw a box around the top left image. Use an Adjustment Layer to Make changes. In your Layers palette, it’s the half-black, half-white circle, fourth from the left in the row of icons on the bottom. Click it and choose your adjustment-I’ll use Curves.
Quick TipSeem like a lot of work? Make an Action! Record steps 1-5, but make your Adjustment Layers without modifying them, so your action will work on any image. You can do the tweaking after it runs.
4. Use an adjustment layer to make changes. In your Layers palette, it’s the half-black, half-white circle, fourth from the left in the row of icons on the bottom. Click it and choose your adjustment. I’ll use curves.
5. Make your changes, then click OK. Select the next layer, and once again draw a box around that layer’s image using the Marquee tool. Then repeat Step 4-use an Adjustment Layer to do your tweaking. Keep going until you’ve done all four pictures. Then make a print. Take a look at your options, and pick your favorite.
6. Now apply the best modification to your final image. Move your Picture Package window to the right to see your original peaking out. Click and drag your chosen Adjustment Layer onto your original. Since you made a selection in Step 3, only a portion of your image will be affected.
7. Make sure the effect covers your whole image by going to your Layers palette and clicking on the black-and-white box (that’s a mask, by the way) in the Adjustment Layer. Go to Edit > Fill, and under Use, choose White. Click OK, and now your whole fixed image shines through.
Quick Tip
Always been nervous about masks? Well, you just used them! Every time you make an Adjustment Layer, Photoshop adds a mask. If you make a selection first, what’s not selected gets masked off.