How to Set Up a Backyard Wildlife Refuge
The opportunity to shoot wildlife is as close as your backyard. Follow these easy steps to get started.
When you ask where to shoot wildlife photography, thoughts of refuges, preserves, sanctuaries and National Parks often come to mind. In my neck of the woods, Birmingham, Alabama, there are wildlife refuges ranging from the Bon Secour Wildlife Refuge on the Gulf Coast to Wheeler Wildlife Refuge in the Tennessee Valley. Not everyone may be as fortunate to have such amazing resources close to home, and it’s not always possible to take a whole day for a photo adventure. All is not lost, though — for many a wildlife refuge is closer than you may think.
I have discovered that I can easily shoot wildlife by stepping out my back door. Granted, I may not have a Bald Eagle perch on one of my oak trees or have a Great Blue Heron wade through the grass, but it’s not uncommon to find a vibrant red Cardinal perched in a tree or a squirrels smiling for the camera in my own backyard. I can find butterflies searching for flowers — and lizards searching for butterflies. You might find out that a great wildlife encounter is but a step out your back door.
Gear
To get the most out of wildlife photography, use a digital SLR. There are some high-end digital, non-DSLR cameras that can produce quality images, but the distance involved in some wildlife photography is beyond most of these camera’s limitations. A DSLR is more adaptive to the lighting, distance and stopping action challenges that wildlife photography presents.
I use a Canon EOS 20D and Mark IIn for my photography but other entry-, mid-, or pro-level DSLRs will be capable of producing quality wildlife images. While the camera body is a very important part of the equation, the right lenses will complete the puzzle.
For birds, squirrels and other creatures larger than a lunch box, you probably need a lens with reach of at least 400mm’s. Naturally, if you can get close to your subjects without them flying the coop, you can afford to shorten your reach slightly. The Sigma 50-500mm f/4-6.3 APO EX DG, Tamron 200-500mm f/5-6.3 Di LD, Canon 100-400mm f/4-5.6L, and Canon 400mm f/5.6L are some of the more popular lenses for wildlife photography.
As an alternative, if you already own one of the popular 70-200mm f/2.8s, consider a teleconverter. You can add a 1.4x or 2x teleconverter to extend the reach while keeping a functional maximum aperture. Just remember, while a teleconverter extends your reach, it also affects your maximum aperture. A 1.4x teleconverter will turn the 70-200mm into a 98-280mm f/4 and the 2x teleconverter turns it into a 140-400mm f/5.6 on an APS-C class camera with a 1.6x factor.
For butterflies, lizards, spiders, and other creatures smaller than a lunch box, a macro lens is your best bet. There are countless lenses out there that have macro abilities, in that they can focus at short distances, but lack serious macro magnification of at least 1:2. The magnification ratio is the ratio between real-life size and the size the object is sized on the sensor. A magnification ratio of 1:4 means one inch of a subject is recorded as 1/4 inch on the sensor. A magnification ratio of 1:1 means one inch is record at one inch.
For example, Sigma’s 28-200mm f /3.5-5.6 Macro has a macro focusing distance (1.5 feet) but not macro magnification (magnification ratio of 1:3.8). In contrast, Canon’s 100mm f/2.8 Macro has a macro focusing distance (6 inches) and a macro magnification (1:1).
While you can have success with the lenses that allow for closer focusing distances, those with 1:1 magnification will give way to greater detail. An alternative to a macro lens would be to use close-up filters on a standard lens such as a 50mm. Focusing is noticeably more sensitive with close-up filters but it may be an economical alternative to a macro lens.
Regardless which macro lens you use, remember the depth of field is extremely shallow with macro work. Even at a mid-range aperture of f/8, the DOF will be noticeably shallower with a macro lens. Focus on the head or eyes of the subject to better bring out the interesting details of your macro subjects.
One of the biggest challenges in any wildlife photography is where do you go to find your subjects. It’s no different with your backyard as opposed to a 10,000 acre wildlife refuge.
When you want to shoot birds, grab a lawn chair or stool and sit out in your front/back yard and relax. Watch the birds, listen for the squirrels. Get a feel for where most of the activity is concentrated.
Once you find that, find a place to position yourself far enough so you don’t spook the wildlife but close enough for your lens to reach the subject. Wildlife photography requires you to be patient — allow your subjects to show themselves and be in a position so you don’t scare them away before you press the shutter.
You may have the opportunity and an understanding spouse who will allow you to put up a concealment blind. This setup can be as simple as stringing camouflage netting between two trees or as complex as building a camo tent/hut to shoot from.
Wherever you set up, remember the animals have to get used to your presence. The least amount of movement from you, the better your chances. If you have to move around, do so slowly. It’s a good idea to use a monopod or tripod for these prolonged shoots, especially with a long, heavy lens.
Now if your wildlife interest lies with the smaller species, they have a different environment. Bugs, lizards and butterflies hang out where there’s food and shelter from predators. Search throughout the bushes, ivy patches, flower gardens, and wildflowers. Once the bugs and butterflies begin to emerge, the spiders and lizards will soon follow.
While you’re scouting your yard, pay attention to the available light. I’ve got spots in my yard that are better in the morning and some that are suited for the afternoon sun. Try to position yourself so the shooting area is front lit and not too much in the shadows. When you are shooting macro, remember not to cast a shadow over your subject as you shoot.
A Little Yard Work Might Pay Off
While you may have a population of birds, squirrels, lizards, bugs, and other critters, it may not be an ideal environment for photography. You may have an abundance of leaves or limbs that hide the birds, bushes that are over-grown and other influences that make it difficult to get a clear shot at your subjects.
In these times, you’ll need to do a little yard work. Yes, I realize that men cower at the notion of trimming back the trees and bushes or planting flowers. Just think of it this way: your wife doesn’t need to know that you’re planting flowers to attract butterflies. Just tell her that you’re trying to spruce up the yard for barbecue season.
You may find that it’s necessary to create a natural habitat or improve upon what you have. With birds for example, once you have found your vantage point, are there limbs that would obscure a clear shot at the birds? In the fall, after the leaves have dropped, it’s easier to get a clear shot but in summer, you may have to do some pruning. Tree and bush trimming is an ongoing process with bird photography.
As you edit your pictures and notice a wayward twig blocking the bird, just get your handy-dandy tree trimmer and snip away. But be mindful of the animal’s habitat when trimming trees and bushes. Don’t go overboard where the animals security and well being is compromised. Avoid exposing nests to a predator’s eyes.
Check with your local garden shop to see what flowering plants attract butterflies for your area. Get some guidance from someone with a green thumb and plant them in a manner where you can both beautify your yard and make a great tableau for your camera.
Flowering plants are an ideal habitat for a lot smaller creatures. The flowers attract butterflies, bees, and other insects. Butterflies, bees, and insects attract spiders and maybe even lizards, depending on where you live. All of which are great macro wildlife subjects. The flowers themselves can also be very photogenic, and as an added bonus, are much more sedentary and less skittish than many small creatures.
Look for opportunities to build natural perches. If you have a row of bushes and one hasn’t survived the winter, trim it down to make an open perch for birds to land on. Grab some of the fallen branches from the winter and fastened them low on tree trunks or use them to build up on a tree stump to create perches for birds.
If you don’t have a lot of activity, place a few bird feeders in the area. Find a location that has some low hanging limbs and set up a feeder or two or three. Check wildlife resources for recommendations on the best bird feed for you location. The National Audubon Society as well as your State chapter of the Audubon Society are good resources to learn about the year-round and migratory bird populations of your area.
When you start shooting, don’t focus on the feeder but instead the perches where the birds may hang out while they wait for their turn at the feeder. While it’s not taboo to snap a shot of a bird at a feeder, a photo of a bird on a tree limb looks and feels much more natural.
You will soon find that if you lay out feeders, birds won’t be the only visitors. Squirrels and chipmunks are likely to hang around too. While squirrels and chipmunks might not be that dramatic of a subject, they can be animated at times and become very photogenic.
You should also consider setting up some bird houses in addition to the feeders to keep your backyard wildlife refuge populated. You can build your own or buy the pre-built houses, but put a few out around your yard and hopefully you’ll get some resident photo subjects.
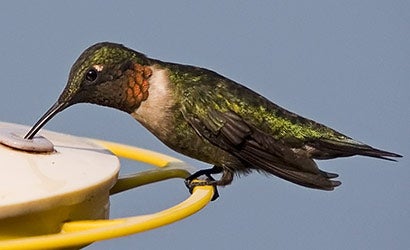
The summer months bring the hummingbirds back to North America. Set up a few hummingbird feeders to give them a place to stay during the summer. If you’re fortunate, dozens of hummingbirds will call your yard home and offer plenty of challenges for you and your camera. Hummingbirds will require a significant jump in shutter speed to capture their movements.
Hummingbird’s flight speeds are proportionally faster than larger song birds reaching flight speeds of 25-30 mph and dive speeds as fast as 60mph. They are also the only bird that can fly forwards and backwards. Their wings beat faster than any other bird. Don’t be surprised if they sound like a race car as they fly by. If you are chasing hummingbirds, look for a shutter speed of at least 1/1000th, or even faster if you want to freeze their wings in action. Try to catch them as they approach and leave the feeders. If available light prevents you from a faster shutter speed, remember to boost your ISO to maintain a higher shutter speed.
Apartment Dwellers, Don’t Give Up Hope…
So what do you do if you don’t have a backyard? What if your backyard is the apartment complex parking lot? Fear not. You may not be able to set up natural perches, large feeders or birdhouses but you can easily target the smaller creatures. Set up a windowbox flower bed to attract the butterflies, lizards and insects. You may be able to attract hummingbirds and small songbirds as well. There are several hummingbird and passerine feeders that are designed to hang from windows. Open a neighboring window and shoot them as they come and go from the feeder.
When All Is Said and Done…
After all the pruning, planting and planning, the most important thing to do is go out and shoot. If you need practice on a captive audience, visit your local zoo. Butterfly houses are becoming popular exhibits at zoos as well as lorikeet houses and other free-range aviaries (where you get to go inside and the birds fly freely). Consider a visit to these exhibits and practice. It’s a good way to learn your equipment.
Birds are the most common form of backyard wildlife probably because their population is so grand. Most will focus their camera and efforts on shooting birds. As you explore your backyard wildlife refuge, you’ll find yourself catching all sorts of visitors and passer-bys. As your local bird population gets established, migratory birds might visit your yard as the seasons change.
The wildlife possibilities that are available in your backyard are only limited by your imagination and species indigenous to your neck of the woods. While a trip to a national or state wildlife refuge is an experience in and of itself, the opportunity to shoot wildlife is as close as your backyard.
Resources
Here are a few wildlife and gardening-related websites to help get you started on your backyard wildlife safari. Also check to see what county, state and nearby national parks have an educational program or exhibit in your area. The teachers and instructors at these parks are usually very knowledgeable about the native fauna.
National Audubon Society: http://www.audubon.org/
National Wildlife Refuges: http://www.fws.gov/refuges/
Butterfly Gardens: http://www.ca.uky.edu/entomology/entfacts/ef006.asp/
Songbird Fact Sheet: http://www.fws.gov/birds/Songbird-Fact-Sheet.pdf/
Hummingbirds: http://www.hummingbirds.net/
Bird Watchers Digest: http://www.birdwatchersdigest.com/site/index.aspx/