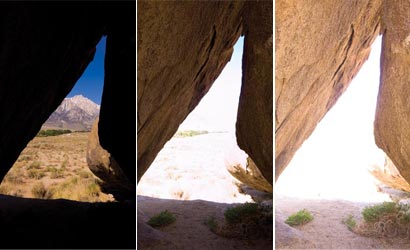
How-To Make HDR Images
How to combine several exposures into a single, gorgeous, high dynamic range image

It’s usually impossible to get lots of detail and good exposure from a digital camera when part of the scene is brightly lit and part is dim. Adobe Photoshop CS2, however, can combine multiple exposures of the same picture to make a single 32-bit image.
Within that merged combo file is enough information to give you a photo that seems beautifully exposed all the way from the shadows to the highlights.
When you’re shooting to make an HDR image, always use a tripod, and, holding the aperture constant, change the shutter speed to take an array of versions from dark to light. You’ll most likely get better results if you shoot in RAW. Converting to TIFF or another format isn’t necessary, although it can help.
To see more of Debbie’s Photoshop tips, check out her Dear Debbie blog.
Quick Tips
1. Not enough local contrast? In the Local Adaptation dialogue, pump up the Threshold. If it’s too washed out overall, raise the Radius. Just beware of those psychedelic haloes — unless, of course, you like them.
2. Are you into HDR but don’t want to schlep a tripod? The new Photoshop CS3 will solve your problem. Just merge your multiple handheld shots and the program will automatically align them and crop off the excess.
Want More HDR?
Get more detail on HDR imaging in Jack Howard’s How to Create High Dynamic Range Images.
Discuss HDR in the PopPhoto Forums.