Become a portrait mode pro
Striking a pose only gets you halfway.
This story was originally published on Popular Science.

Portrait mode photos are everywhere these days. Some shots look great, others… don’t. So if you want your pics to really stand out, there are certain techniques you need to know.
Since it was introduced with the iPhone 7 Plus in September 2016, some kind of portrait mode has been available on most flagship phones, including the iPhone XS, Samsung S10, and Google Pixel 3.
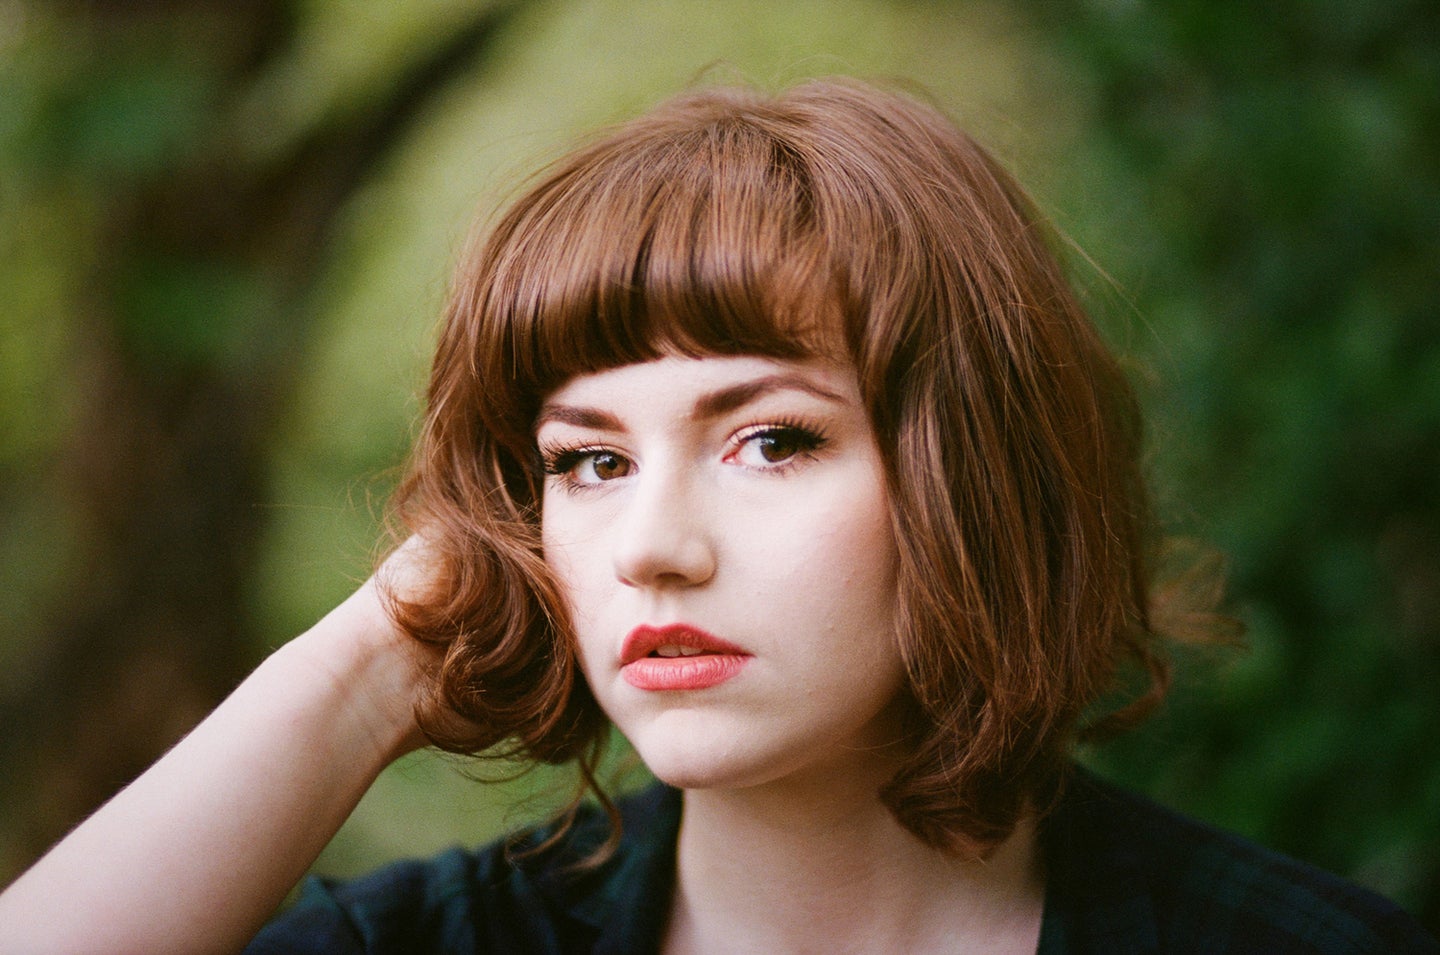
Either the phone has two cameras and uses the slight differences between the images to determine how far everything is from the camera (like the S10 and iPhone XS) or it uses a single camera, some technical trickery, and a lot of machine learning to figure out what’s the subject and what’s not (like the Pixel 3). No matter the method, the purpose is the same: to replicate the blurry background look of a portrait taken with a wide-aperture lens on a professional camera, like the photo below.

But because every manufacturer’s portrait mode uses software to mimic an optical effect, they’re not always reliable. Your phone has to clearly distinguish between the subject of the portrait (normally a person, but sometimes a dog, cat, or superhero model) and, well, everything else. When there’s a clear separation in terms of distance, contrast, and color, that process usually goes well, but when there’s any ambiguity, the software struggles. Let’s look at an actual portrait mode shot.

This one’s actually pretty good. For the most part, the iPhone 7 Plus that shot this image managed to work out what was Harry and what was not-Harry. Still, there are a couple problem areas.

If you compare my two shoulders, the one on the right is clearly separate from the white wall; it looks sharp, and as it should. The shoulder on the left, however, is off. My phone just wasn’t able to correctly distinguish between dark-Harry and dark-not-Harry, so it ended up blurring my black sweater into the dark background.
It’s the same story with the side of my face. Not only has the dark hair at my temple been blurred into the dark background, but there’s also a thin white line around my ear and sideburn, where the phone assumed some of the painting behind me was part of the foreground.
To be clear, I’m not trying to bash portrait mode. It’s incredible technology and the results can be super-good. I consider the photo above totally usable, but it’s a great illustration of where portrait modes can get things right, and where they can get them wrong.
How to make portrait mode work for you

Now that you have a better understanding of what portrait modes are trying to do (and where they’re likely to make mistakes), we can look at proper technique. You can’t just throw your phone in portrait mode, start shooting, and expect good results.
It’s all about the background
Because portrait modes blur the background, it’s the background you really need to focus on. You’ll want to pick one that contrasts your subject. If the person you’re taking a portrait of is wearing dark clothing, you’ll want to find a light background. If they’re wearing light clothing, put them in front of a dark one.
And it’s not just color contrasts we’re looking for. If you can find a contrast in textures, that’s even better. For example, if your subject has soft, floppy hair, you’ll get the best results if you use a plain background—a soft, textured background will end up blurring into their hair. On the other hand, if your subject is wearing a plain white T-shirt, have them stand in front of a hedge or another highly textured surface. Your phone will have an easy time figuring out the difference, and the background will look great in the final image.
Keep your distance
Portrait modes work best when your subject is between four and six feet away from you. Outside that sweet spot, the techniques used to separate the subject from the background won’t work properly.
The distance between your subject and the background is even more important. The bigger the physical separation between the two, the easier it will be for your phone to accurately gauge depth and take a better photo.
Vary the blur
The worst portrait mode shots are the ones where there’s just too much blur, and every transition looks soft and unnatural. The good news is there’s an easy fix: dial down the amount of blur.
Apple, Samsung, and Google all offer a way for you to adjust the amount of blur applied to your images. Use it to find the right amount for each image you shoot.
On an iPhone XS, open a Portrait mode photo in the Camera Roll, tap Edit, and then use the Depth slider to adjust the blur effect.
On a Samsung S10, you can adjust the depth slider while you shoot, or afterward by opening your photo in the Photo Gallery and selecting Change Background Blur.
On a Google Pixel 3, open an image in the Photo Gallery, then tap Edit and Depth. Use the sliders to adjust the blur, and even select a new focal point.
Remember that portrait mode portraits are still portraits

Images shot in portrait mode might look fancier than regular photos, but a bit of background blur can’t make up for bad technique. If you want to take a good photo with your phone’s portrait mode, you also need to take a good portrait. How? Glad you asked.
Use shade and windows
For portraits, you’ll find the best light either in the shade outside (like under a tree or in an alley) or coming through a big window. Both settings provide wonderful, flattering, soft light that still leaves enough definition for your subjects to look good. Hard light, on the other hand—like that from direct sunlight—creates nasty, harsh shadows, especially on people’s faces. Position your subject somewhere shady or looking at a window, and you can’t go far wrong.
Talk to your subject
The best portraits you’ll take won’t be the awkward, staged ones, they’ll be the natural ones; the ones where someone is smiling after they’ve just laughed or have thought of something witty to say. The easiest way to get photos like these is to talk to your subject, keep making jokes, and simply never stop chatting away. Don’t let it become some silent, fashion-esque shoot.
Shoot lots
And don’t stop shooting. The more photos you take, the better chance you have that at least one of them will be great. Portraiture is kind of a numbers game. I have thousands of photos of gorgeous people looking utterly ridiculous because they’ve just sneezed or I’ve caught them mid-word. Whenever you’re taking portraits, shoot a dozen pictures for each look, location, or pose, then choose the best one. Digital photos are basically free.
Don’t force it
Portrait modes don’t work in all situations, or with all subjects. If you’re trying to take photos of a moving subject, or in low light, it won’t work well, if it works at all—every manufacturer’s portrait mode kicks up a fuss if it can’t find a good subject to focus on.
Ultimately, portrait modes are a great technological solution to taking photos that isolate the subject, but because they rely on software, not optics, you have to work with them to get the best results. At least for the time being, they won’t replace dedicated portrait lenses—but they’re getting close.
