Software Workshop: Adding Contrast for More Dramatic Landscape Photos
Use multiple apps on the same image to get the tone right
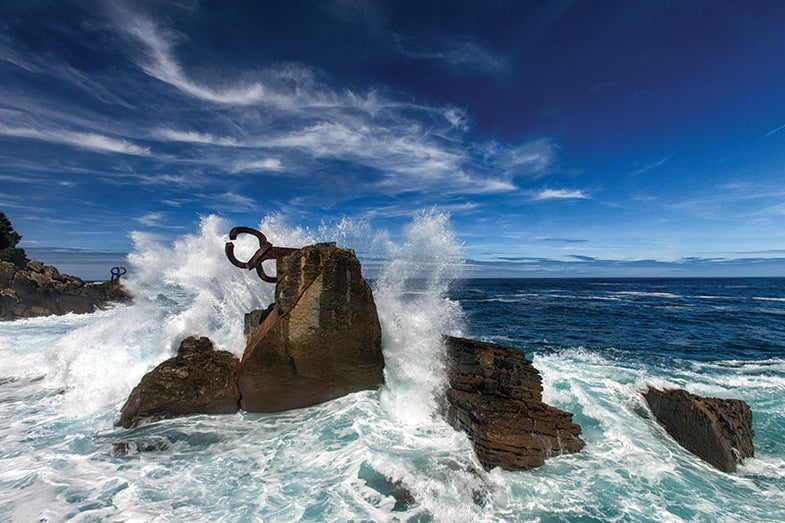

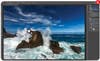
Tennant captured these waves crashing against rocks and the iconic “Wind Combs” sculpture by Eduardo Chillida in San Sebastian, Spain. Photo: Chris Tennant
Have you ever taken a photo of a vibrant landscape scene only to be disappointed by a lifeless result? And then noticed that adding contrast alone won’t fix the problem?
Simply sticking to the contrast slider can easily impart an unnatural, overdone look. After all, photographs can suffer just as much from having too much contrast as from not having enough of it. As with many image editing tasks, the trick is to strike exactly the right balance.
Often you’ll find it useful—and even necessary—to use several kinds of software in editing a single image to achieve the look you want. No matter the application, there are a variety of ways to control tonal contrast. Adjustments made in Adobe Photoshop Lightroom 4 or 5, Photoshop CS6 or Creative Cloud, and Nik’s Color Efex Pro 4 plug-in can work hand-in-hand by helping you make progressively more targeted corrections. You’ll learn to create a finished photograph that not only pops, but also maintains the realism of the original scene.
**Step 1 **
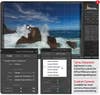
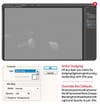
Start with basic RAW adjustments. Find your image in Lightroom (we’re using version 4, but 5 will work, too). Head down to the Lens Corrections panel and check the Enable Lens Corrections box to remove optics-induced distortion. For more pleasing blues, which dominate this seascape, change the profile to Canon’s Camera Landscape—other camera makers offer similar presets—in the Camera Calibration panel. Finally, use the Crop & Straighten tool’s Angle slider to rotate the image until the horizon is level.
Step 2
**
**
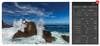
In making global adjustments, the most obvious way to increase contrast is to use the Contrast slider in Lightroom’s Basic panel. While adjusting it, keep an eye on the histogram to avoid clipping highlights or shadows. After increasing the Contrast slider (set to +25 here), make a similar decrease in the Highlights (–25) and boost the Shadows (+25) to preserve detail in each region; for more midtone contrast, increase Clarity (+25). Use each slider with restraint to build a good foundational image.
Step 3
**
**
With the initial adjustments in Lightroom complete, it’s time to import the image into Photoshop CS6 (or CC). Two of the most critical adjustments to any image are global contrast and color cast corrections—this step achieves both. First, create a new Levels Adjustment layer. Then adjust each color channel (red, green, blue) separately by moving the black- and white-point sliders to the edge of the histogram. When done properly, setting the contrast will naturally saturate colors and restore vibrancy.
Step 4
**
**
Contrast adjustments do not always have to be made globally. Using simple masks in Photoshop for local adjustments, you can target changes to draw attention to (with higher contrast) or away from (lower contrast) specific areas. Here the rocks are getting a bit too dark in the shadow regions. Lighten them using a dodging layer: Create a new blank layer and fill it with 50% gray (Edit > Fill). Next change the layer’s blend mode to Soft Light. Then, with a soft, white brush set to low opacity (10%), paint to selectively lighten the shadows. (You can burn an area that is too light simply by changing the brush to black.)
Step 5
**
**
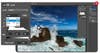
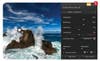
Among the many plug-ins for Photoshop, we like the tonal contrast filter in Nik’s Color Efex Pro 4 for its exceptionally good contrast control. This filter provides another degree of refinement by targeting highlight, midtone, and shadow areas separately. First create an adjustment layer (Filters > Nik Collection > Color Efex Pro 4) and increase the contrast in the Highlights (+30) and Midtones (+30). This brings out detail and texture in the crashing waves. But to avoid affecting the sky, where adding structure to the clouds would have given the whole image an unnatural look, add a mask to the layer (Layer > Layer Mask > Hide All) and with a white brush paint on the mask to reveal only the water.
Final Step
**
**
Notice that with your contrast properly set, the colors are rich and saturated—no further adjustments are necessary. Back in Photoshop, it’s time to put the finishing touches on the image. Add a slight vignette to the bottom half to keep the viewer’s eye focused on the center of the image and prevent it from wandering out of the frame. One simple way to do this is to create another dodging layer (see Step 4). We used a soft, black brush set to low opacity to paint (Burn) in a vignette. After cloning out sensor dust spots using the Spot Healing Brush tool, and then sharpening the full image (Filter > Sharpen > Smart Sharpen), the finished photograph is ready for display. Making use of several complementary methods of contrast control, we’re able to profit from what each app does best and create a more visually dynamic image.
A physicist with a longtime passion for photography, Chris Tennnat lives in Virginia with his wife and three boys. His award-winning landscapes and waterfalls can be seen on his website.