Software Review: Adobe Photoshop Lightroom 4
Lightroom 4 fixes video, adds books, and more
By now, Adobe Photoshop Lightroom needs little introduction; most of us are familiar with it, as well as other similar RAW workflow programs. It’s the type of software that can handle most of a RAW shooter’s editing process: It imports and catalogs, processes, and outputs.
Over the years, Lightroom has added some longed-for functions, and now, in version 4, can import, play, and trim video, map your images and tag them by location, and help you create books. This version ($80, direct, for an upgrade; $150, full program) brings a major overhaul to the Develop module and much-improved RAW processing, as well. New features such as true Curves adjustments and Soft Proofing, plus targeted adjustment tools for noise and white balance, make a visit to Photoshop less necessary than ever.
New Developments
Toss out most of what you knew about processing RAW files in the Develop Module’s Basic panel, because it’s been totally revised and reprogrammed. The conversion engine, Process Version 2012, does away with some sliders and revises the functions of others.
Such a major overhaul will inevitably cause some consternation for new users. (So much so, in fact, that we decided to explain it in this month’s Software Workshop, page 42.) The new system means it is much easier to make precise adjustments to the range of tones you want to affect.
Annoyingly, the sliders in the Basic panel in previous process versions worked on various scales. Brightness ranged from –150 to 150, Contrast from –50 to 100. Weirder still, Adobe’s default adjustments landed on various places on these scales, so you could never be sure where the neutral starting point was, and it was hard to go back to the default. Not anymore. All the sliders now begin at zero—and to return there quickly, you simply double-click the slider’s name. Each of the sliders makes the image lighter when you move it to the right, and darker to the left, so the whole process is now far less confusing, particularly for those new to RAW.
Curves wasn’t a strong suit of Lightroom’s either—it limited you to adjusting the RGB channels simultaneously, and you couldn’t add points to the curve. But now you can adjust individual color channels and add points, just as in Photoshop. So you can target your adjustment for a narrow range of tones and also use the power of Curves to make creative adjustments for new presets. Curves is extremely powerful in Photoshop, but now that you can bring this toolkit to bear on all the data in a RAW file, it’s even more so.
Heavy users of Lightroom will also adore the new soft-proofing function, which allows you to preview—while still in the Develop module—what your image will look like using a particular printer or screen profile. Check the Soft Proofing box and choose a profile to tailor your corrections to output. This tool is huge for photographers who want color accuracy but want to avoid a back-and-forth trip to Photoshop.
And Lightroom’s soft proofing has more accessible tools than Photoshop: Mouse over an icon in the upper right corner of the histogram, and you’ll see a warning of the hues that your chosen color space or profile can’t reproduce. Lightroom has also implemented a new system of Proof copies (a specialized kind of Virtual Copy) to make it easy to keep track of your output-corrected images.
Video Gets Real
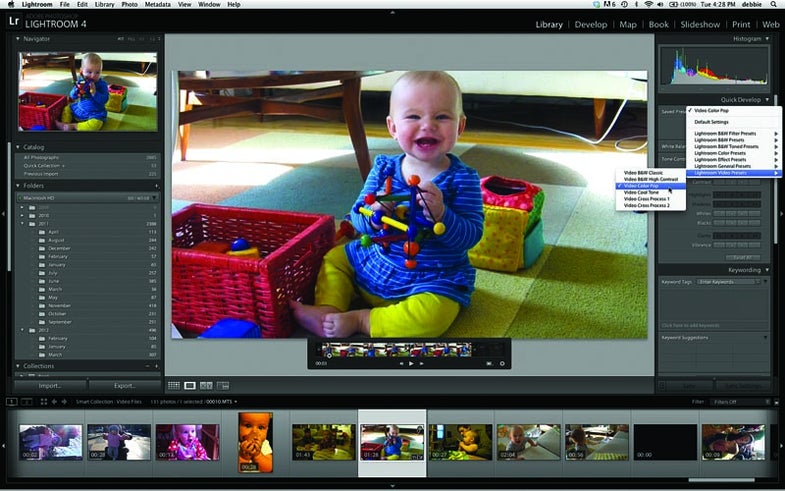
In Lightroom 3, video seemed like an afterthought. It imported a very limited selection of video file types and required an external viewer to play your files. You couldn’t do much besides naming and tagging these files. But we love the new video features in Lightroom 4, which finally provides a good method for dealing with the kinds of high-quality, short video clips that many enthusiasts shoot. No, you can’t string them together, but you can trim them and do fairly sophisticated color correction.
You can use the Quick Develop panel in the Library to make adjustments to the color and exposure of your video, or grab a still and use many of the Develop module’s tools on that frame to create a preset that you can apply to your whole video.
For photographers who don’t do enough video editing to need a high-end program that allows intricate white-balance corrections or the use of Curves on a video file, this is a boon. Though we’re still holding out for the day that you can add videos to a photo slide show within Lightroom.
New Maps and Books
Lightroom 4 introduces two new modules: Map and Book. The former uses GPS coordinates to add pictures to a Google map. If your camera records this information, using the maps is automatic. You can also drag your images onto the map to tag them with that location. Locations are searchable by address or, in many cases, by landmark or neighborhood.
To make really good use of the maps, you can combine them with your GPS-enabled smartphone. Get an app that allows you to record a tracklog, then use the Maps module to sync this with the images from your non-GPS camera. You’ll end up with your photos tracked on the map, and, better still, location information recorded in the metadata. We really appreciated the addition of the Book module. Adobe has partnered with Blurb for this—you can choose paper stock and cover options within the module, and you’ll see an estimate of your book’s cost as you proceed. The creation process works well for making simple books with one or a few photos per page, so for an art book or a portfolio, it’s great.
However, the preset template options are very limited (for now), and there are no automatic presets that yield a book designed to have a varying number of images throughout. We’d love to see more template options—not all of us have the graphic design chops to quickly choose a pleasing series of layouts on our own.
Facing the Competition
There are plenty of options in the digital workflow software market.
Corel acquired Bibble last year and relaunched it as AfterShot Pro. It lacks video capabilities, though, and now that Lightroom allows targeted adjustments for white balance, AfterShot doesn’t have much on Lightroom.
Other programs, such as ACDSee Pro 5 and Cyberlink’s PhotoDirector 3, also lack video and geotagging capabilities. Nor can either of these match the elegance of Lightroom’s interface or the overall quality of its results. Apple’s Aperture 3 led Lightroom in video, geotagging, and books. At this writing, no update has been announced, but we hope to see one soon.
All of this competition means good news in terms of prices: Aperture has dropped to $80 from $200 at launch, AfterShot is down to $60 from $100; and ACDSee costs $75, down from its initial $240. (The recently launched PhotoDirector is $150.) Lightroom 4, at $150, costs half as much as its predecessor did when it came out—and if you’re upgrading, it’s closer in price to its competitors.
But with its new RAW processing tools and best-of-breed video editing, Lightroom 4 definitely comes out on top. For now.
Specifications
Minimum system: Mac: Multicore Intel processor, OS 10.6.8 or later, 2GB RAM; Windows: Intel Pentium 4 or AMD Athlon 64 processor, Vista or Windows 7, 2GB RAM.
Price: $150 for the full version; $80, upgrade.
Info: adobe.com