Software Hands On: In the Zone
LightZone software gives the old-school Zone System a totally modern twist.
Lots of photographers couldn’t care less about removing their ex from a photo, adding text, or taking years off the life of a subject. What they really want to do is fix the things that they could always fix in the darkroom — contrast, tone, and color. Light Crafts’ Light-Zone 2.0 is a program for those who’ve gotten fed up with learning software that has far more tools than they could ever use, and who instead want more control over the way their pictures look.
The heart and soul of the program is the ZoneMapper. Based on Ansel Adams’ Zone System, the ZoneMapper gives you exacting control over the amount and location of contrast in your photo. Represented by a black-to-white gradient, it works like this: Points on the gradient correspond to a smaller, grayscale representation of your image called the ZoneFinder, and when you mouse over the gradient, the corresponding zones in the ZoneFinder light up. To brighten or darken those tonal areas, simply click to create a handle, then drag it up or down on the grayscale to expand or contract the zones of the scale. Much more intuitive than Curves, you can make minute or grand adjustments very quickly.
The program treats RAW (almost all types), JPEG, and TIFF as equals, and saves your nondestructive edits as LZN files. If you like your adjustments and want to use them again, you can easily save them to drop on other images in a batch.
This second version of the software ($250 download, www.lightcrafts.com), has a much-improved interface and browser. It always works in a wide-gamut color space and it automatically converts images in other color spaces to it. It also lets you color-manage your print process and tag and convert images to other color spaces on export.
With its browser and many great tools, LightZone 2.0 may not be your total solution — there’s no redeye removal tool or method for doing batch resizing, for example — but it’s an excellent RAW converter and imageeditor. With Adobe Lightroom, Apple Aperture, and Nikon Capture NX, there are many alternatives to Photoshop that are aimed squarely at dedicated photographers. This one’s got a free trial, so it’s well worth finding out if Light Crafts’ modern Zone System will work for you.
The LightZone Top 5
1. Never Ruin a Picture
If you’re sick of Saving As over and over, or if Photoshop’s Layers have never made sense to you, LightZone’s system of piling up your fixes and keeping them always-modifiable will be appealing. You’ll never permanently mess up a picture again, and you can save your favorite sets of fixes to apply to other images.
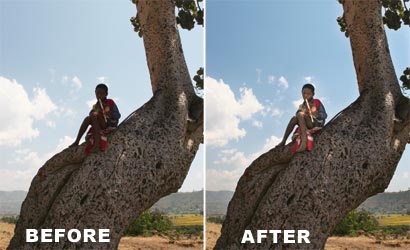
2. Contrast Where You Want It
With this digital version of the Zone System, you can add contrast to your clouds without losing the shadows on the ground — no masking required. Just tweak the tones you think need changing.
3. Select Like a Pro
One of the most taxing aspects of photo editing is selecting areas to be changed separately. Pick one of LightZone’s three selection tools, then click points around what you want to select, and watch as the program builds the shape for you. Tug in or out on the automatically formed interior ring to modify the selection’s feathering.
4. Edit All Files
Gone are the days when you need to convert and edit your RAW files in a separate workflow from your JPEGs. This program treats them all the same, letting you edit and adjust all your files using the same toolset.
5. It’s All at Your Fingertips
Forget a thousand menus and keyboard shortcuts — you can see everything you can do to your picture in LightZone’s main window, thus making it much easier and faster to edit a photo and move on to the next.