Extreme Depth of Field with Helicon Focus
New software lets you to create images that are tack sharp from right in front of the camera to infinity -- even with macros and telephotos!
We may earn revenue from the products available on this page and participate in affiliate programs. Learn more ›
Extreme depth of field used to be the province of pinhole shooters and pricey view cameras, but now anyone with a manually-focusing camera, a tripod, a computer, and $30 can create images that are tack sharp from right in front of the camera to infinity — even with macros and telephotos!
The secret to this new technique lies in the processing engine of Helicon Soft’s nifty program, Helicon Focus, which takes the in-focus areas of multiple exposures of the same subject — manually focused on different planes throughout the field of view — and combines them into one, completely focused image with virtually unlimited depth of field. While the algorithms used to create final images are undoubtedly complex, photographers using Helicon Soft will find its operation quite simple.
Here are the three basic steps:
Step One: Find a subject that can be enhanced with an extensive depth of field. You might immediately think of micro and macro subjects, where depth of field is always minimal. Who hasn’t taken a close-up of a flower and wished to have everything from the tip of the anther to the last dew-dropped petal in focus? Now you can. But don’t just limit yourself to small subjects. Even landscapes can benefit from extreme depth of field. Imagine kneeling down before a mountain lake, keeping foreground flowers and background mountains all in focus without tilting lenses.
In fact, Helicon Focus allows photographers to capture images impossible even with huge view cameras. If a scene includes one object occupying a vertical plane near the camera and others in vertical planes great distances away, extremely small apertures are an often-employed solution. But Helicon Soft’s program will produce much sharper results. The traditional technique of stopping down to f/16 or beyond and using the hyperfocal distance will render a scene reasonably sharp, creating a seemingly large depth of field. Remember, sharpness is relative. Depth of field has to do with circles of confusion, the technical term for what viewers accept as slightly blurred but apparently in focus.
Try this experiment: inspect an object at infinity in a picture taken at, say, f/16 and focused for the hyperfocal distance; it will not have the same sharpness as when focused at infinity itself. That’s because distant subjects (and those close at hand) are mostly in focus, having fairly small-sized circles of confusion. With Helicon Focus, everything can be tack sharp — the nearest tree and the distant hillside — because the circles of confusion in the final, processed image are tiny. The results are pleasing and, if you think about it, natural. Isn’t this the way our mind perceives and remembers scenics — everything in focus?
Step Two: With your camera solidly mounted on a tripod, take multiple pictures, focusing progressively from the far away to the close by. I suggest that, after turning your auto focus off, you focus on the nearest subject, noticing the distance indicated on the lens barrel. Then focus on the farthest point and work backward. Take one picture; then refocus closer. Take another picture; then refocus closer, and so on. Don’t base your refocusing on the lens’s distance scale; instead, turn the focus ring in equal increments (degrees) between the distant end and the closest point. Also, keep the manual exposure the same for all images, and, as you turn the lens progressively back toward the closest part of the subject that you want to be sharp, try to keep your camera and tripod still. (If I’m outside, I often push down on the tripod, sinking the legs into the ground.) You may take as few as three or four pictures, or you may need many more. The software will process any number of shots.
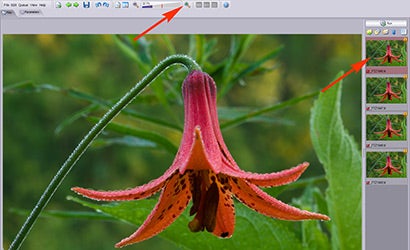
Step Three: Believe it or not, now comes the easiest step. Load the images into Helicon Focus and let it do its thing!
The program is incredibly simple, so much so that I was processing images within minutes of startup. What’s even more amazing is that slight movement from image to image is handled by the software (both camera and subject movements). Further, Helicon Focus corrects for the progressive magnification that occurs when you focus from infinity back toward the camera. And don’t worry about the slight decrease in exposure that happens as you refocus some lenses. Helicon Focus even corrects for exposure differences. The accompanying photograph of the male giant water bug reveals all of these corrections. I photographed this hemipteran while he was perched atop a moving piece of wood!
After a brief time (ranging from less than a minute for a few, small files to several minutes for numerous, large files), voila! You will have a photograph with incredible depth of field. The real fun is zooming in to 100 percent, where all the details from close-at-hand to far away are in tack sharp focus!
Here are a few pointers I have found from my experience using Helicon Focus:
• Using a fairly small aperture works best. For close-ups, try using f/11 or f/16 and changing the focus very little. For scenics, back off to f/5.6 or f/8 — often your lens’s sharpest setting — and refocus four to eight times.
• One effect impossible to create any other way is extreme depth of field of your macro subject with the background rendered completely out of focus. Shoot with larger apertures — f/5.6 or larger — and refocus many times between the back and front of your subject, intentionally shooting with the background completely out of focus.
• Consider shooting in RAW and then processing all the images using the same settings, converting to TIFF files. Helicon Focus will process RAW files as well as JPGs and TIFFs; I prefer, however, to use a separate RAW converter and bringing 16 bit TIFFs into Helicon Focus.
• Sometimes camera or subject movement is too much for Helicon Focus, and sometimes intricate subjects, e.g., ones with many crossing lines and patterns, cause artifacts. It seems that most ghosting and other artifacts occur along well-defined edges in the picture, and I have found that these often can be fixed with the cloning and healing tools in Adobe Photoshop. Helicon’s Pro version of the program also offers versions of these corrective tools.
• Generally, for macro and micro photographs, more images focused in smaller increments are required than for landscape photographs.
• All ranges of lenses can be used. Macro lenses are great for small subjects, and wide angle lenses work well for scenics. Telephotos can also be used to isolate a part of the scene while still maintaining extensive depth of field.
• Don’t hesitate to run the program on older computers. The company’s web site says that images over 8 megapixels require at least 512 MB of memory — not a whole lot. A machine with at least 1 MB of RAM would seem preferable. If your machine is older, processing may take a bit longer, but the time will not be prohibitive. I have run Helicon Focus, for example, on a 2 year old Pentium 4 with 1 MB of RAM, and a half dozen high resolution, 16 bit TIFF files from a Nikon D2x ($3495, street) take about three minutes to process.
• Two main parameters for conversion are radius (from 1 to 30) and smoothing (from 1 to 10). Higher radius settings decrease detail in the final image, and lower settings increase detail. I recommend using a lower radius setting, e.g., 3, for highly detailed subjects. The smoothing parameter determines how well-blended the images are in transition areas. You may want to keep this fairly low, e.g., the default setting of 4, but you may find some artifacts left from processing. In this case, either touch them up using an image editing program or reprocess the image with a slightly higher setting. Higher smoothing settings result in less sharpness in the final image.
Helicon Focus is available in the “Lite” or “Pro” versions, which are compatible with both Macs and PCs. Both versions handle unlimited images, offer dust mapping, and read and write 8- and 16- bit files. The professional version has built-in retouching and batch processing capabilities. The basic version costs $30 for a one year license or $115 for unlimited use. The pro version is $70 for one year and $250 for unlimited use. For more information or to purchase Helicon Focus, visit www.heliconsoft.com.
–David FitzSimmons is a freelance photographer and writer as well as an Assistant Professor of English at Ashland University in Ashland, Ohio. His images have appeared on regional postcards, in international calendars, and in a variety of periodicals. Check out more of David’s work at www.fitzsimmonsphotography.com.