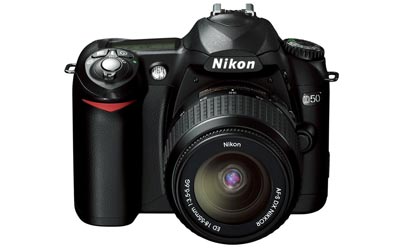
10 Things You Should Know About the Nikon D50
This little camera's got a lot. Here's how to get the most from it.
We may earn revenue from the products available on this page and participate in affiliate programs. Learn more ›
Of course the Nikon D50 is popular. It’s a heck of a camera (see Hotshot Shoot-Out, March 2006), and, for a starter DSLR, a heck of a buy ($550 street, body only). It even gives the Nikon D70s a run for its money, with virtually all of its older sibling’s basic features, including a robust burst mode, accurate exposure metering, and iTTL electronic flash control.
But getting the most out of this camera takes more than just reading the manual and fiddling with the controls. It requires an exhaustive analysis. I can say that, because I’ve done it. The result: 10 tips to help you do more with your Nikon D50.
1. Look, No Wires
The D50 can’t trigger Nikon SB-600 and SB-800 strobes or the new SB-R200 speedlights wirelessly for multiple flash setups. But if you calculate exposure yourself (or if you own a flashmeter), you can use any brand of external flash with a built-in slave sensor, or attach a slave trigger to your external strobe. The NIkon D50’s flip-up flash automatically triggers all of the slaves. To minimize the built-in’s effect on the scene, go to the Custom Setting menu and choose CSM 16: Flash Mode, then set the manual output level as low as 1/16 Power.
To use the D50’s iTTL automated flash features with Nikon-brand flash units, buy the new SU-800 Wireless Speedlight Commander ($250, street). It can control an unlimited number of speedlights arranged in up to three groups, in four different channels (to minimize conflicts with other photographers), at up to 66 feet.
2. Need an Assist?
Frustrated when the Nikon D50’s focus-assist lamp doesn’t help in dim light? The problem may be the focusing mode you’ve selected — it doesn’t work in AF-C (continuous autofocus). Although AF-C is great for subjects that move as you frame, it can trigger a spate of refocusing, so the AF-assist LED is disabled. Switching to AF-S (single) reactivates the lamp. If the subject moves, you might have to press the shutter release again to refocus.
Also avoid the AF-A (automatic) mode in dim light; if the subject moves, it can switch your D50 to AF-C from AF-S without notice. The AF-assist lamp is disabled in the Sports and Landscape Digital Vari-Program (DVP) scene modes, too, so use Shutter Priority instead.
3. Get Focused
The Nikon D50 beats the D70s with the AF-A option, and even the AF modes the two have in common work differently. When you partially depress the shutter release, the Nikon D50 automatically adjusts focus according to your AF mode (see above), but it won’t take a picture until the focus is sharp, a mode called “focus priority.” This differs from the D70s, which uses “release priority” in AF-C mode; it will let you take a picture even if it’s slightly out of focus. That may be preferable with sports and other fast-moving action, because a slightly fuzzy picture at the critical moment is still better than nothing.
To get release priority on your Nikon D50, go to the Custom Settings menu, choose CSM 14, and program the AE/AF-L lock button on the back of the camera to perform autofocus lock (AF-L) only. Then, hold down the lock button as you press the shutter release. The camera will respond as if it were in release-priority mode regardless of the original setting.
4. Screen Saver
Unlike other Nikon DSLRs, the D50 doesn’t come with an LCD protector. One inexpensive solution is to apply a screen “skin”, like those used for personal digital assistants. Sold at office supply stores, they’re easily trimmed to fit the Nikon D50’s 2-inch LCD. Another solution: a three-sided hood. We like the H-D50 FlipUp LCD cap from Hoodman (www.hoodmanusa.com, $35). It clips onto the D50’s eyepiece flange and lower edge, which helps viewing in bright light and protects the LCD. The Pop-Up Shade from Delkin Devices (www.delkin.com, $35 and up) is another nice snap-on.
5. What’s shakin’?
Hear that faint rattle as you gently shake your D50? It’s the orientation sensor, which determines whether you’re shooting in vertical or horizontal, and lets the Nikon D50 embed this information in the image file. When you review images on the LCD, the camera orients them properly. The sole drawback: When you’re reviewing images in the camera, vertical shots may be rotated and fitted to the LCD’s shorter dimension. To see your previews full-size (but sideways), go to the Setup Menu, choose Image Rotation, and set it to Automatic. Then, visit the Playback menu and, under the Rotate Tall option, pick No. The correct orientation will be stored in the image file, but the D50 won’t use it in image review.
6. No Comment
The Image Comment feature seems like a good idea until you try to use it. Entering text through the camera’s menu system can be challenging, even for those photographers who are adept at two-thumb text messaging.
A better bet is Nikon Capture software ($100, street), which includes Capture Camera Control. Link your D50 to your computer with the camera’s USB cable, and change camera settings, including Image Comments, right from your keyboard. From the utility’s Camera menu, choose Edit Image Comment and type in up to 36 characters.
7. ISO Gone Wild
Don’t you just hate it when your camera changes your carefully chosen basic settings? Then beware the Nikon D50’s ISO Auto setting, which automatically boosts the ISO for optimal exposure when your current ISO is too low. The problem: When you think you’re shooting at ISO 400, you may not want a grainier ISO 1600 shot. And the ISO Auto alert in the viewfinder and top panel LCD is easy to miss.
You can disable this feature with the Custom Settings option CSM 10. Better, you can spell out under what conditions you find the automatic ISO adjustment acceptable: An additional option in CSM 10 lets you specify the minimum shutter speed before ISO increases.
8. Don’t Feel the Noise
Despite the Nikon D50’s above-average performance at high ISOs, any digital camera will pick up random noise at ISO 800 or above. Noise is even worse with exposures longer than 1 sec, but you can minimize it with the D50’s Long Exposure Noise Reduction feature. Activate it from the Shooting Menu by choosing Long Exp NR and switching it ON.
The D50 uses a process called Dark Frame Subtraction. Basically, the camera takes a second, blank frame, and compares it with your original picture; grainy speckles common to both are deemed noise and removed. The viewfinder remains blank during this process, and a blinking message reading “Job nr” appears in the viewfinder and the top panel LCD. Noise reduction can cause a slight loss of detail, and 30-second exposures can stretch to 60-second pauses while the Nikon D50 does its stuff.
9. Folder Fodder
By default, the D50 will store its images on your memory card in a folder named 100NCD50. Each folder holds 999 shots, and when one is filled, the Nikon D50 will create a new default folder, numbered one higher (e.g., 101NCD50.)
But what if you use the same memory card in several D50s, or you want a different folder for each day of your vacation? You can create folders, rename existing ones, and remove old ones, plus select the folder for new photos. Switching among folders is fast and easy, although creating or renaming them can be a pain.
To create a new one, choose Folders from the Setup menu and scroll down to the New option. The Nikon D50’s painful text entry screen will appear, and you can usually enter the name of the new folder in a minute or two. Use the same screen to rename a folder. Then, to switch among folders, access the Folders screen again, choose Select Folder, and scroll down to the folder you want to use for subsequent images.
Tip: You can choose to play back a specific folder (or choose All) in the Playback menu under Playback Fldr.
10. Downsize This
For e-mailing or posting shots on the web, the Small Pictures function is a handy way to create byte-saving miniatures. Shrinking a batch of images is a simple, two-step process. Your original images are untouched.
First, access the Select Pictures feature of the Print Set option from the Playback menu. Use the thumbnail images, the multiselector cursor control, and the Enter button to mark the photos you want to shrink. Return to the Playback menu and choose Small Picture. Select Choose Size, and opt for 640×480-, 320×240-,or 160×120-pixel copies. Then transfer the small images to your computer for e-mail or web use.
The D50 highlights shrunken pictures with a gray border during picture review, so you won’t mistake them for full-size originals.