Software Workshop: Tethered Shooting with Adobe Lightroom
Preview your images' true color and tone by tethering your camera to your computer
_
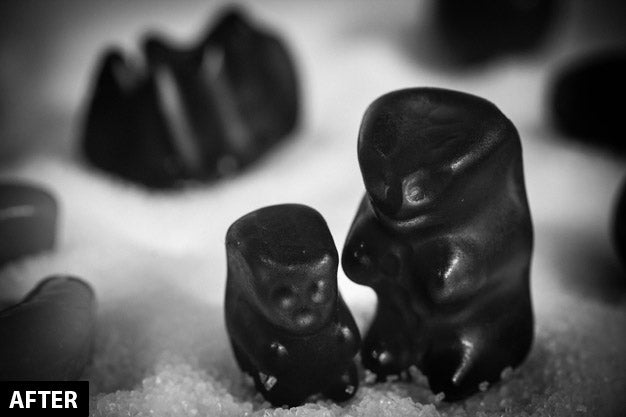
Use Adobe Photoshop Lightroom 3 or 4 to capture remotely and process images as you shoot. Photo: Debbie Grossman_
Tethered shooting can be a beautiful thing—having your camera connected to a computer as you photograph brings a host of benefits.
If the monitor is color-managed, you’ll be able to see a true preview of your images’ color and tone. Your photos can be copied simultaneously to the computer’s hard drive and to your memory card as you capture, so you’ll have a backup before you even finish shooting. Since your preview is on the monitor, you’ll have much more real estate for checking focus, and chimping on the larger screen lets you have a real sense of whether you’ve captured what you need.
Even better, with software such as Adobe Photoshop Lightroom, you can process all of your RAW files in real time, rather than after the shoot is over.
So if you plan to do something dramatic, like the RAW and black-and-white conversion shown here, you can adjust exposure, lighting, and composition using a more accurate preview of your finished product, instead of just relying on your imagination.
All it takes to shoot tethered is a camera you can connect to a computer (usually via USB cable), and compatible software. Try it first at home with a simple setup. If you want to shoot in the field, you can find accessories to help, from tripod mounts that support a laptop to screen hoods that hide the day’s brightness.
Here is a project to get you started shooting tethered in Lightroom, plus instructions for doing a preset RAW conversion as you work.
Step 1
(CLICK FOR FULL-RES)
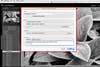
Set up a still life with your computer (desktop or notebook) nearby, turn the camera on, and connect it to the computer. In Lightroom 3 or 4, go to File > Tethered Capture > Start Tethered Capture. Fill in your session name and destination. Choose your metadata template, add keywords to tag your images, then click OK to start shooting.
Step 2
(CLICK FOR FULL-RES)
After tethered shooting is initiated, you’ll see the tethered toolbar pop up. If your camera is awake and properly connected, its make and model will appear on the left. You’ll see your exposure and white balance settings, but you can’t change those from the toolbar. Click on the shutter button to take a picture. Your image will transfer to the computer and appear, selected, in Lightroom.
Step 3
(CLICK FOR FULL-RES)
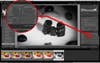
Keep shooting until you get your exposure settings and lighting right. But don’t worry too much about your composition or setup at this point. Instead, develop an image to help you execute your final product. Click to select the last properly exposed image you shot, and switch to the Develop module. Process the image the way you’ll want your final picture to look. You can pump up vibrance, tweak your white balance, add a little vignette—everything you normally do when you work on a RAW file. To hide the tethered shooting toolbar as you work, hit Ctrl (Command) + T on your keyboard. Your tethered connection will remain active.
Step 4
(CLICK FOR FULL-RES)
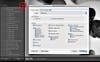
Now use your current develop settings to make a Preset. Click the plus sign (circled) in the Presets panel to do so. Hit the Check All button to make sure all the adjustments you’ve made to your current image will be applied to your subsequent shoot. Name your preset, and tell Lightroom where to put it. You can create a special Tethered folder to hold your shooting presets.
Final Step
(CLICK FOR FULL-RES)
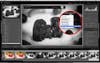
Now type E on your keyboard to go back to Loupe view in the Library, and hit Ctrl + T to bring back the tethered toolbar. Under Develop Settings, use the pulldown menu to find and select your presets. All the photos you shoot from now on will have your preset automatically applied, which should make it much easier to see how changing your lighting and composition will affect your final image.