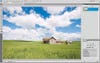
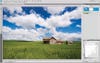
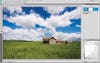
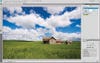
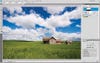
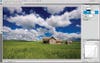
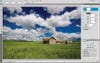
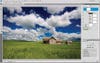
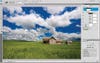
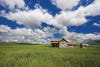
Most photographers who’ve used Photoshop for any length of time appreciate the value of a nondestructive workflow. The term can be intimidating, but all it means is that you use Photoshop’s adjustment layers and individual image layers so that the changes you make to an image don’t alter the color or tone of its original pixels. Global adjustments — overall changes to an image layer — will get you only so far. To maximize the power of a nondestructive workflow, sometimes you need to focus your changes on a specific area of the image. You apply these “targeted adjustments” with Layer Masks. And you can take the targeted adjustments you do with Layer Masks to the next level by using Layer Groups. Step 1: Before diving headlong into targeted adjustments, apply whatever global adjustments you can to make the image look its best. In this case the exposure for my original photograph was pretty “bright,” with values placed as far to the right of the histogram as possible without risking a loss of highlight detail. While this maximized the amount of information captured and minimized the amount of shadow noise, I needed to use a Curves adjustment to improve overall density. Step 2: That adjustment provided a solid enhancement to the image, but I felt that the sky could use a bit more drama — the perfect opportunity for a targeted adjustment. I created a selection of the sky (excluding the landscape portion of the image) using Photoshop’s Quick Selection tool. The Quick Selection tool is a great choice for singling out areas that have variable texture but are visibly separate from other areas of the image.Step 3: When making targeted adjustments, you might want to apply more than one adjustment to the area you’ve selected. A Layer Group allows you to do this much more efficiently. To add a Layer Group, I simply clicked the Create a New Group button (the folder icon) at the bottom of the Layers panel.Step 4: A Layer Group allows you to apply a single Layer Mask you’ve created to multiple adjustment layers. To add a Layer Mask to the Layer Group based on the current selection, simply click the Add Layer Mask button (the circle inside a square icon) at the bottom of the Layers panel. The active selection of the sky created in Step 2 was automatically used as the basis of this new Layer Mask that constrains any adjustments so that they affect only the sky.Step 5: With the Layer Group selected on the Layers panel, any adjustment layers you add will automatically go inside that layer group — and will be constrained based on the Layer Mask attached to that Layer Group. In this case, I made another Curves adjustment to add more drama to the sky.Step 6: With the adjustment layer inside the Layer Group or the Layer Group itself active on the Layers panel, any adjustment layers you add will go inside the Layer Group, affecting only the area defined by the Layer Mask. In this case I added Color Balance and Vibrance adjustment layers.Step 7: At this point the image was looking much better. But I thought that the drama of the sky would be more effective if it tapered off toward the top of the image. To get started with that, I clicked the thumbnail for the first Layer Group to make it active, then clicked the Create a New Group button at the bottom of the Layers panel to add another Layer Group.Step 8: The Layer Mask for this Layer Group wasn’t based on a selection, so I simply added an empty Layer Mask by clicking the Add Layer Mask button at the bottom of the Layers panel.Step 9: In order for the adjustment layers in Group 1 to be affected by the Layer Mask that I was going to create for Group 2, the two groups had to be nested. So I dragged the folder icon for Group 1 onto the folder icon for Group 2.Step 10: Next I clicked on the thumbnail for the Layer Mask attached to Group 2 to make it active. Then I chose the Gradient tool from the toolbox, pressed D to set the colors to their defaults of white and black, and made sure the Foreground to Background gradient was selected on the options bar, with the Linear option chosen. Then I held down the Shift key to restrict the angle of the gradient, dragging from a little above the horizon to partway up the sky.The final result? A group of adjustment layers that affect only the sky — and affect it in a gradient fashion, thanks to two Layer Groups each with its own Layer Mask. Tim Grey has authored more than a dozen books on digital photography and imaging for photographers, including the best-selling Photoshop CS4 Workflow_. He also publishes the_ Digital Darkroom Quarterly_ newsletter and the_ Ask Tim Grey_ eNewsletter. Details can be found at_ www.timgrey.com_._