How To: Create the Illusion of Depth in Photoshop
Sometimes a fake effect is the best kind.

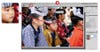
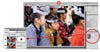
Recently, reader Rod Sawyer wrote to us for advice: He’d seen commercials and music videos in which a subject is in sharp focus and surrounded by an area of blur, and wanted to know how it could be done. He liked the effect for the way it makes the subject stand out and for the dramatic illusion of depth. It’s fairly simple to achieve this look, especially if you have Adobe Photoshop, and as long as you choose to work on the right kind of picture. In order to create the illusion of depth, you need a picture that has a clear foreground, middleground, and background. Try the effect on a flat-looking picture, and the blur will look like an odd Photoshop trick, rather than an almost-realistic one.
Even though this kind of highly selective blur isn’t one you could get with an ordinary lens, or even a special tilt-shift lens, sometimes it’s fun to use Photoshop to make a kind of picture that would be difficult to make in a camera.
Step 1
This method for making blur uses two layers: the original, sharp image on the bottom, and another layer on top that you’ll blur completely. To create the layer that you’ll add the blur to, duplicate the Background Layer. Go to Layer > Duplicate Layer and click OK, or just drag the Background Layer down to the New Layer button in your Layers panel.
Step 2
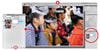
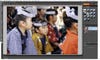
Now create the blur. With your Background Copy Layer selected, go to Filter > Blur > Lens Blur. Use the Radius slider to adjust the blur amount, and play with the other sliders until you get a look you like. The blur should be strong, but not so much that it obscures what’s going on in the blurred areas. When you like what you see, click OK.
Step 3
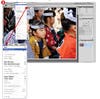
Now that there’s a blurry layer on top of a sharp layer, you can use a mask to reveal a portion of the sharpness. With the Background copy selected, click the Add Layer Mask button (circled). The white box that appears next to your layer’s thumbnail is your mask—when you click on it and see an extra box around it, it’s selected.
Step 4
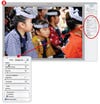
Next get the Gradient tool from the toolbar. In the Options bar, you’ll see a set of buttons for different types of gradients. The one on the far right (circled) creates a diamond shape perfect for this effect. Click on it to select it, then draw a horizontal line outward from the center of the area of your picture you want sharp.
When you draw a diamond gradient, the line you draw represents the diamond’s radius; the other three points will be the same distance from the center as the length of your line.
Final Step
Unless you’re lucky, the first gradient you draw probably won’t be correct. But when you use the Gradient tool to create a mask, it’s easy to replace. Simply draw a new line for a new gradient. If there are still areas of sharpness or blur that you want to show or hide, select your mask, grab the brush, and paint with black to reveal sharpness or white to reveal more blur.
Elements Method
If you use Photoshop Elements, this tutorial won’t work for you. Elements lacks layer masks, so you won’t be able to make a diamond-shaped blur, plus there’s no lens Blur tool. But you can get a similar effect: Follow the first step. Then, in the second, do a gaussian blur instead. to choose what will be sharp, get the elliptical marquee tool and make it very feathered—at least 50px. Circle the area you want sharp, then hit the Delete key to put a hole in your layer and reveal the sharpness below.