How To: Fine-Tune White Balance in Tricky Mixed Lighting Situations
Make the most of your color balance, even when there is no "correct"
For a photographer, living within walking distance of one of the most graphically compelling civil engineering projects in the U.K. can provide constant inspiration. For one as avid as 57-year old Kenneth Barker, a cab owner and driver from Falkirk, Scotland, it’s turned into a daily obsession.
With his Panasonic Lumix DMC-G1 in hand, once or twice a day, almost every day, Barker walks the family boxer by the Falkirk Wheel, a rotating boat lift that connects two canals in central Scotland.
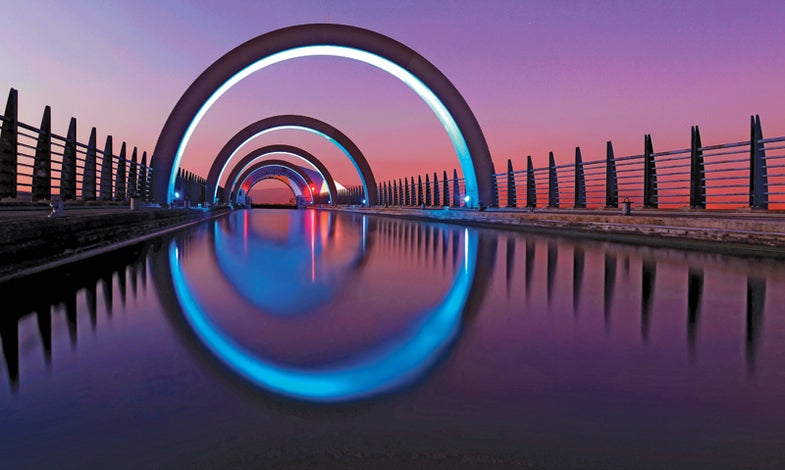
Barker has captured this Scottish tourist attraction in all kinds of light and all kinds of weather. “This photo is one of my favorites,” he says. “I chose sunset for its richness of color, and I waited until there was little or no wind, because I wanted a good reflection of the illuminated hoops in the water below.” He also mounted the G1 on a Joby Gorillapod for sharpness.
Because he was shooting in mixed light, however, his main challenge was finding the right white balance. Says Barker, “There were four types of light here: the last embers of a dying sunset, LED lights in the structural hoops, incandescent uplighting of changing colors [here blue], and an urban glow from the town of Falkirk below.”
For a good working strategy to determine white balance with mixed-light subjects, follow the 4 steps at below. They should work for you even if your camera doesn’t offer RAW capture.
How To White Balance In Mixed Light
1. Set File Format: Under mixed light, shoot RAW files for maximum flexibility to later fine tune color balance in software. However, if your camera doesn’t shoot RAW, you prefer smaller JPEG files, or you don’t want to fuss with color later, pick a principal subject and determine its predominant color temperature. Set that white balance either from a preset or by creating a custom white balance.
2. Bracket Color Temperature: This is a good backup practice. Barker bracketed by dialing through his G1’s scenic presets, of which five were for after-dark photography. He settled on “night scenery,” which most closely matched the color he saw.
3. Bracket Exposure: This gives you control over color richness or saturation. Typically, dialing down exposure compensation saturates color through slight underexposure, while setting it in the plus range desaturates it by overexposing. Barker used a +1/3 stop of exposure comp.
4. Compose For Color: In mixed light where the interplay and contrast of competing color temperatures is your true subject, compose your picture to showcase this and include little else. Here, Barker set his camera low, almost to water level, allowing him to fill almost the entire frame with color both manmade and natural.