How To: Guerrilla Lighting Techniques For Location Photography
Master fast flash setups for speedy location lighting
We may earn revenue from the products available on this page and participate in affiliate programs. Learn more ›
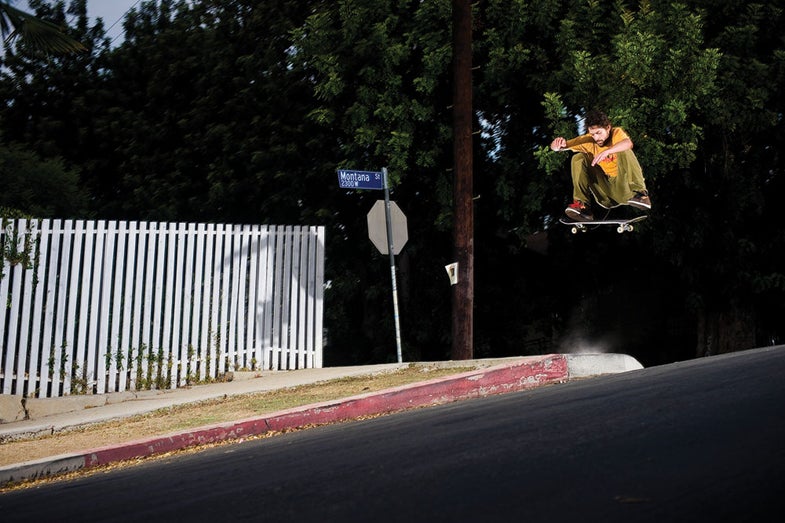
The ability to work fast is the mark of a great location lighter. And nowhere is this need for speed more acute than for shooters of skateboarding. “Skateboard photography is guerrilla-esque,” says Los Angeles-based Sam Muller, who specializes in it.
“There’s almost no preproduction,” he explains. “The skater picks the location, and you have to set up and break down your lights really fast. You never know when cops or security guards are going to show up.”
This image of Nate Broussard performing a trick called a front-side flip is a good example. It took Muller 20 minutes to shoot, with another 25 to set up and break down his three-light kit. And, yes, the guys were asked to leave the location.
Muller credits his Lumedyne and Quantum lights for his ability to work at a breakneck pace. “The lights I used for this specific photograph are pretty standard in skateboard photography, because they’re portable and powerful, with short flash durations.” he says.
Muller has also developed a set of specific techniques for quick setup and breakdown, leaving as many pieces of equipment plugged in and attached as he can. For example, he rarely disconnects head from packs, or packs from wireless flash triggers. “I leave all my sync cables plugged into my PocketWizards to eliminate that step, and I have the PocketWizards and flashes organized in the bags so everything is as close to its counterpart as possible,” he says. “It also helps to practice setting up and breaking down new gear when you buy it.”
He keeps all of his lighting gear in one Think Tank Airport Security roller and all his cameras in a Lowepro Computrekker Plus AW backpack to avoid going back and forth between bags.
Other skateboarding tips:
• Use strobes with short flash durations that can freeze motion more sharply.
• Avoid flat lighting. “Don’t be afraid of shadows,” says Muller. These can set off your subject, emphasize depth, and add graphic interest.
For more great skateboard imagery, go to sammuller.com or visit his blog at sammuller.tumblr.com.
Kris Holland/Mafic Studios
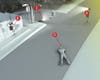
“The spot was actually great for a skateboard location shot,” says Muller. “A beautiful light raked across the trees in the background. I knew I had to use it.” At the same time, however, he didn’t want too much detail back there. He set his two mainlights, a Lumedyne 400ws P4XX
(A) and 200ws P2XX
(B) to bright enough output that the skater would stand out. He then set the background ambient exposure in the camera so the sunlight on the tree would read, but not much else. “To get the proper sculpting on the skater, I needed some shadows on him, so I placed the main lights at 90-degree angles to the camera,” says Muller. His positioned his third light, a Quantum QFlash T5dR****
(C), behind and below his subject. Hidden by the curb, it produced a rim-lit effect around the figure that separated him from the background. Muller shot with a Nikon D3 and 24–85mm f/2.8–4 Nikkor zoom****
(D). The manual exposure was 1/80 sec at f/6.3, ISO 200, and the short-duration flash burst froze the skater mid-trick.