Software Workshop: Use Your Tablet to Edit Photos on the Go
Tablet-based editing software like Snapspeed and Perfectly Clear 3 lets you quickly fix images anywhere
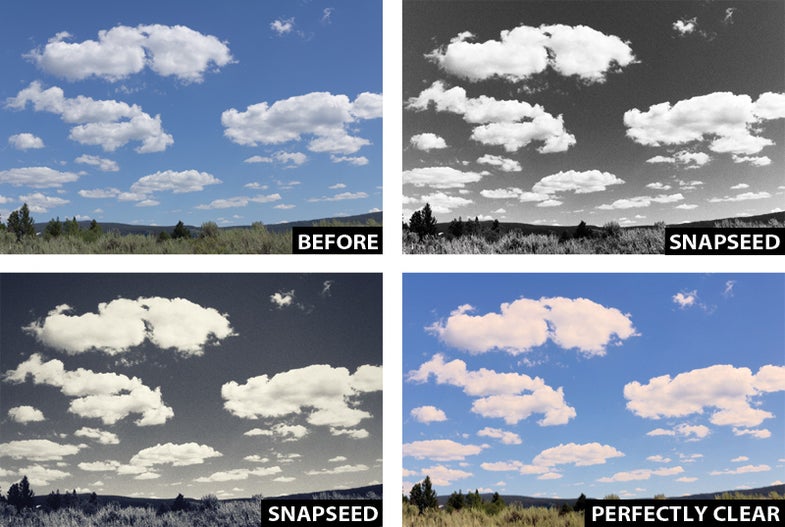
As a serious photographer, you’d never consider doing major photo editing on your tablet—or would you? While we still edit our most important shots on a computer with a calibrated display, for sharing snapshots and images quickly, our fondness for tablet-based editing is growing.
Both the Snapseed app, from Nik (Free) and Perfectly Clear 3, from Athentech ($2.99 for iOS; $1.99 for Android) allow you to do high-quality edits quickly. Snapseed excels at creative filters and targeted adjustments for bigger files, while Perfectly Clear is aces for photos snapped with a phone or tablet. Both make good use of touch gestures and offer the added bonus of allowing you to edit from the couch, the plane on your way home from vacation, or wherever you happen to be.
There are limitations, of course. Getting images shot onto your tablet without using Wi-Fi can be a pain. And, especially with Perfectly Clear, file size limitations prevent you from outputting high-resolution images (Snapseed tops out at 20.25MP if you have the latest iPad, and can even edit RAW files). Here are some cool ways you can use both these inexpensive tools on an iPad.
Make targeted adjustments

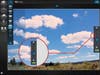
Nik software is known for its control points—when you add a dot to your image, it automatically creates a mask to target the area you want to affect. In Snapseed, tap Selective Adjust to start. Select the radius of your area by using the pinch gesture. The software shows your mask in the form of a red overlay as you resize the radius. When the mask is set, tap and drag up or down to choose to adjust Brightness, Contrast, or Saturation. Then drag left or right to decrease or increase the effect. Make one control point to darken and add saturation to the sky, and add another one to increase contrast and saturation in the ground. Then duplicate that control point three times to add the effect to the whole bottom part of the image. Hit Apply to accept the changes.
Go black-and-white

Nik makes the b&w plug-in Silver Efex Pro, so it has plenty of monochrome know-how in its pocket. Snapseed is a much less expensive way to get access to it. When going grayscale, begin by tapping on the Presets button to see some options for starting points. Select the Film preset to use one that has grain already added in. As in the Selective Adjust tool, swipe up or down to choose to adjust Brightness, Contrast, or Grain, and swipe left or right to decrease or increase the strength of each.
Add tone or texture
Here’s where the boundaries of your taste come into play. It’s easy to go overboard when with a few simple swipes you can make your picture look like a moldy, selenium-toned tilt-shift. For more subtlety, tap on Center Focus and decrease edge brightness to add a slight vignette. Choose Vintage and pick a Style preset with a color tone you like, then dial down the Texture Strength to zero. Reduce the style strength, too—enough so that it’s just adding a subtle tint. Then decrease the Brightness to add a bit more drama.
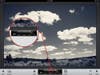
Assess the auto-fixes
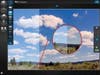
One of the strengths of Perfectly Clear is how quickly it can improve an image with no input from you. With this picture, the automatic fixes added vibrancy and depth. To see exactly what the app did, tap to bring down the toolbar next to the Fix icon in the top left, and adjust its fixes accordingly. The ones that aren’t grayed out are those that are switched on. The automatic exposure correction didn’t brighten the sky enough, so use the slider to increase it slightly. You can choose how much of the uncorrected image to show by dragging the border between “before” and “after” to one side.
Adjust color
Tap the tint button to change the tone of your image. This photo seems very cool-toned, so warm it up for more of a sunset look: Tap the slider and drag up to increase it, but beware of adding too much rosiness to the clouds. Toggle the on/off switch at the bottom of the slider to see your image with and without the effect.
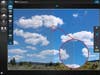
Fix Noise
Another thing Perfectly Clear does quite well is to take noisy cameraphone images and make them look decent—and sometimes even great. So we faked a version of this photo, which was shot with a DSLR, to make it look like it might have been taken with a phone to give you a sense of what the app can do. Scroll down among the fixes to Noise, and, as in the other tools, use the slider to add more noise reduction. Our fake noise is so bad that you need to crank up this tool to make it work. To correct the softness you added reducing the noise, go back to the Sharpen tool and turn it up, too.