Filters vs. Photoshop
How optical filters and software can make your landscapes gorgeous.
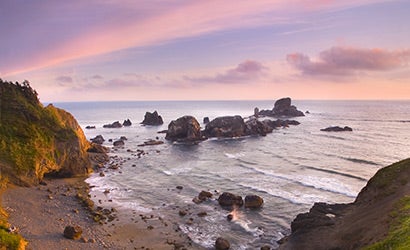
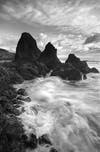
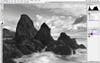
| © Marc Adamus |
| A 2-stop hard-edge split ND filter brings out the full color. Click photo for more images. |
When you see a beautiful, perfectly exposed landscape photograph, do you ask yourself: Is it real, or is it Photoshop? Maybe the answer isn’t as clear-cut as you think. Sometimes the answer is, simply, “Yes.”
Marc Adamus, an accomplished landscape photographer who lives in Corvallis, OR, has no interest in engaging in the debate between reality and fakery. His goal is to make pictures that come as close as they can to the natural beauty he sees through his viewfinder. Rather than get mired in the semantics, he lets his subject guide his method.
If you argue that doing it in-camera is the only acceptable way, or if you insist you’re wasting your time not to do it in Adobe Photoshop, take a look at his photographs — then eat your words.
His weapon? The split neutral-density filter, a half-tinted piece of glass that makes the sky look as good as the ground. To get great landscapes, Adamus suggests that you start with the basics: three split neutral-density filters, including a 2-stop hard-edge, a 3-stop hard-edge, and a 3-stop soft-edge, also called a graduated; and, if you shoot large bodies of water, a polarizing filter to cut glare and reduce unwanted reflections. He does all his shooting digitally in RAW. And when filters aren’t enough, or if the line of the graduated filter interrupts the landscape, he uses Photoshop to pick up where the filters left off.
The result are pictures almost as great as nature itself, and that’s all the reality Marc Adamus requires.
Neutral Density 101
Our eyes (and brains) are amazing — they can look at a landscape and see a color-dense, spectacular sky and detailed, intricately-shadowed land, all at once. Our cameras…not so much.
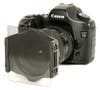
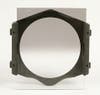
That’s where the split neutral-density filter comes in. It’s typically a square piece of glass that fits into a holder that in turn fits in front of the lens. Half of it is dark. The simple genius: It cuts the exposure on top (or, for that matter, the bottom or the side), so you can take one picture that gets the light right for the whole scene.
When you’re looking at a distinct horizon, you’ll want one that has a relatively sharp line between darkened and clear (a hard-edge filter). When you’re looking at a scene where the brightness fades, you’ll want a soft (graduated) filter. If the sky is on the bright side, try one where the dark half is 3 stops dimmer than the clear half. If the sun is lower, try your 2-stop. The rest is nuance.
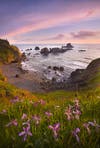
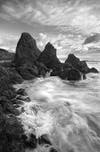
|| |—| | | © Marc Adamus| | Adamus combined two exposures in Photoshop for a single spectacular image. Click photo for more images.| How to Meter
There are two ways to figure out which filter you need: Trial-and-error or measuring the light. Either way, first set your camera to manual mode, then meter for the dark parts of your image — usually the ground.
If you want to eyeball it, put on your 3-stop filter, take a shot, and check your LCD. If you’re losing too much sky, or if it’s unnaturally dark, switch to the 2-stop.
For precision, meter for the sky, determine how many f-stops brighter it is than the ground, then pick the corresponding filter.
When to Use Software
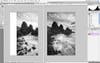
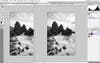
Getting your photo right with filters will save you a lot of time, but there are times when you’ll need additional help from Photoshop. In the shot on the previous page, a big sea stack intersected the line where the filter transitioned from dark to light. Not even a soft graduation helped.
Adamus solved the problem by shooting the scene twice, with and without the graduated neutral-density filter. Then he combined the shots in Photoshop to create exactly the image he envisioned when he saw the scene. Here’s how you can do the same thing: Click here for the steps.
Marc Adamus proves that it can actually be easier to make bright, sharp, dramatic landscapes in the camera with a split neutral-density filter. Who would have thought that — with occasional aid from Photoshop — making something so beautiful could be so simple?

Filters-vs.-Photoshop-How-it-works-Without-a-fil
Filters-vs.-Photoshop-A-2-stop-hard-edge-split-ND
Filters-vs.-Photoshop-A-Cokin-P-filter-holder-fo
Filters-vs.-Photoshop-A-soft-ND-filter-fades-slig
Filters-vs.-Photoshop-Filters-Photoshop-The-ta

Filters-vs.-Photoshop-A-second-exposure-used-the
Filters-vs.-Photoshop-Adamus-combined-the-two-in
Filters-vs.-Photoshop-2.-Now-type-V-for-the-Move
Filters-vs.-Photoshop-3.-Then-hold-down-Alt-Opti
Filters-vs.-Photoshop-4.-Set-the-foreground-color