10 photography rules to break
Throw everything you learned in Photo 101 out the window, the rules were made to be broken.
Over the years, we’ve heard certain guidelines, maxims, and rules repeated over and over again by nature photographers. We’ve even repeated a few ourselves, before stopping to think, “hey, some of these have merit, but most don’t.” Here are 10 of our favorite “rules” that have little or no basis in reality. Go ahead and break them.
[ED. NOTE: While these entries are grounded in nature photography, many of them can certainly be extrapolated into just about any discipline.]

A good exposure has a bell-curve-shaped histogram
Break it: The shape of the graph doesn’t actually tell you whether exposure is “good” or not, just how tones are distributed. For instance, proper exposure for a dark backlit scene, with just a fringe of light and very few midtones, will have a histogram that resembles an inverted bell curve.
Although you should generally avoid overexposure of highlights (a histogram bulky on the right side) and underexposure of shadows (bulky on the left), this isn’t always so. In that backlit scene, keeping the highlights from overexposing will likely give you a dark image with some shadows ending up as pure black.

Shoot in manual for better exposure control
Break it: While there might be some learning value for beginners, manual mode doesn’t have any practical advantage over the easier-to-use—and more intuitive— aperture- and shutter-priority autoexposure modes. In fact, we’ve seen countless shooters struggling to find the proper settings using manual, while their autoexposing counterparts get the shot before fleeting conditions change.
Think of aperture and shutter priority as speed manual: You set just one variable, and the camera will set the other based on the meter reading. If you don’t like how it looks, you can brighten or darken it with the exposure-compensation control.
When shooting landscapes, we almost always shoot with aperture priority, because f-stop is often non-negotiable—when we need f/16 for sufficient depth of field, for example. For wildlife, the converse is usually true: Shutter speed is usually crucial.

Customize your white balance before every shot
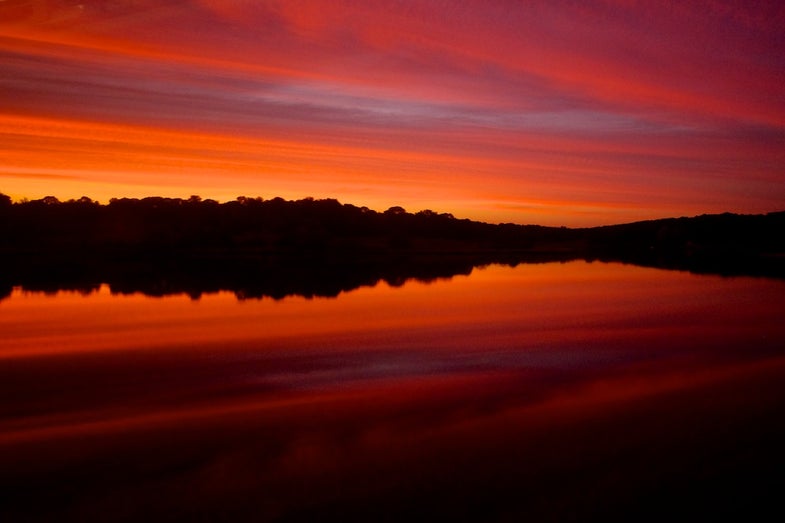
Break it: Using a gray card or white-balance cube to set the “correct” white balance for a nature photo is not only impractical, it imposes a rigid standard onto a subjective, artistic decision. While ensuring a neutral color balance makes sense for situations where color fidelity is paramount, this is not often the case with nature photography. In fact, certain color casts—the blues of dawn and dusk, or the warm hues of sunset—create mood and inject emotional content into the image. Setting a custom white balance during a sunset shoot will only remove the magic quality of the light that attracted you to the scene in the first place.
And if you shoot in RAW format, you can easily set white balance during the processing stage without compromising image quality. This lets you tweak it precisely on a calibrated monitor.

For maximum sharpness, focus one-third of the way into a scene
Break it: Used mostly with wide-angle landscape photography, this guideline allegedly finds the hyperfocal distance—the focus point that optimizes depth of field from nearest to farthest objects. But it is usually imprecise, and often plain wrong. Say your composition includes flowers 3 feet away and mountains 3 miles away. According to this rule, your optimal focus point is about 1 mile away!
To find the real hyperfocal distance, you could consult a distance chart or app (e.g., dofmaster.com). Or simply double the distance of the nearest element in your composition and focus there—if those flowers are 3 feet away, pick something 6 feet away. Next, stop down the aperture until everything is acceptably sharp from front to back, and touch up focus as necessary. Live view makes it easier.

Always shoot with the sun at your back
Break it: With the sun behind you, subjects in front of you are evenly lit, with lower contrast, making exposure easier. But while front lighting might be the best approach in some cases, directional light can create wonderful nature photos:
Sidelighting reveals important texture and detail in the landscape while giving the image a sense of depth and dimensionality; backlighting lends drama to wildlife shots, creating glowing rim light and bold silhouettes. Working with directional light can be tricky, and flare is often a challenge—use a lenshood or a well-placed hand for shade.

Turn off image stabilization when shooting on a tripod

Set your aperture to f/8 or f/11
Break it: For wildlife, mounting the camera to an unlocked tripod head allows for quick repositioning whenever the subject moves, and IS can mitigate the shake that comes with this or with wind.
Shooting landscapes with long exposures? Many current IS lenses, notably Canons and Nikons, have tripod detection that can compensate for mirror slap. But many lenses, and cameras with sensor-shift IS, lack this feature, and on these you should definitely turn off IS—the IS may actually induce vibration. Consult the manual to be sure.
F/22 and be there
Break it: The flip side of the previous rule, this one is simple laziness that has evolved into accepted wisdom for landscape scenes in order to get maximum depth of field. But because of the aforementioned diffraction, your image quality will not be as good as it would have been had you used, say, f/13. Using a smaller aperture also requires a longer shutter speed—or a higher ISO—than you might need.

Prime lenses are better than zooms
Break it: Twenty years ago, this would have been true. The variation in optical quality between prime and zoom lenses back then did justify carrying a large assortment of primes, dwarfing the inconvenience. But now the quality differences are much less—and in some cases nil—while a zoom’s convenience, versatility, and portability often far outweigh any perceived image degradation.
For some specialized applications, such as wildlife, serious shooters will still prefer the superior optics and wider apertures of certain prime lenses—especially macros and long telephotos—but for the vast majority of uses, zooms are just fine.

You can always fix your photo later
Break it: Despite the powerful temptation to improve an image with Adobe Photoshop or other image editor, you’re still much better off getting as much of it right in the camera as possible. Crop later? Better to crop it now, in the camera, and not throw away those pixels unnecessarily.
While you should leave ome decisions (e.g., setting white balance) to the processing stage, many fixes, such as brightening a significantly underexposed image, can reduce picture quality. As much as editing is a part of the craft of photography, skill with the camera remains your most important tool.