How To: Photograph Food Like a Professional
Food photographer and chef Francesco Tonelli breaks it down
Are you crazy about food? If you appreciate its color and visual qualities as much as its taste, you have an excellent chance for success in culinary photography.
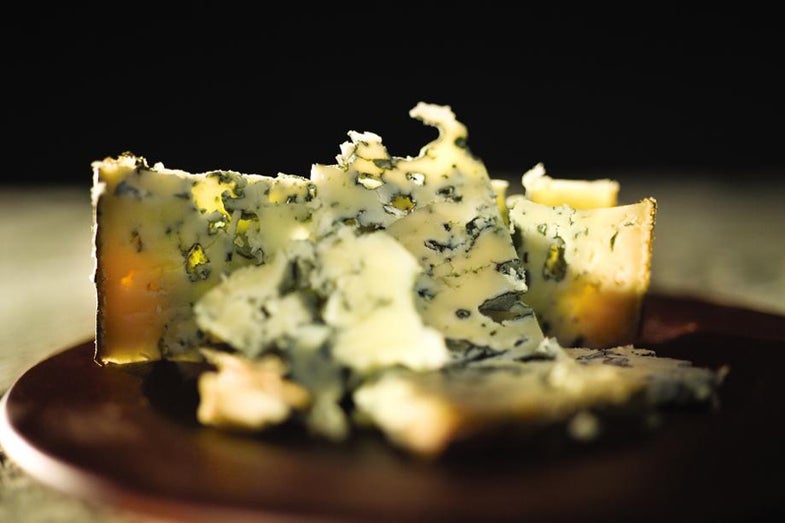
It’s exactly what catapulted Francesco Tonelli of Union City, NJ, into a flourishing career. The photo above exemplifies his passion. “I bought this wedge of Valdéon to enjoy with dinner,”he says. “But after I sliced through it, I was captivated by its color, texture, and translucent quality. I had to photograph it—immediately.”
Tonelli is a native of Italy and a chef who transitioned into food styling, a skill he learned in order to showcase his own dishes. Now, as a professional food photographer, he offers…
Tips for a Novice:
Start with stable subjects. “It’s easier to photograph most vegetables, fruit, whole eggs and other items that won’t dry out, wilt, or otherwise change as you shoot,” says Tonelli. “Ho tfoods are the most challenging because they can quickly develop an unattractive skin when their surfaces cool.”
Keep it fresh. “Make sure the food looks fresh, juicy, and appetizing.” Use an atomizer to keep surfaces moist. Glycerin water beads up nicely if water droplets are required as accents on food or glassware.
Work up an appetite. “Keep styling your subject,” he says,”until you want to eat it.”
Step by Step:
**Step 1: **Go shopping. Explore your local greengrocer’s for photogenic food. Look for colors, shapes, and textures that fascinate you. Perfect, unblemished ingredients are usually best—occasionally, though, a bit of rot or a scarred rind tells a more poignant story.
Step 2: Gather your gear. You’ll need a high-speed close-up lens, tripod, lights, reflectors, atomizer, and food-related props such as plates, vases, and flatware. Props should have color and character that add to the scene without distracting from the subject. “I opted for a plain wooden plate, a slate table, and a dark background. It helped the cheese stand out,” says Tonelli.
**Step 3: **Light to accent the food’s character. “For this shot, I backlit the cheese to allow the translucent slice to glow,” Tonelli explains. “Then I set a front light at a lower intensity to fill in, but not flatten the shadows.”
Step 4: Use a stunt double. “Think and prepare your shot in detail before you unwrap, slice, or plate your food,” he says. If you’re shooting something that loses its visual “life” over time (i.e., cooked or frozen foods), you should compose, light, and work out exposure using stand-in objects.
**Final Step: **Get help. If you have trouble arranging food, ask a friend who sets an attractive table to help. Pro shooters hire food stylists all the time.