
The best telescopes for beginners in 2023
Discover comets, become the next Carl Sagan or just stalk the International Space Station with the best telescopes for beginners.
| Best for looking at planets |
|
Sky Watcher Classic 250 Dobsonian 10-inch Aperture Telescope | SEE IT |
A large Dobsonian telescope for checking out planets. |
|
| Best computerized |
|
Celestron NexStar 130SLT Computerized Telescope | SEE IT |
A user-friendly computerized telescope. |
|
| Best for travel |

|
OYS 70mm Telescope | SEE IT |
A telescope with quick setup and convenient carrying case. |
We may earn revenue from the products available on this page and participate in affiliate programs. Learn more ›
Finding the best telescopes for beginners may seem more daunting than finding water on Mars. Where do you start? How much should you spend? Will it break easily? And what do any of the specifications mean? Learning about the various features and decoding the product descriptions can help rookie astronomers and their families take a peek at the universe. Don’t be intimidated by astronomy equipment. You’ll be able to use the best telescopes for beginners without a PhD. in astrophysics. Whether you want to track the ISS or discover a new planet, you can have fun with these instruments designed for usability. Innovative setups and computer tracking make stargazing simple and approachable. Become a genuine space ranger even if you can’t tell the difference between a nebula and an eyelash.
- Best for looking at planets: Sky Watcher Classic 250 Dobsonian 8-inch Aperture Telescope
- Best for teens and young adults: Celestron 22030 Travel Scope
- Best for astrophotography: Sky Watcher Virtuoso
- Best computerized: Celestron NexStar 130SLT Computerized Telescope
- Best for travel: OYS 70mm Telescope
- Best budget: Celestron 70mm Travel Scope
The best telescopes for beginners: Reviews & Recommendations
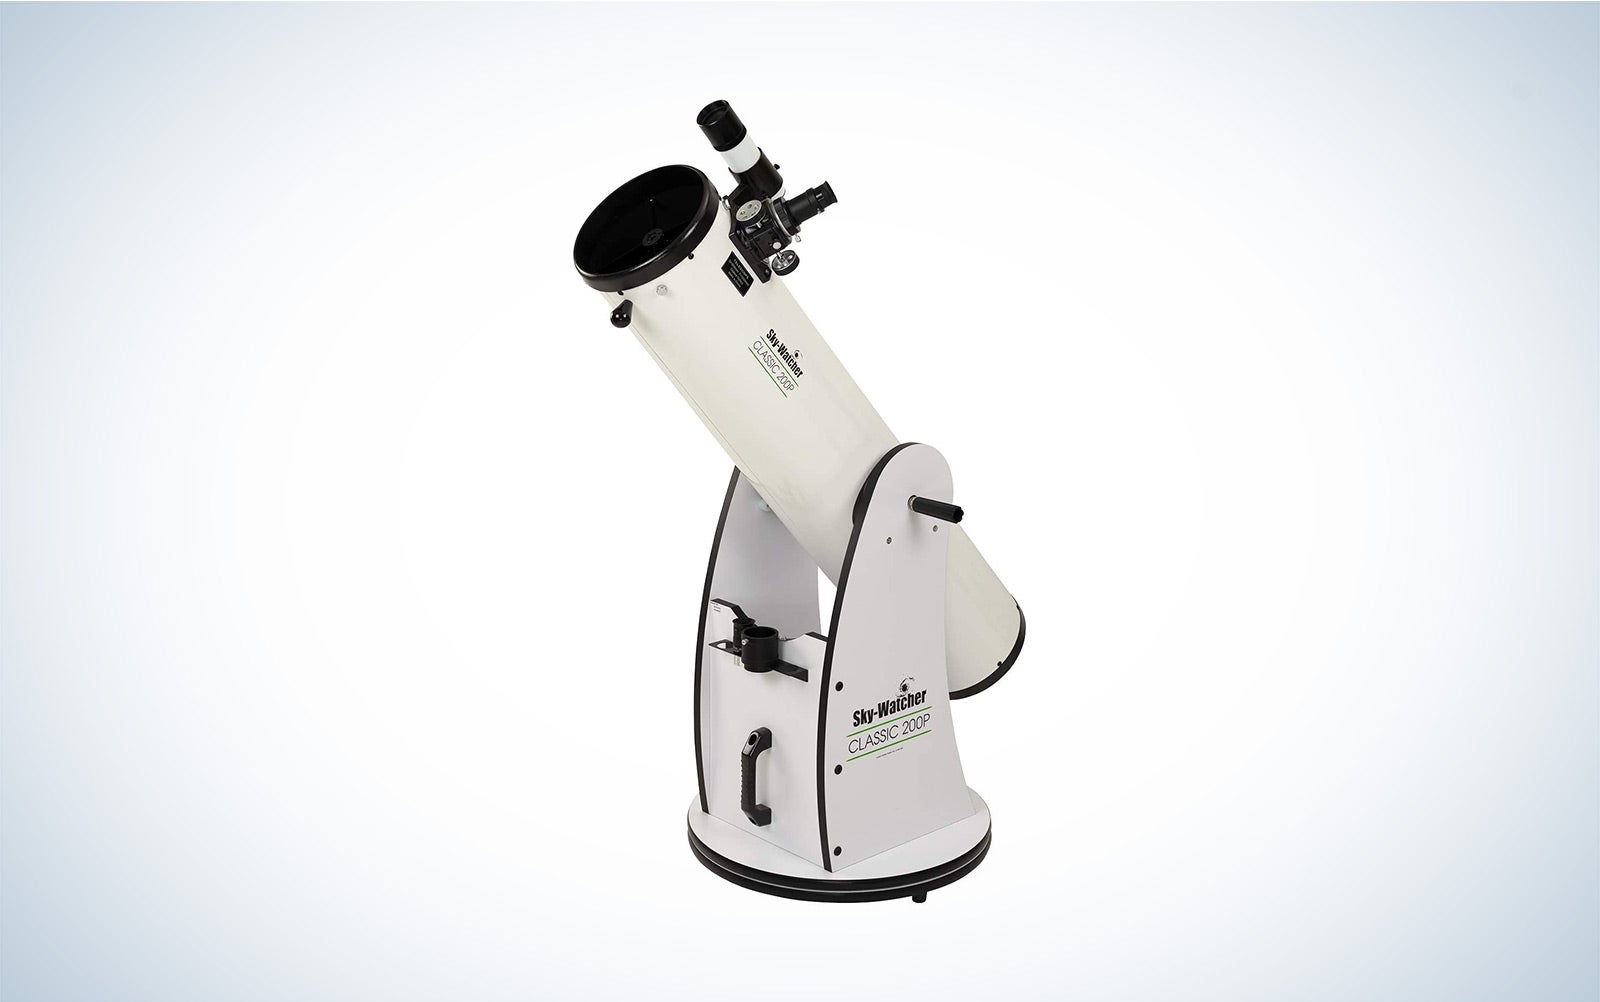
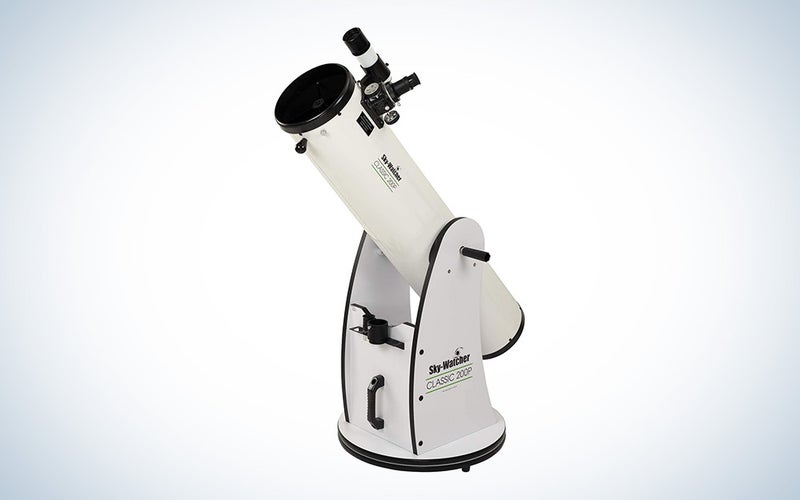
Best for looking at planets: Sky Watcher Classic 250 Dobsonian 10-inch Aperture Telescope
Amazon
The Sky Watcher Classic is a Dobsonian telescope, meaning it’s a big, cannon-shaped beast. Don’t let the size scare you off. Dobsonian telescopes are perfect for your first astronomical instrument. Once out of the box, you’ll be stargazing in a matter of minutes. The large optical tube allows for a wide aperture and mirror, which means this telescope can soak up a lot of light. That’s good for trying to see clear images of planets and the moon. It’s not ideal for astrophotography, but if you want to quickly set up a telescope and see something impressive, this basic Dobsonian is the best telescopes for beginners and a good investment.
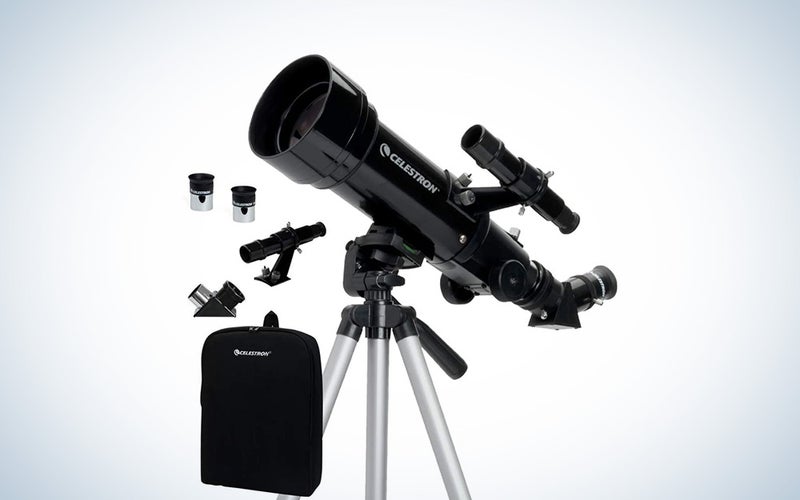
Best for teens and young adults: Celestron 22030 Travel Scope
Amazon
Trees and light pollution cramping your backyard observatory? Pack up and move to a better location with the Celestron Travel Scope. As the best telescope for beginners, this telescope gives viewers a great look at planets and the moon. It can even pick up the far-off Andromeda galaxy with surprising clarity. The custom carrying case keeps everything organized, a big plus for teens who don’t yet appreciate the art of proper storage. And the telescope has a smartphone mount so users can snap quality pics without needing additional adapters. It’s also great for spotting wildlife here on Earth, something reflector telescopes have trouble with. Though not ideal for more seasoned astronomers, the price point and quality make it perfect for teens or adults new to the hobby.
Best for astrophotography: Sky-Watcher Virtuoso
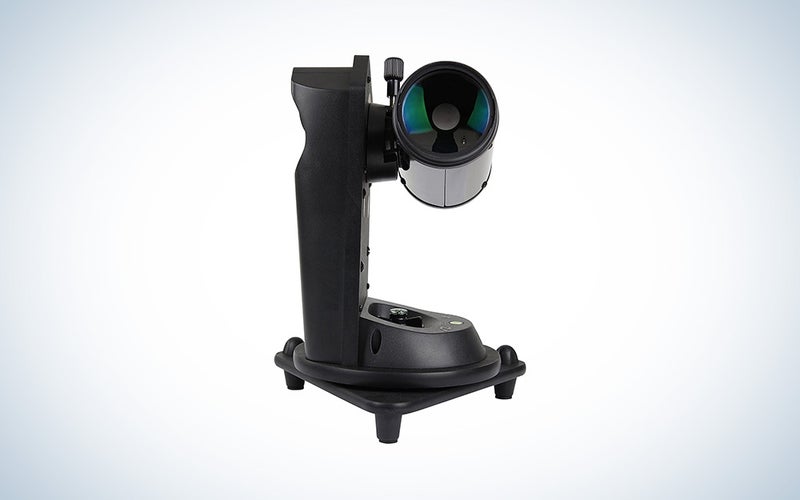
Amazon
The Sky-Watcher Virtuoso is a gateway to the deep world of astrophotography and camera telescopes. While the telescope is included, you’re really paying for the tracking mount. Tracking alignment on the Sky-Watcher isn’t too complicated and the mount does a decent job keeping things moving. This is a table-top scope, which gives you great stability for the fine and delicate art of astrophotography. It comes with an automatic shutter release for Canon DSLR cameras and a camera bracket. With a little practice, a novice can take dynamic photos of the moon and planets.
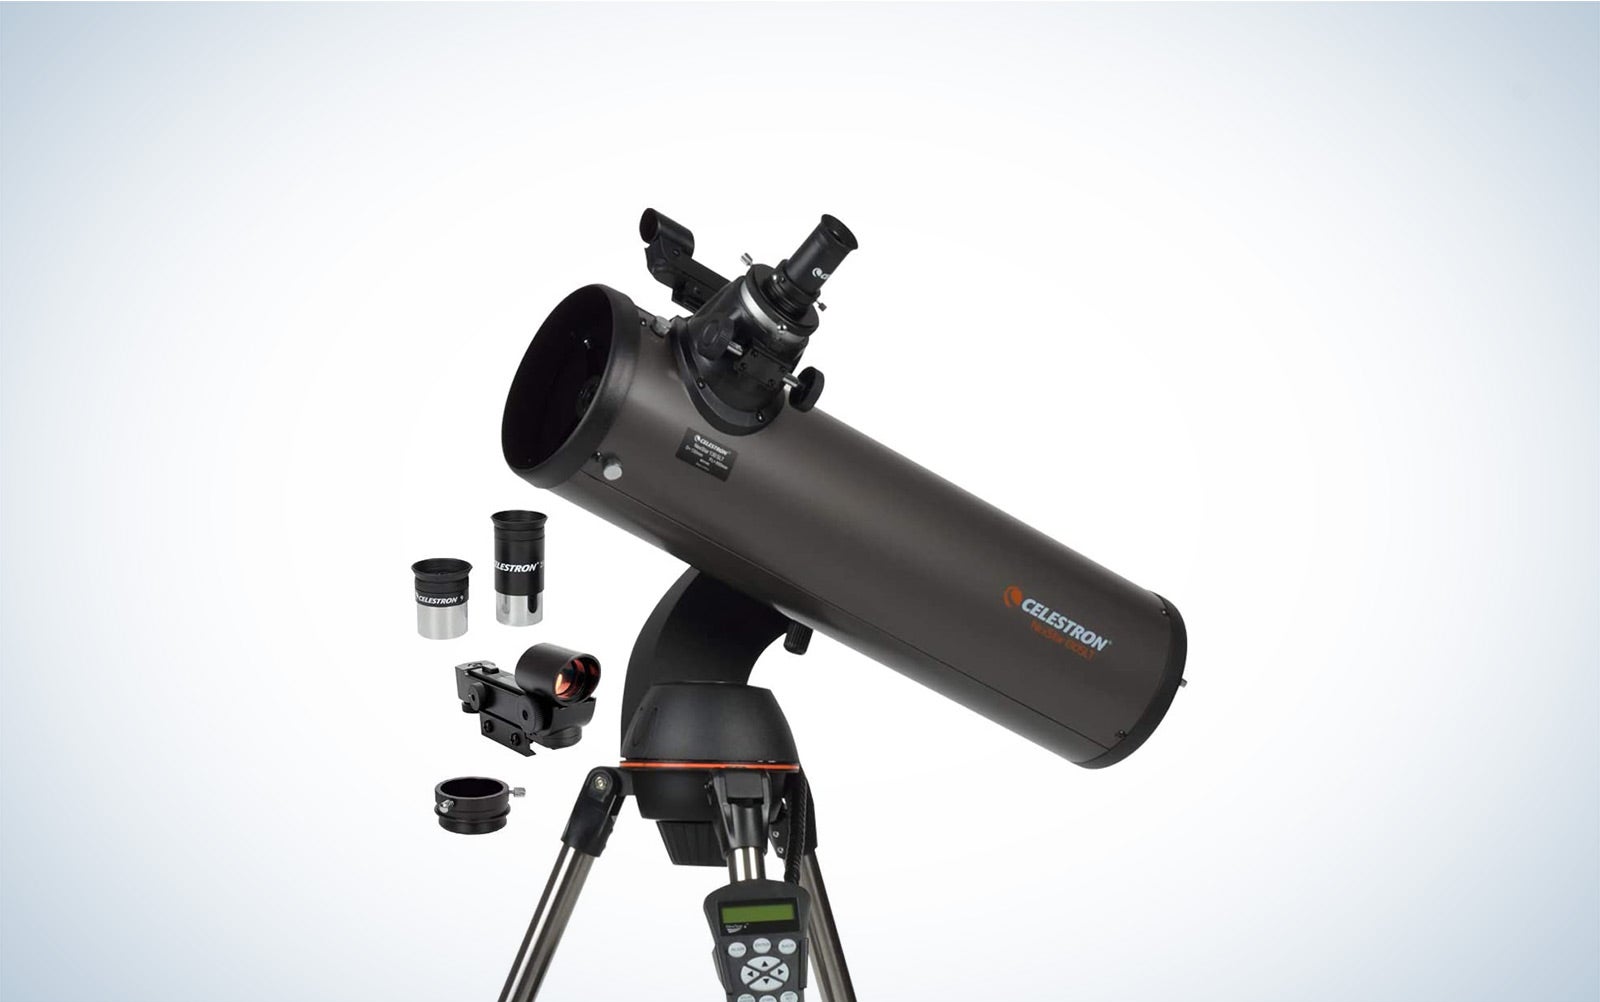
Best computerized: Celestron NexStar 130SLT Computerized Telescope
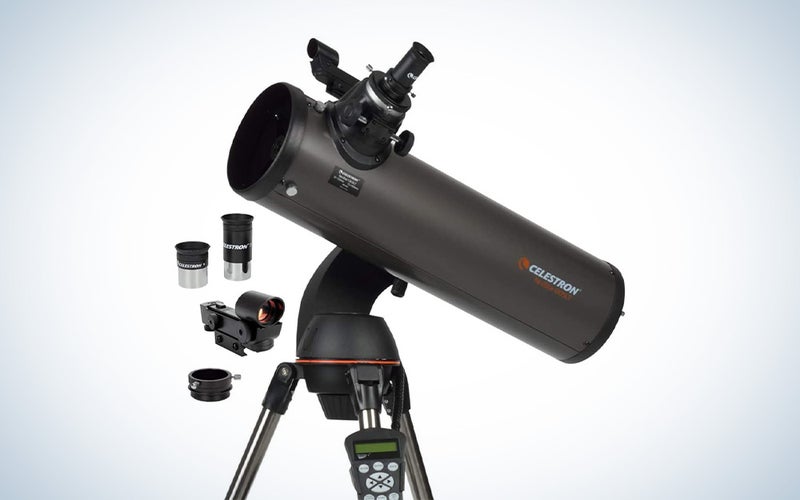
Amazon
For $500, the Celestron Nexstar is the best computerized telescope for beginners. Just give yourself time to learn the ins and outs before trying to locate your own comet. The controls are more user-friendly than other GoTo mounts. And Celestron’s own SkyAlign setup is as easy as aiming at any three bright points in the sky. You’ll get clear, bright views of objects even at high magnification. The included eyepieces are adequate and upgrades are available if you want to dig deeper into the cosmos. If you’re looking for your first GoTo telescope, this is an affordable place to start.
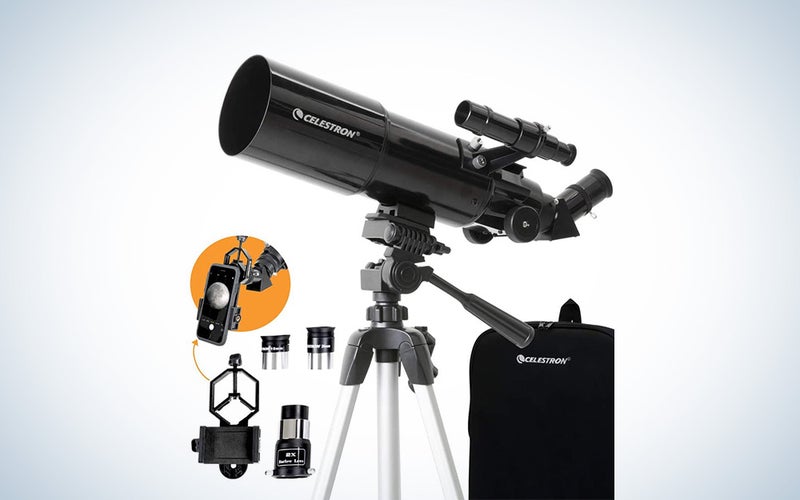
Best for travel: OYS 70mm Telescope
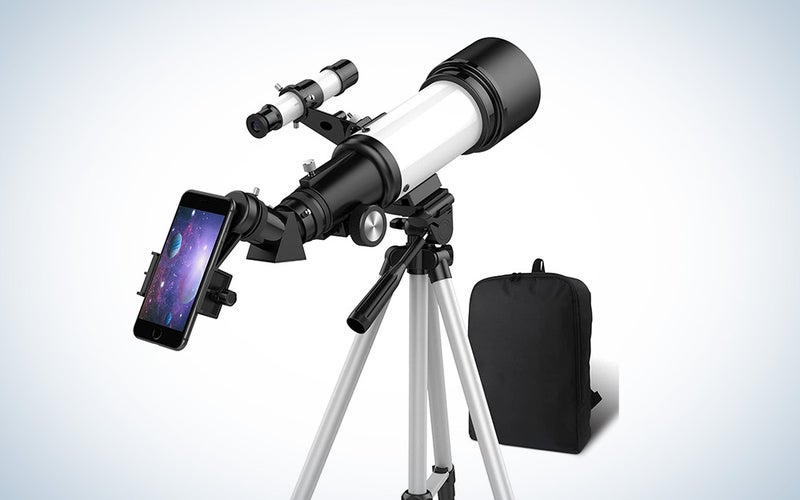
Amazon
If all you want in your first telescope is something quick and easy, the OYS 70mm Telescope is there when you need it. The lightweight refractor telescope has everything you need to look at the moon and stars and can be set-up in minutes. The carrying case makes travel convenient. Bring it along to outdoor picnics or keep it in your car if you spot any UFOs on your commute. The included phone adapter will let you quickly post cosmic visions to all your social media friends, adding to the easy-breeze causal nature of this fun, inexpensive telescope. It’s lightweight and stress free. What more could you want in a hobby?
Best budget: Celestron 70mm Travel Scope
Amazon
The price is right, at $90 and the Celestron brand is a dependable option for beginner telescopes. This refractor scope is powerful enough to see the rings of Saturn…but don’t expect Hubble-quality images. For looking at the moon or scanning the sky on a lazy summer night, it does a fine job. The lightweight scope is perfect for road trips and comes with its own travel bag. And if you get tired of the cosmos, it works well as a nature telescope for birdwatching and sightseeing.
Features to consider when shopping for the best telescopes for beginners
There are high-end, professional, room-sized telescopes. And then there are the best telescopes for beginners. If all you need is something to causally locate stars, planets and maybe aliens, you can find a great, inexpensive and, best of all, simple telescope for amateurs and kids. And they are easier to use than you think.
How important is magnification for the best telescopes for beginners?
When looking at magnification and lens data of a telescope, you should focus (ha!) more on aperture size than magnification specs. The aperture size dictates how much light gets into the telescope. The bigger the aperture, the clearer the image. If you have a high magnification and low aperture size, the image will be blurry when you zoom in because there’s just not enough light getting through the aperture. And no amount of hefty magnification can fix it.
Still, people love to see big magnification numbers. Know that beginner telescopes are smaller, with smaller apertures. So giant magnification numbers aren’t much of a benefit. As a general rule, for clear images a telescope’s max magnification should be no more than 50 times its aperture in inches. If the aperture is 4-inches, the magnification should be about 200x. And that’s plenty of spying power for backyard skyscanners.
Focal length and focal ratio are also important numbers to consider. And it can get confusing, especially for newcomers. Focal length is (basically) the distance light travels while it’s inside the telescope. It’s not simply the length of the scope in every case because mirrors and other optical tricks can modify light’s path. And the focal ration is the focal length divided by the aperture. Without drowning you with math, a focal ratio of F8 is good for seeing planets, the moon and anything else a first time astronomer would want to see.
Is the telescope for you or the kids, or both?
There is a difference between a telescope made for beginners and a telescope for kids. Astronomy products aimed at youngsters tend to be simplified, sturdier and less expensive. They can also be dumbed down and have a cheap, plastic feel if you’re not careful. If your smart, inquisitive teen is interested in space, avoid telescopes with “Kid” in the title or else you may be buying a glorified toy. And if a rowdy, rough toddler is interested in space, there’s always a paper towel tube.
The best telescope for younger teens is probably a refractor telescope. Of the two types of scopes, refractor and reflector, a refractor telescope is the less complicated and easier to care for instrument. Refractor telescopes are what most people imagine when thinking of telescopes. It’s the classic tube with a big lens at one end and an eyepiece at the other. Even the best Refractor telescopes (for beginners) are not great for exploring deep space, but the simplicity may be a big bonus.
A reflector telescope, on the other hand, uses mirrors to focus on the universe. Those mirrors must be perfectly aligned to function properly. That makes reflector telescopes more delicate. If you are mature enough to handle a smartphone, you are mature enough to use a fragile reflector telescope. But if you worry about knocks and bumps and breaks, stick with a refractor telescope.
There are compound telescopes that use both reflection and refraction. These offer the best of both worlds, but can be pricey. If the telescope is for an adult beginner, a compound telescope is a great idea. If this is for a child who may lose interest the moment you can’t find the Death Star, stick with a basic refractor telescope.
Not all scopes are designed for astrophotography
The good news: Taking impressive pictures of space has never been easier. The bad news: It’s still not easy. Anyone who has tried to take a photo of a full moon with an iPhone knows that what you see with your eye and what the camera shows are vastly different.
Many beginner telescopes come with smartphone options and cradles, and most work reasonably well. But for truly mind-blowing photos you will need to A) do your homework and B) use a telescope designed for astrophotography.
Before snapping your first picture, you should have at least a moderate understanding of your camera. From exposure length to white balance, the more comfortable you are with your camera the better. Trial and error are the best teachers for photography, so practice, practice, practice
When it comes to attaching a camera to a telescope there are a wide variety of options. The key to great photos is a long exposure. And the key to long exposures is tracking. Everything in the sky is moving, at least it seems that way when you’re standing here on earth. A photo of a star will show a tail during a long exposure. This is why astrophotographers depend on tracking telescopes for crystal clear pics.
Tracking means the telescope is automatically moving along with the stars to prevent trails from appearing. Once set up, you can track the objects as they move across the sky, allowing for clear photos. Keep in mind, this is different from GoTo telescopes. GoTo scopes find a specific star or planet based on coordinates. Tracking only means the telescope is slowly moving at a deliberate speed. It sounds more complicated than it is. Simply put, your camera must move with the stars and there are mounts and telescopes designed to do just that.
Computerized Telescopes are a complicated piece of astronomy equipment.
While some telescopes use nothing more than a standard camera tripod, if you want greater control to track stars and planets the best telescopes need a dedicated stand. And if you want a robot assistant, you need a motorized, computerized mount.
Computer-controlled mounts (called GoTo mounts because they automatically “go to” specific coordinates) may seem perfect for first-time astronomers. Instead of hunting and tacking tiny specs in the sky, let the computer-controlled GoTo mount do the work. However, GoTo mounts have a few drawbacks. First, they can cost three times as much as a non-motorized telescope. If this is a new hobby, you may not be ready to invest $1,000 in equipment. Second, they can be finicky to set up and use. Without a basic understanding of star navigation, users will have difficulty getting the telescope to align properly. And third, It’s more fun to use your own hands to aim your telescope. Most GoTo telescopes don’t let you aim manually, making you the backseat driver to cosmic discovery.
For astrophotography enthusiasts, a GoTo mount can make capturing images and movements of the heavenly bodies easy. And GoTo mounts make having a skygazing party in the backyard less prone to people complaining about your aim. If you’re willing to spend the money and take the time needed to master your astronomy equipment, a GoTo telescope could be your new best friend.
Related: How to shoot epic landscape photos of the night sky
The best telescopes for beginners goes everywhere
You may not want a big, bulky 72-pound behemoth clogging up your deck. And your driveway may not have great viewing angles. Thankfully, the best travel telescopes are tiny and let you take the scope to prime viewing spots in your neighborhood.
If this is your first telescope, and you plan to travel with it to the park, cheaper is better. Travel can be tough on a telescope, and it’s less painful to crack a $100 spyglass than a $1,500 computerized telescope.
When shopping small, keep an eye on aperture size and ignore magnification. Always remember: Aperture matters and magnification numbers are for bragging. A refractor telescope is a great option for traveling because it’s easy to set up once you get to your destination, unlike more complex scopes which are made for fine tuning. Keep the packaging, as foam inserts can be reused to keep your telescope safe and secure. And when stashing away your tiny telescope, please put the lens caps on.
Best budget telescope for beginners: What you get for under $100.
If this is a new pastime, save money upfront and upgrade as you get deeper and deeper into the hobby and deeper and deeper into space. Eyepieces, tracking mounts, optical tubes, and many other telescope parts can be swapped out for higher-end, more powerful replacements. When starting out, go for a basic telescope for planets. See how it feels. Learn how to master the controls. And as you get more experienced, your tools will get more specific and specialized.
At the same, spending too little usually results in blurry views, broken parts and ruined nights. Avoid the cheapest of the cheap, unless you only want to use the telescope to entertain your young kids for a few minutes. For those on a budget but still want something usable, aim for the hundred dollar range. There are plenty of good all-around options ready to use right out of the box. Just read the specs and make sure the budget-priced telescope is more than pirate prop.
FAQs
Q: How do you maintain a telescope?
To maintain a telescope, you need a soft touch. Your main enemy will be dust on the delicate glass. Never use your fingers to wipe lenses or parts. Instead, use a squeezable blower to blow away loose materials and then wipe the area with isopropyl alcohol diluted with distilled water on a cotton ball. Be as gentle as possible, using only the faintest amount of pressure. A dusty lens or mirror is better than a scratched one.
Q: What is the most powerful telescope for home use?
The most powerful telescope for home use may not be that powerful at all. The term “powerful” can be misleading. Remember, magnification power isn’t as important as aperture and focal length. Put another way, it’s not how powerful a telescope is, but how much light it can see. The Hubble telescope has an apatrue of over 7-feet. You can find reasonably priced Dobsonian telescopes for your backyard with an aperture of 16-inches.
Q: How do you travel with a telescope?
To travel with a telescope, treat it like a baby bird. Be very careful. The telescope is a tube of glass and jostling it can misalign mirrors and lenses. Before heading out, store the scope properly with lens cap covers and padding. You can bring your telescope on a plane, but you’re taking a big risk by transporting it with checked baggage. If possible, and within the airline’s size limits, travel with the telescope as carry-on luggage. And always make sure you have everything you need — eyepieces, batteries, tripod brackets — because if you get out to an isolated area, a telescope without the proper parts is really just a useless tube of glass.
A final word on shopping for the best telescopes for beginners
The best telescopes for beginners is one you feel comfortable with both in function and price. It could be a computerized telescope, a simple refractor telescope or some homebrewed astronomical instrument. What’s most important is that you enjoy using it. Since humans first looked up, we’ve been fascinated by the night’s sky. Exploring the vastness of space is surprisingly easy, even with basic, budget-priced equipment. All the stats and figures of telescopes may make your eyes roll, but if you remember the importance of aperture and keep on eye on the price tags, you can have a backyard observatory in no time.