9 Tips for Dramatic Ice Photos
Cold weather isn't preventing you from making great photos, it's challenging you to get out there and make them

Frozen water makes an amazing subject. It’s graphic, reflective, textured— and its sparkle mirrors the colors of its surroundings. Sure, there are a few considerations to keep in mind when working with ice, but the results are worth the effort.
ENTER OUR ICE PHOTO CHALLENGE HERE
**1.) See into the depths. **

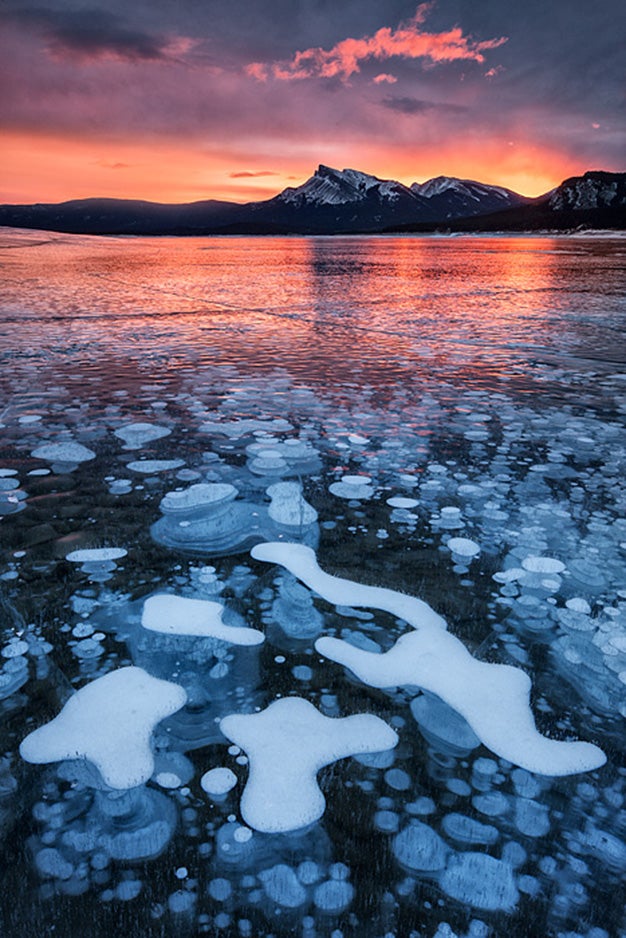
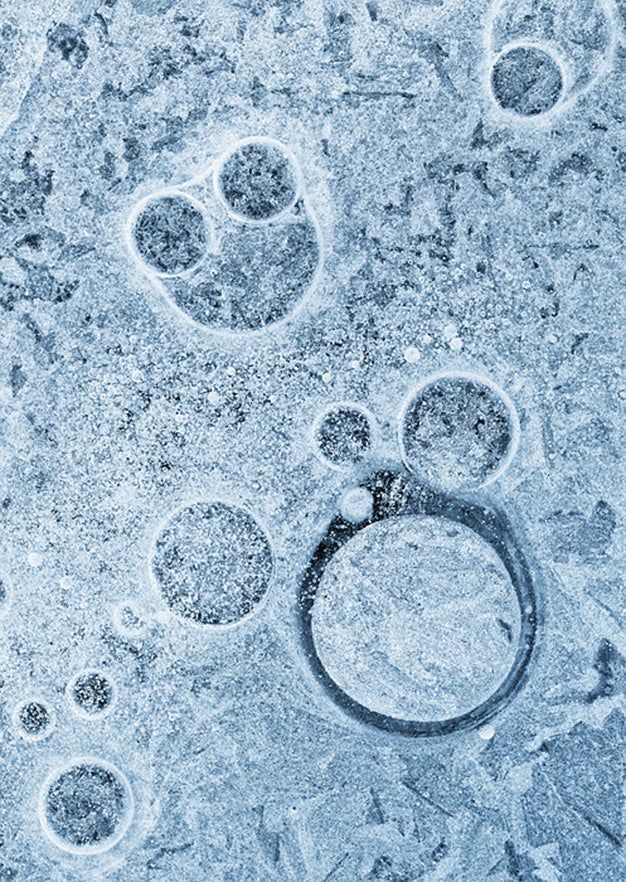
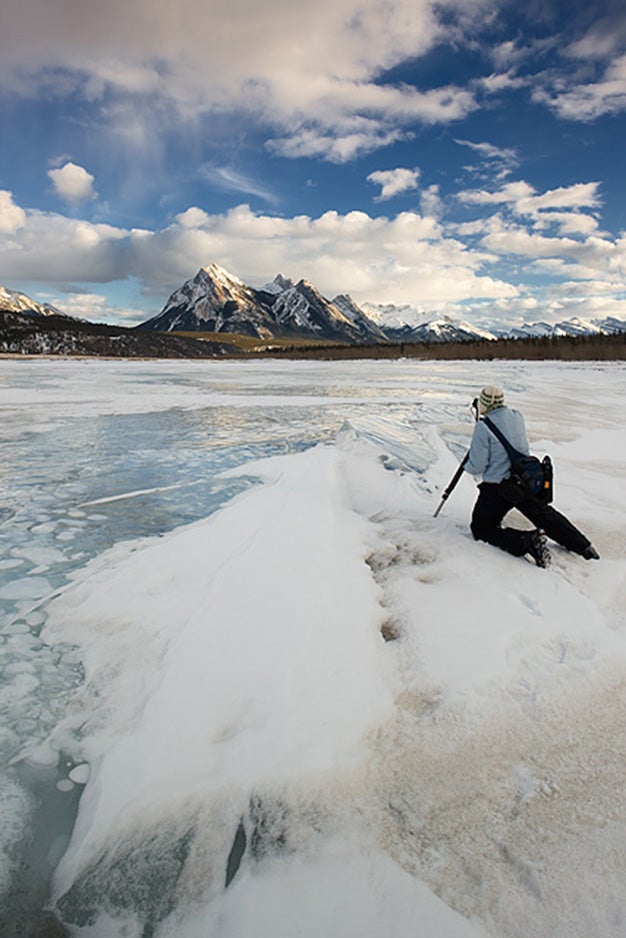
A polarizing filter let these photographers see deeper into Abraham Lake in Kootenay Plains, Bighorn Wildlands, Alberta, Canada. Shot with a Canon EOS-1Ds Mark III and 24mm f/3.5L II tilt-shift Canon lens; 6 sec at f/11, ISO 100.
If a lake or stream has frozen clear, mount a polarizing filter to your lens. By removing reflective glare, you’ll be able to peer down into the lake’s depths. Rocks, vegetation, bubbles, and even logs become wobbly and distorted when photographed through ice. To find clear ice, scout early in the winter before snowfall buries it. Later in the season, seek out areas where the wind has blown the snow off of the ice. Of course, before you venture out on frozen water, make sure it’s thick enough (at least six inches) to hold your body weight. Outfit your boots with trail crampons [spiked metal cleats] so you don’t slip.
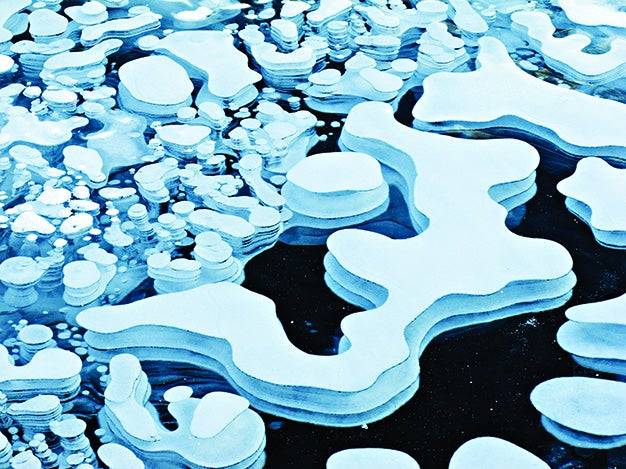
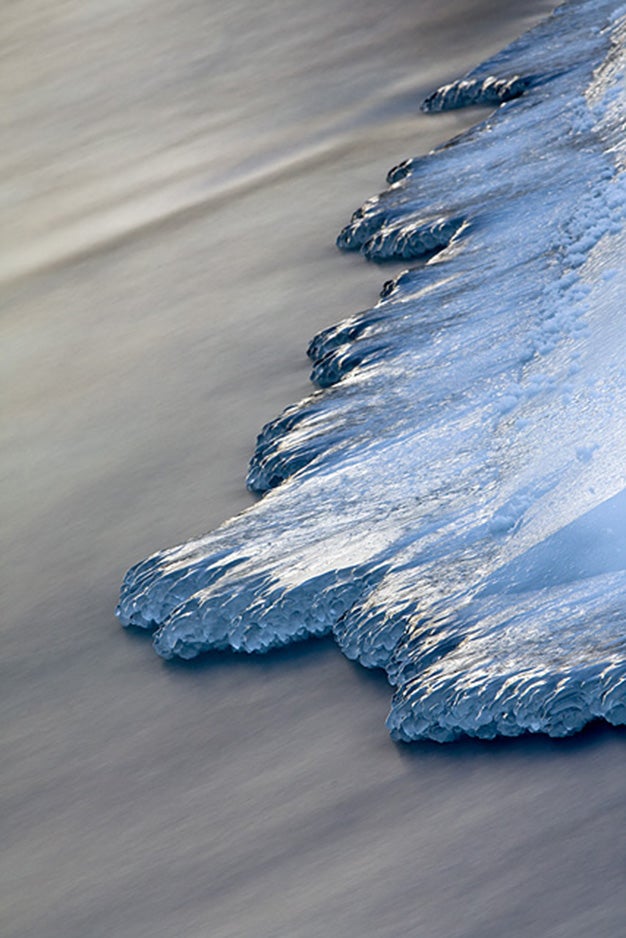
2.) Forget color.

The couple went for a monochrome abstract on the North Saskatchewan River in Kootenay Plains, Alberta, using the 1Ds Mark III and a 90mm f/2.8 tilt-shift Canon lens. Exposure 1/4 sec at f/8, ISO 100.
Winter scenery is often devoid of color, but you can make an amazing image solely from the interplay of dark and light tones. To help visualize the tonal contrast you’ll capture, set your camera’s picture style to shoot in monochrome—the images will appear on your LCD as black-and-white. Shoot in RAW plus JPEG mode so that your JPEG acts as a reference and the RAW file retains the information you need to make more advanced conversions. After processing, try toning your b&w image with a blue monochrome to evoke an icy chill.
3.) Find frozen nature.

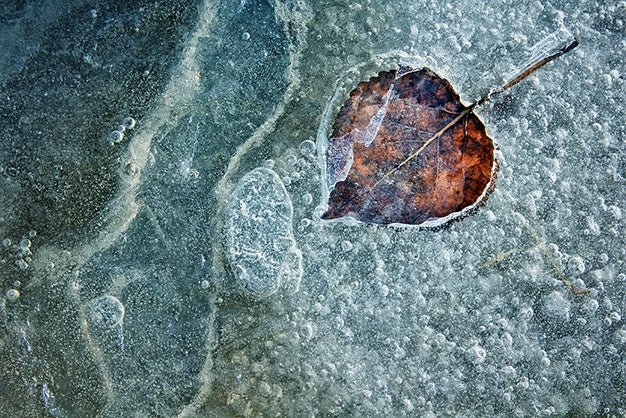
Aspen leaf frozen on Abraham Lake in Kootenay Plains, Alberta. Shot with a Canon EOS Rebel T2i and a 17–50mm f/2.8 Sigma lens. Exposure was 1/13 sec at f/14, ISO 100.
The edges of streams and lakes harbor leaves, pinecones, and other vegetation suspended in ice. Dig out your macro lens and make abstract renditions of these captured objects. Use your polarizer to help remove the sheen from the ice and bring out details below the surface. Be sure to use an aperture that will give you the depth of field needed to maintain sharpness across your scene.
**
4.) Record movement.**
Ice is just water in solid form, and capturing it in both states simultaneously can be magical. Scout along the edges of streams and rivers for places where ice meets moving water. To enhance the contrast between static and dynamic elements, add a neutral density filter. Filters with five stops or more will dim the light that reaches your camera and allow for long exposure times of 1 to 30 seconds. Of course, such long exposures demand a solid tripod and remote release to ensure sharp results. Don’t forget that snow moves, too: Try a frozen, windswept lake with patches of exposed ice and swirling, blowing snow. Use longer exposures to capture streaking drifts against the solid ice.
5.) K****eep it simple

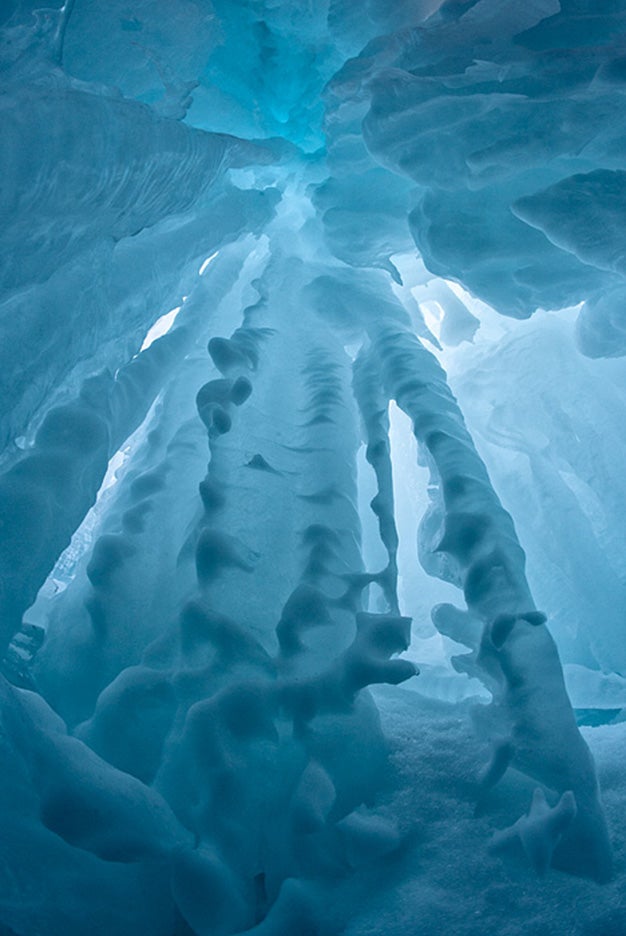
Icicles hang from frozen Panther Falls in Banff National Park, Alberta. Chrysanthou and Wiggett homed in on them using a Canon EOS-1Ds Mark III and a 15mm f/2.8 Canon EF fisheye lens. Exposure was 1/80 sec at f/10, ISO 400.
Clutter kills pictures—a good photographer is a master of exclusion. Clean, simple, graphic compositions work best with ice photography. It’s easier to distill a scene to its essence with a telephoto or macro lens, as a wide-angle lens will see too much of the scene. No matter what lens you choose to use, keep simplicity as your mantra when shooting ice.
6.) Demonstrate scale.
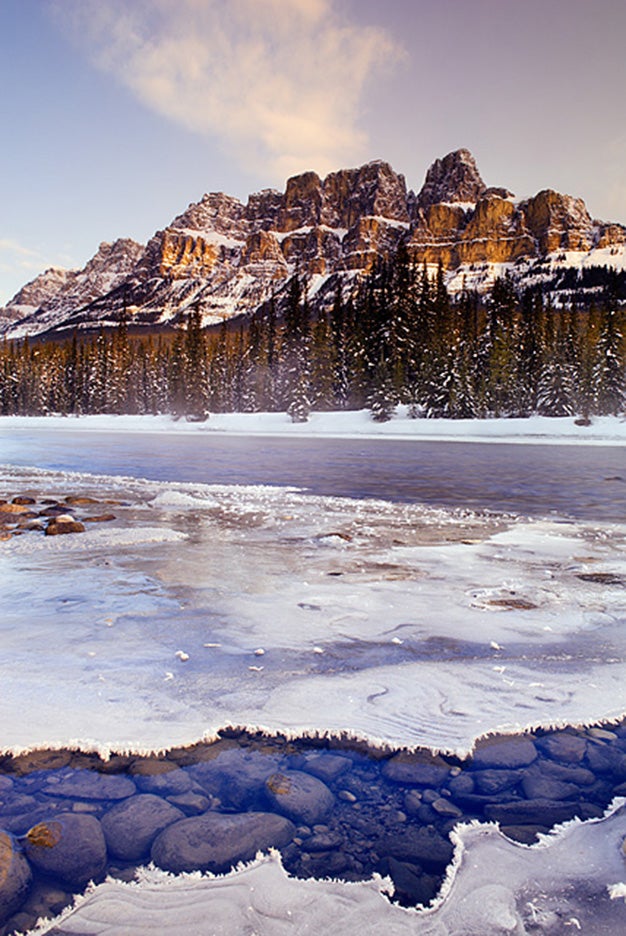
With frozen waterfalls or big ice formations, it’s often not enough to photograph the ice alone. To convey a sense of scale, add a person. If you’re lucky enough to arrive when climbers are scaling frozen waterfalls, ask permission to make an image of their ascent. One caveat: Avoid the “butt shot,” where you stand below the climber and shoot upward. Side, straight-on, or top-down views are more exciting if you can manage to catch them. For safety, stay clear of the wide debris zone where ice and rocks tumble from climbers’ axes and crampons. A wide-angle lens will bring in the surroundings for an environmental portrait of the climbers. What if there is no one to add scale to the shot? Here, again, a wide-angle lens will help: Use it to show a foreground element and put the background in context.
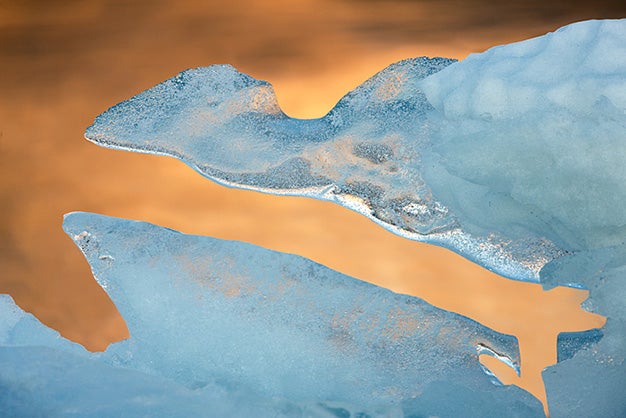
7.) Use Reflective Contrast.
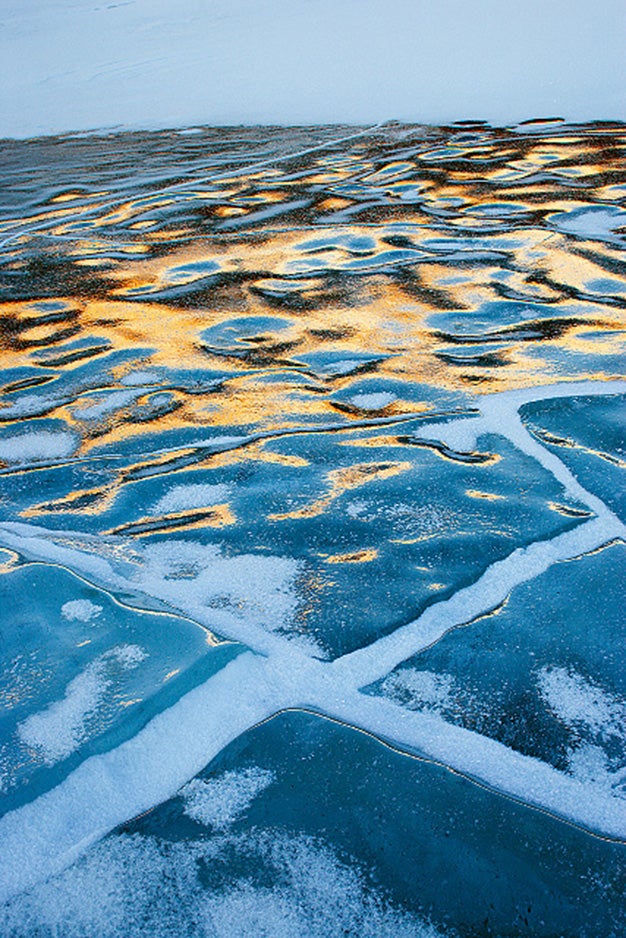
Canada: Alberta: Kootenay Plains
The human eye is attracted to contrast, whether it’s found in color, tone, or both. To find contrast, look for a section of ice in the shade with a background that is lit by the sun. The ice will reflect the warm hues of the sunlit scene as well as portions of the blue sky, and the resulting interplay of warm and cool tones will add energy to your shot. Here is a case where you don’t want to use your polarizer—it will remove the strong reflective highlights you’re seeking to capture.
8.) Light the background.
Contrasting colors appeared in this ice rift, also shot at Abraham Lake. The pair used the 1Ds Mark III and a 120–400mm f/4.5–5.6 Sigma DG OS lens. Exposure was 1/80 sec at f/5.6, ISO 100.
Ice is often most appealing when it’s transparent. As with photographing glass, clear ice often looks best when the background is lit and the ice itself is not. If the ice is in the shade but the background is being lit by the sun, get behind the ice and shoot through it. Try a shallow depth of field so only the ice is in focus and the background is a blur of color or tone. Use a greater depth of field to see a sharp background through the clear ice. However you choose to do it, shooting through the ice to a brighter background can produce a dynamic image.
**9.) Stay warm **
Finally, you won’t be creative if you or your camera succumbs to the weather. To keep your camera in operation, nest a spare battery in an inner coat pocket. When the battery in your camera gets cold and threatens to give up, swap it out with the warm one. The cold one will soon warm up and regain its charge. When you’re finished shooting, never go from the frigid outdoors to a warm environment without putting your camera in a plastic bag or zipping it tight in your camera bag. Let the camera slowly come up to room temperature. Bringing a camera in from the cold without a buffer will cause condensation on and in your camera and lens.
When working in the elements, your hands and feet are the weakest links, so dress in layers. Thin silk gloves with hand warmers against the skin can serve as the first layer. Over these gloves, wear mittens attached to your coat sleeves. The attachments will allow you to pop your mittens off (without losing them) for fine camera adjustments; change the controls and dive back into the mitts to keep your hands warm between shots. Layer your socks with a thin silk sock as the first layer and a thicker, woolen sock for extra insulation. Wear winter boots that aren’t too tight to keep your tootsies from tingling and keep you out there shooting.
_Photographers Samantha Chrysanthou and Darwin Wiggett run workshops and publish eBooks on their website, oopoomoo.com. _