You Can Do It: Enhance Your Nature Photos In and Out of Camera
Bring out nature's charm with some careful shooting and editing
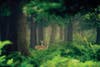
In his Flickr stream, Andrew Evans (www.flickr.com/andrewevans) titled this image “Enchanted Forest” for its fairytale-like mood. How did he achieve it? The Kent, England, amateur enumerates four strategies for finding and enhancing nature’s magic: Pick a suitable subject, get the right gear, shoot at an appropriate time, and tweak the image in software.
For Evans, deer make magical subjects. They’re fairly easy to find and blessed with beautiful coloration, and the majestic, hyper-alert poses they strike can make for stirring photography.
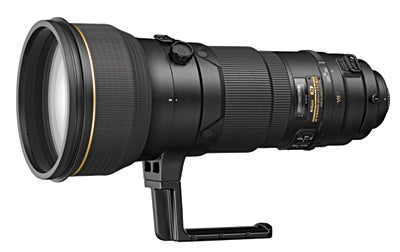
For lenses, Evans recommends a healthy telephoto reach (say 400mm) to get you as close as possible to these striking animals. Also, a lens or camera body with image stabilization frees him from the burden of setting up a tripod.
When shooting woodland creatures, Evans starts by spot metering his subject; then he sets that exposure manually, and continues with it until the lighting on his subject changes.
Later, in software, he brings out the “enchanted” quality of his images. He accentuates the subjects’ warm tones, and brings up the cooler greens in the background. This lets the deer pop out while the backgrounds recede. His last tasks? Tweaking color quality and overall contrast for a magical, painterly look.
Follow Andrew’s steps below to replicate his photo magic:
Step 1
Find your subject. To pinpoint locations with wildlife potential, do image searches on Web sites such as flickr.com, photo.net, and smugmug.com. Type “Virginia deer” into a search field, for example, and dozens of galleries will show you where others have found deer in Virginia.
Step 2
Go at the right time of day. “For deer, I always go at sunrise,” says Evans. “This is the best time for most wildlife because they are most active at dawn, and, luckily, the amazing light thrown by the sun then is perfect.”
Step 3
Be patient. “You can’t expect to get the perfect shot on your first or second morning out,” says Evans. “Always be ready, though, with your camera and lens pre-set. For this photo, I had only a few seconds before the deer ran off.”
Step 4
Don’t stop shooting. Set continuous mode, and when wildlife appears, keep firing. Alter your composition, orientation, and exposure as you go. Evans advises positioning the camera below your subjects’ eye height.
Final Step
Fine-tune images in software. “Just a simple tweak of the colors and contrast in Lightroom or Photoshop,” is all Evans does. “In Lightroom, I always use the split toning tool. I give the shadow tones a hint of cool blue, and the highlights a hint of warm yellow/orange.” This can add a dynamic depth to the scene.